To eliminate laboratory image glare, position lights at 45-degree angles away from direct reflection paths. Use polarization filters, rotating them for best clarity. Add dome lighting for uniform 360-degree illumination. Shield with matte materials to block ambient light. Adjust camera settings with higher shutter speeds and shorter exposures. Apply anti-reflective coatings on surfaces. Create custom diffusion systems. Install modular barriers. Incorporate HDR techniques for complex specimens. Regularly recalibrate as conditions change. These proven techniques will transform your imaging results.
10 Proven Ways To Eliminate Laboratory Image Glare
Five critical techniques can dramatically reduce glare in laboratory imaging scenarios.
First, shield your light sources with physical barriers to block unwanted ambient reflections from reaching the camera.
Strategically positioned barriers around light sources effectively prevent stray illumination from contaminating your critical imaging data.
Second, cover reflective surfaces with matte materials to absorb and diffuse light rather than creating harsh reflections.
For ideal uniform illumination, use dome lights that provide diffuse lighting without direct reflections.
Adjust your camera settings by employing higher shutter speeds and shorter exposure times while increasing Machine Vision lighting intensity to overpower ambient light. This balance works in both bright field and dark field configurations.
Finally, incorporate polarizers to filter out unwanted reflections, though be prepared to compensate for the resulting darker images by increasing your lighting intensity accordingly.
Strategic Positioning of Light Sources for Minimized Reflection
Positioning your light sources at a 45-degree angle to the workpiece surface will dramatically reduce unwanted reflections and glare in your images.
You’ll achieve even better results by implementing off-axis illumination techniques, where multiple lights are strategically placed from different directions to eliminate hotspots.
For particularly challenging shiny surfaces, try adjusting your light positions based on the specific material properties you’re working with, as even minor repositioning can yield significant improvements in image clarity.
Optimal Angle Positioning
When you’re struggling with glare ruining your images, the strategic positioning of your light sources becomes your most powerful weapon. Setting up your lights at a 45-degree angle offers an ideal angle that highlights important features while directing reflections away from your camera lens.
Position light sources at oblique angles relative to reflective surfaces to minimize direct light that creates unwanted glare. You’ll find that adjusting the intensity of the light along with its positioning creates dramatic improvements in image clarity.
Try experimenting with multiple light sources to achieve more uniform distribution across your subject. For real-time enhancement, adjust your lighting angles during image capture to get immediate feedback.
Directional lighting like spotlights can target specific areas while avoiding the reflection problems that plague poorly positioned setups.
Off-Axis Illumination
Unlike traditional setups, off-axis illumination tackles glare at its source by positioning lights away from the direct reflection path to your camera.
When you strategically place white light sources at angles that avoid direct bounce-back, you’ll considerably reduce those bright spots that obscure essential details on reflective surfaces.
The key is manipulating the angle of the light relative to both your specimen and camera. By directing illumination from positions outside your camera’s line of sight, scattered light still reveals important features without creating overwhelming reflections.
For ideal results, combine angled lighting with diffuse sources to create uniform illumination across your entire sample.
Experiment with various positions and distances in your controlled laboratory environment—you’ll find the perfect setup that minimizes glare while enhancing surface detail visibility, particularly with highly reflective materials.
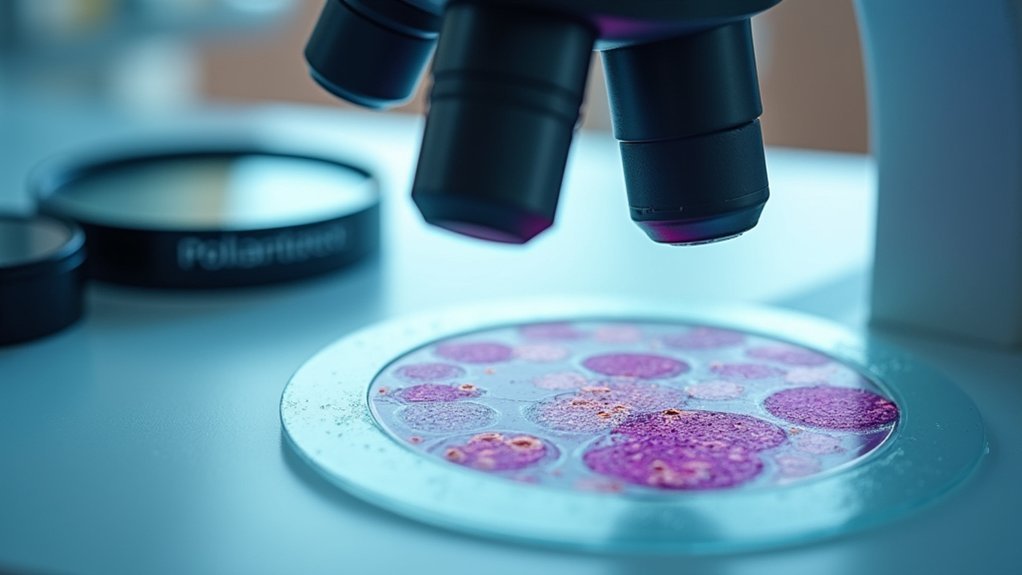
Implementing Polarization Filters to Cut Unwanted Glare

One of the most effective tools in your glare-reduction arsenal is the polarization filter.
These filters work by allowing only light waves oriented in a specific direction to pass through, dramatically reducing reflections that can obscure your field of view.
When working with shiny materials in laboratory settings, polarization works well because you can adjust the filter angle to maximize glare reduction while preserving critical details.
Try rotating the filter until you achieve the best clarity.
Remember that polarization filters may darken your overall image, so you’ll need to increase lighting intensity to maintain proper exposure.
Always test your setup in the actual laboratory environment to determine the ideal filter angle and lighting configuration for your specific application.
Creating Custom Diffusion Systems for Even Illumination
The secret to capturing crystal-clear laboratory images lies in creating effective diffusion systems that distribute light evenly across your subject. You’ll find remarkable improvements by using frosted acrylic or polycarbonate sheets to scatter light uniformly, eliminating harsh shadows and reflections.
| Material | Benefit | Best Application |
|---|---|---|
| Frosted Acrylic | Excellent diffusion | General microscopy |
| Dome Lights | 360° illumination | Reflective specimens |
| LED Panels | Built-in diffusion | Large sample areas |
Don’t hesitate to adjust your setup regularly—changing the distance and angle of your light sources can dramatically reduce glare. For maximum flexibility, incorporate adjustable diffusers that allow you to fine-tune light intensity based on your specific experimental conditions. Remember that different specimens may require different diffusion solutions to achieve ideal clarity.
Optimizing Camera Exposure Settings to Control Brightness

You’ll find that adjusting your camera’s shutter speed is one of the most effective ways to combat glare, as faster settings limit the amount of reflected light hitting the sensor.
When configuring your machine vision system, remember that properly balancing gain against exposure time creates ideal image clarity—higher gain amplifies both signal and noise, while longer exposure captures more detail but increases glare risk.
Testing different combinations of these settings in your actual working environment will help you identify the sweet spot where glare is minimized without sacrificing the critical details needed for accurate inspection.
Shutter Speed Control
When battling persistent image glare, mastering your camera’s shutter speed settings provides a powerful solution that’s often overlooked. By increasing your shutter speed, you’ll dramatically reduce the time light enters your camera, minimizing reflections and hot spots that compromise image quality.
Higher shutter speeds effectively limit light exposure duration, preventing overexposure from ambient sources while maintaining clarity in your laboratory images. This guarantees more accurate measurements and analysis of your specimens.
You’ll need to experiment with different settings in your specific lab environment to find the ideal balance between glare reduction and image brightness.
Remember that faster shutter speeds typically require increasing your Machine Vision light intensity to compensate for reduced exposure time. This combination of adjusted shutter speed and appropriate lighting will give you glare-free images with proper illumination.
Gain Versus Exposure
Finding the perfect balance between gain and exposure time constitutes a critical step in eliminating unwanted glare from your laboratory images.
While higher gain amplifies signals in low-light conditions, it can increase noise levels, compromising image clarity. Conversely, shorter exposure times reduce motion blur but may require higher gain to maintain brightness.
For ideal results when managing glare:
- Test different combinations of low gain and longer exposure times for reflective samples to minimize glare while capturing fine details.
- Adjust settings based on your specific laboratory lighting environment, as ambient light considerably impacts image quality.
- Regularly recalibrate your camera settings as lighting conditions change to maintain consistent image quality.
This balanced approach guarantees you’ll capture clear, glare-free laboratory images while preserving important visual details in your samples.
Utilizing Dome Lighting for Uniform Sample Illumination
Three essential challenges in laboratory imaging are hotspots, uneven illumination, and unwanted reflections – all of which dome lighting effectively addresses. By distributing light in a 360-degree pattern, dome lights create diffuse illumination that minimizes direct reflections and produces consistent sample images crucial for accurate analysis.
| Benefit | Traditional Lighting | Dome Lighting |
|---|---|---|
| Reflection Control | Poor – creates hotspots | Excellent – minimizes glare |
| Feature Visibility | Inconsistent | Enhanced across all angles |
| Workflow Efficiency | Requires adjustments | Streamlines image capture |
You’ll find dome lighting particularly valuable for Machine Vision applications, where it improves pattern matching and OCR reliability. By implementing this lighting solution, you’ll reduce time spent on glare mitigation adjustments while maintaining high-quality imaging standards across all your laboratory samples.
Designing Effective Light Shields and Physical Barriers
Effective light shields can transform your imaging results by incorporating non-reflective, matte materials that absorb stray light instead of reflecting it back into your camera’s field of view.
Position your shields strategically around light sources to block ambient illumination while directing useful light onto your specimen, creating a controlled optical environment that enhances detail capture.
You’ll achieve maximum flexibility with modular barrier systems that can be quickly reconfigured as your imaging needs change, allowing you to adapt to different sample types and lighting conditions.
Custom Shield Materials
Creating custom shield materials represents one of the most powerful strategies in eliminating unwanted image glare. When designing your shields, focus on matte finishes and textured surfaces that absorb light rather than reflect it, greatly enhancing image clarity in your laboratory setup.
For ideal results with your custom materials:
- Select opaque materials like black foam or painted metal to block ambient light from reaching your camera and specimens.
- Consider the specific angles and intensity of light sources in your lab environment when shaping and positioning your shields.
- Incorporate adjustable components that allow you to fine-tune your setup based on changing conditions and different specimen types.
Don’t forget to design shields that are easy to install and remove for efficient maintenance and quick adjustments as needed.
Shield Positioning Strategies
While custom materials form the foundation of glare elimination, strategic positioning of your light shields ultimately determines their effectiveness. Position barriers to block ambient light while maintaining sufficient illumination on your workpiece. Consider both light source and camera angles to prevent unwanted reflections from reaching your lens.
| Position Type | Application | Benefit | Challenge |
|---|---|---|---|
| Overhead | Top-down imaging | Blocks ceiling lights | May cast shadows |
| Side-mounted | Profile captures | Eliminates lateral glare | Requires careful angle adjustment |
| Adjustable arm | Variable specimens | Provides positioning flexibility | Needs frequent readjustment |
| Enclosure | Sensitive analysis | Complete light control | Reduces workspace access |
Use adjustable shields for quick adaptation to different workpiece designs. Remember that even well-chosen materials won’t perform effectively without proper positioning. Regularly evaluate and adjust your setup as laboratory conditions change.
Modular Barrier Systems
Three key principles define successful modular barrier systems: adaptability, precision placement, and material selection.
When designing light shields for your laboratory imaging setup, prioritize matte materials that effectively absorb and diffuse light reflections rather than bouncing them back into your camera lens.
Your modular barriers should be strategically positioned to account for:
- Incoming light angles – Place barriers to intercept direct light paths before they create reflections.
- Equipment configuration – Design shields that can be quickly reconfigured as your experimental setup changes.
- Workpiece-to-camera relationships – Focus on blocking light paths that create direct reflections from your specimens to the imaging device.
Regularly assess your barrier system’s effectiveness and make adjustments as lighting conditions or equipment arrangements change in your laboratory environment.
Applying Anti-Reflective Coatings and Materials

The battle against image glare often requires specialized surface treatments to minimize light reflection. You’ll find anti-reflective coatings particularly effective, reducing surface reflections by up to 99% and dramatically improving image clarity in your laboratory settings.
These coatings function through multiple material layers that create destructive interference with light waves, effectively canceling reflections. When selecting coatings, match them to your specific imaging requirements—different materials enhance performance across visible, ultraviolet, or infrared spectrums.
For machine vision applications, consider applying matte finishes or specialized films that diffuse light and reduce glare on critical surfaces.
Remember that environmental factors and wear can diminish coating effectiveness over time, so implement a regular maintenance schedule to preserve peak performance. Periodic reapplication ensures your anti-reflective treatments continue working as intended.
Adjusting Microscope Condenser Settings for Optimal Contrast
Proper condenser adjustment stands as a critical factor in eliminating microscope image glare. By aligning your condenser with the microscope’s optical axis, you’ll prevent unwanted light scattering that diminishes image quality.
Remember to match the condenser’s numerical aperture (NA) to your objective lens for enhanced contrast and clarity.
Enhance your microscope’s illumination with these techniques:
- Adjust the condenser height to focus light precisely on your specimen, minimizing reflection and maximizing detail visibility.
- Manipulate the iris diaphragm to control light intensity and limit excess illumination that causes glare on reflective specimen surfaces.
- Experiment with Köhler illumination and various light angles to achieve peak contrast based on your specific specimen type.
These adjustments will transform your microscopic observations by revealing fine details previously obscured by glare.
Incorporating HDR Imaging Techniques for Challenging Specimens
While condenser adjustments optimize conventional microscopy, some specimens remain stubbornly difficult to visualize due to their reflective properties. HDR imaging offers a powerful solution by capturing multiple exposures that you can combine to reveal details in both bright and dark areas simultaneously.
| Exposure Level | Benefits | Best For |
|---|---|---|
| Underexposed | Preserves bright area details | Highly reflective regions |
| Standard | Maintains overall accuracy | General specimen areas |
| Overexposed | Reveals shadow details | Recessed or dark features |
| Bracketed Series | extensive range capture | Complex mixed surfaces |
| Combined HDR | Balanced final image | OCR and barcode reading |
Frequently Asked Questions
How to Get Rid of a Glare in a Picture?
To eliminate glare in your picture, use physical barriers or matte materials to block light, adjust camera settings with faster shutter speeds, employ diffusers for even lighting, or try HDR post-processing techniques.
How Should Glare Be Eliminated?
To eliminate glare, you’ll need to shield your camera with physical barriers, use matte materials on reflective surfaces, increase lighting intensity, employ polarizers, and test different configurations regularly to maintain ideal image quality.
What Can You Do to Reduce the Effects of Glare?
To reduce glare effects, you’ll need to shield light sources, cover reflective surfaces with matte materials, adjust lighting intensity with faster shutter speeds, and use polarizing filters. Always test different configurations in your actual environment.
How Do You Remove Glare Reflection?
To remove glare reflection, you’ll need to use physical barriers, apply matte materials to reflective surfaces, adjust lighting intensity, use polarizers, and employ faster shutter speeds. Don’t forget to test your setup regularly.
In Summary
You’ll find that eliminating image glare doesn’t require expensive equipment—just thoughtful application of these proven techniques. With practice, you’ll develop an intuition for which methods work best for your specific imaging needs. Don’t hesitate to combine approaches for ideal results. Remember, clear, glare-free images aren’t just visually appealing—they’re essential for accurate analysis and reliable scientific documentation in your laboratory work.


Leave a Reply