
Creating perfect plant tissue slides requires ten simple steps: select fresh tissue, gather sharp tools and stains, fix specimens promptly, section thinly (under 4mm), dehydrate through ethanol series, clear with xylene, stain selectively, mount with clean coverslips, prevent air bubbles by angling coverslips, and optimize lighting for photography. Store slides flat in dark environments to preserve clarity. Follow these fundamentals and you’ll discover intricate plant cellular structures in stunning detail.
Selecting the Right Plant Material for Microscopy
When preparing plant tissues for microscopic examination, your selection of appropriate specimens forms the foundation for successful observation. Choose fresh, healthy tissue that displays the specific features you’re studying—like chloroplast-rich leaves for photosynthesis research.
Consider the physical characteristics of your sample before creating a plant tissue slide. Tissues that are too thick may not allow sufficient light transmission, while overly delicate specimens might disintegrate during preparation. The ideal sample will yield a thin section that maintains structural integrity.
The perfect plant specimen balances thickness and durability, ensuring clarity without sacrificing structural detail.
Remember to match your tissue selection with your intended staining due to varying affinities between dyes and cellular components. Process your samples promptly after collection to preserve cellular structures and prevent degradation.
This careful selection process guarantees your microscopy results will accurately represent the plant’s natural state.
Gathering Essential Tools and Staining Solutions
Now that you’ve selected your ideal plant specimens, you’ll need to assemble the proper equipment before beginning the slide preparation process.
Start by gathering essential tools: a sharp razor blade or scalpel for precise cuts, tweezers for delicate handling, microscope slides, and cover glasses for mounting your samples.
Don’t forget to prepare appropriate staining solutions like iodine or methylene blue, which highlight cellular structures within plant tissues and enhance visibility.
Keep distilled water nearby for rinsing specimens and diluting stains when necessary.
Have paper towels or blotting paper ready to remove excess fluid from your slides before applying the cover glass—this prevents air bubbles that can obstruct your view.
With these tools and solutions properly organized, you’re ready to create clear, high-quality plant tissue slides for microscopic observation.
Proper Fixation Techniques for Plant Tissues

To properly fix your plant specimens, you’ll need to select an appropriate buffer like 10% neutral buffered formalin that prevents cellular breakdown while preserving structural details.
The timing of your fixation process is critical—fresh samples must be immediately placed in fixative to prevent autolysis, and they should remain in solution for 6-24 hours depending on tissue thickness.
You’ll achieve ideal results by maintaining a 10:1 fixative-to-specimen ratio and handling your fixed tissues with care to preserve their integrity for the subsequent processing steps.
Fixation Buffer Selection
The success of your plant tissue slides depends largely on proper fixation techniques, with buffer selection being a critical first step. When choosing your fixation buffer, consider formaldehyde or glutaraldehyde for robust preservation of plant tissue structure.
You’ll need to apply the buffer immediately after collection to prevent autolysis and maintain cellular integrity.
- Use a phosphate-buffered saline (PBS) solution for gentle fixation that minimizes cellular damage.
- Maintain a fixation buffer-to-tissue volume ratio of at least 10:1 to prevent distortion.
- Verify your buffer has a neutral pH (around 7.0) to avoid chemical alterations.
- Allow at least 24 hours for thorough fixative penetration.
- Consider specific tissue types when selecting your buffer—woody tissues may require stronger fixatives than delicate specimens.
Timing Matters Most
Beyond buffer selection, when you fix your plant tissue samples can dramatically impact your microscopy results.
You must begin fixation immediately after collection to prevent autolysis and preserve cellular structures.
For ideal results, immerse your plant tissue in 10% neutral buffered formalin solution, maintaining a 10:1 fixative-to-specimen ratio. Allow 6-24 hours for complete fixation, ensuring adequate penetration throughout the sample.
Always use leak-proof, clearly labeled containers during fixation to prevent contamination and maintain organizational integrity.
Remember, delayed or inadequate fixation will compromise cellular morphology, potentially rendering your specimens useless for microscopic evaluation.
The success of your plant tissue slides depends primarily on timing – prompt fixation preserves cellular details that would otherwise be lost, giving you the clearest possible view of plant cellular structures.
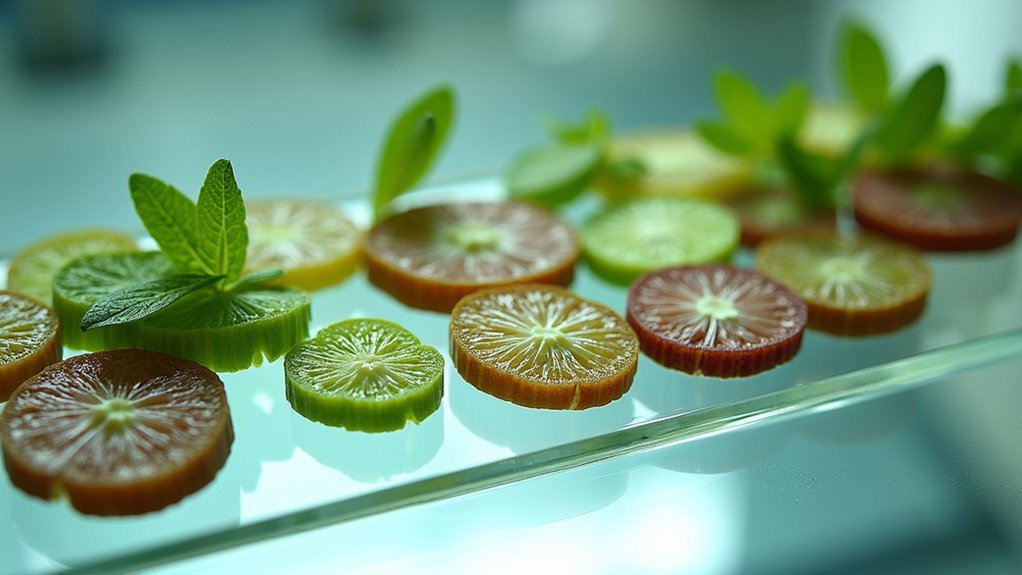
Mastering the Art of Sectioning Plant Specimens
Five critical steps separate novice plant microscopists from experts, with proper sectioning technique standing as the most fundamental.
When you prepare a plant tissue sample, aim for sections thinner than 4mm to reveal cellular structures clearly. You’ll need a clean, stable microtome or razor blade for precision cuts that maintain tissue integrity.
- Use fresh specimens whenever possible for ideal cellular visualization
- Consider boiling or chemical fixation for woody tissues that resist cutting
- Transfer your thin tissue section to warm water to eliminate wrinkles
- Mount immediately after flattening to prevent dehydration damage
- Develop your technique through consistent practice—steady hands produce cleaner cuts
Dehydration and Clearing Process for Optimal Clarity
After sectioning your plant specimens properly, achieving crystal-clear microscopic visibility depends on thorough dehydration and clearing.
Begin by immersing your sections in a progressive ethanol series, starting with 50% concentration and working up to 95%. This methodical dehydration removes water from cells, preparing them for the next critical step.
Methodical dehydration with graduated ethanol concentrations ensures pristine specimens ready for microscopic revelation.
Once dehydrated, introduce a clearing agent such as xylene or toluene to replace the ethanol. This makes your tissue more transparent, greatly enhancing cellular structure visibility.
For ideal clarity, make sure you completely remove the clearing agent before staining or mounting your slides, as any residue will interfere with visualization.
These techniques aren’t merely procedural—they’re essential for creating high-contrast, transparent specimens that reveal intricate cellular details under microscopic examination.
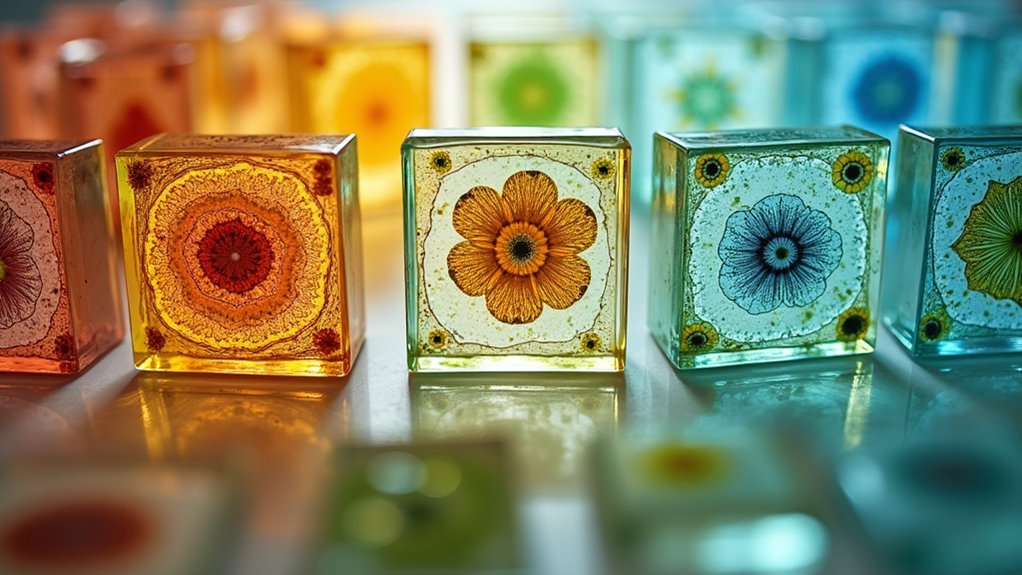
Effective Staining Methods to Highlight Plant Structures
You’ll find that common staining solutions like iodine and toluidine blue offer remarkable contrast for visualizing different plant cell components.
Experiment with differential staining techniques by varying your stain concentration and exposure times to highlight specific structures such as cell walls, nuclei, and starch deposits.
For enhanced contrast in your plant tissue slides, don’t skip the vital step of rinsing thoroughly with distilled water after staining to remove excess dye that might otherwise obscure fine cellular details.
Common Staining Solutions
The right staining solution can transform an ordinary plant slide into a revealing window to cellular structures. When you stain the tissue, consider how different solutions highlight specific components. Iodine works wonderfully to reveal starch deposits with a blue-black coloration, while Toluidine blue offers versatility for various plant structures when sections are stained.
- Safranin O effectively highlights lignified cell walls and vascular tissues
- Methylene blue targets nucleic acids, creating excellent contrast
- Staining times vary by plant type—always conduct trials to determine ideal duration
- Proper rinsing after application prevents excess stain from obscuring details
- Different stains can be used sequentially for differential highlighting of structures
Remember to adjust your staining protocol based on the specific plant tissue you’re examining and the cellular components you want to emphasize.
Differential Staining Techniques
Differential staining techniques bring plant cellular architecture to life by selectively highlighting specific structures. When you prepare thin sections of plant material, strategic application of specific stains reveals otherwise invisible cellular details.
| Stain | Target Structure | Color | Application Tip |
|---|---|---|---|
| Iodine | Starch granules | Blue-black | Apply for 1-2 minutes |
| Toluidine Blue | Lignin, nucleic acids | Blue-purple | Works well on fresh sections |
| Safranin O | Vascular tissues | Red | Effective for woody tissues |
| Methylene Blue | Cell walls | Blue | Quick alternative to toluidine |
After applying your chosen stain, rinse thoroughly with distilled water to remove excess color. This prevents background staining that might obscure important features. You’ll need to experiment with staining times for different tissues—some may require longer exposure while others stain quickly.
Contrast Enhancement Tips
Achieving striking contrast in plant tissue slides requires more than simply applying a stain and hoping for the best.
You’ll need to carefully select staining solutions that highlight specific internal structures. When using iodine, you’ll see starch granules transform to blue-black, while toluidine blue creates vivid differentiation between cell walls and nuclei.
- Adjust the focus continually as you examine different tissue layers to capture all structural details.
- Time your staining carefully—too brief won’t provide enough contrast; too long will obscure details.
- Rinse slides with distilled water after staining to remove excess dye and improve clarity.
- Try multiple stains on separate sections of the same tissue to compare effectiveness.
- Experiment with light intensity to enhance natural autofluorescence in unstained sections.
Mounting Techniques for Long-lasting Slide Preparations
Creating durable plant tissue slides requires meticulous attention to the mounting process. Start by thoroughly dehydrating your tissue specimens with appropriate solvents to prevent decay.
Choose a clear mounting medium like glycerin or Canada balsam, which enhances light transmission while preserving your sample’s structure.
When applying the cover slip, lower it gradually from one edge to prevent trapping air bubbles that could obscure your view. You’ll achieve better results by using the tip of a needle to guide the cover slip into place.
Seal the edges with nail polish for added protection against leakage and contamination.
Store your finished slides flat in a dark environment to minimize light exposure and temperature changes that degrade specimens over time.
This careful approach guarantees your plant tissue preparations remain viable for years of study.
Avoiding Common Air Bubble and Contamination Issues
Even the most carefully prepared plant tissue slides can be compromised by air bubbles and contamination. When placing tissue on the slide, cleanliness is essential for ideal viewing.
You’ll need to carefully apply the cover slip at an angle rather than dropping it flat to prevent trapping air bubbles between the specimen and glass slides.
- Use tweezers when handling cover slips to prevent fingerprint contamination
- Apply staining solution with a dropper—just enough to cover the specimen
- Clean all glass slides thoroughly before use to remove residues
- Lower cover slips at an angle to minimize air bubble formation
- If bubbles appear, gently tap the slide or use a fine needle to remove them
These techniques will help you create clear, bubble-free preparations that showcase plant structures with maximum clarity.
Optimizing Lighting and Focus for Plant Tissue Photography
You’ll need to carefully adjust light intensity on your microscope to achieve the perfect balance—too bright washes out cellular details while too dim obscures important structures.
Focus stacking improves your plant tissue images by capturing multiple shots at slightly different focal planes, then combining them for superior depth and clarity.
When photographing delicate plant structures, experiment with various magnification levels while maintaining precise focus to highlight the specimen’s most interesting cellular features.
Adjusting Light Intensity
While capturing clear images of plant tissues requires proper slide preparation, mastering light adjustment remains the critical factor that separates mediocre microscopy from exceptional results.
You’ll need to fine-tune your light intensity as you move to high magnification, preventing both washout and obscurity of cellular details.
Start by:
- Using your microscope’s dimmer to gradually increase illumination until cellular structures become distinct
- Beginning with low magnification to find your focus area before adjusting light intensity
- Placing diffusers or filters to soften harsh lighting and reduce glare
- Moving to higher magnifications only after optimizing lighting conditions
- Regularly cleaning and calibrating your light source to guarantee consistent illumination quality
Remember that adjusting light intensity isn’t just technical—it’s an art that reveals the hidden architecture of plant tissues while preserving their natural appearance.
Focus Stacking Techniques
When conventional microscopy fails to capture the intricate depth of plant tissues, focus stacking emerges as the solution that transforms flat images into richly detailed representations.
To implement this technique effectively, capture multiple images of your thin tissue specimen at different focal planes, particularly when you increase the magnification.
Set your camera to a low ISO and high f-stop to maximize sharpness, and use a ring light or diffused illumination to evenly light your glass slide without harsh shadows.
Keep your microscope properly calibrated and lenses clean for ideal focus accuracy.
Process your image stack with specialized software like Helicon Focus or Photoshop, which will align and blend the frames seamlessly.
This combination of proper equipment setup and post-processing creates stunning plant tissue images with exceptional depth and clarity.
Storing and Cataloging Your Plant Tissue Slide Collection

Three critical factors determine the longevity of your plant tissue slide collection: proper storage, organization, and maintenance.
Always store your slides in a cool, dry environment between 20°C and 25°C to prevent deterioration. Use labeled cassettes or slide boxes with clear marking of species, collection date, and staining methods for easy identification.
Develop a thorough catalog system—digital or physical—that tracks each slide’s details and associated research notes.
- Inspect slides regularly for signs of degradation
- Clean or re-stain specimens as needed to maintain quality
- Store in temperature-controlled environments for maximum preservation
- Include detailed information on each slide label for reference
- Create backups of your catalog and research data to safeguard against physical damage
Frequently Asked Questions
What Are the Basic Steps in Tissue Slide Preparation?
You’ll need to select fresh tissue, slice it thinly, place on a slide, add water if needed, apply stain, cover with a slip, and observe under microscope at increasing magnifications.
What Are the Steps for Preparing a Slide?
To prepare a slide, you’ll need to cut thin tissue sections, place them on a slide with water, apply stain, and add a cover slip without trapping air bubbles.
How Do You Prepare a Microscope Slide for a Plant Tissue?
You’ll need to cut thin plant sections, place them on a slide with water, add stain for contrast, cover with a slip, and view under microscope at increasing magnifications to observe cellular structures.
What Are the 10 Steps in Tissue Processing in Histopathology?
You’ll follow these 10 steps: specimen collection, fixation, dehydration, clearing, infiltration, embedding, blocking, sectioning, mounting, and staining. Each step preserves cellular structure and prepares tissue for microscopic examination in histopathology.
In Summary
Your plant slide collection can now grow with confidence and precision! By following these steps, you’ll create professional-quality specimens that reveal plant structures in stunning detail. Don’t hesitate to practice these techniques regularly—you’ll find your skills improving with each preparation. Remember, high-quality slides aren’t just scientifically valuable; they’re beautiful, lasting records of the intricate botanical world you’re exploring.


Leave a Reply