
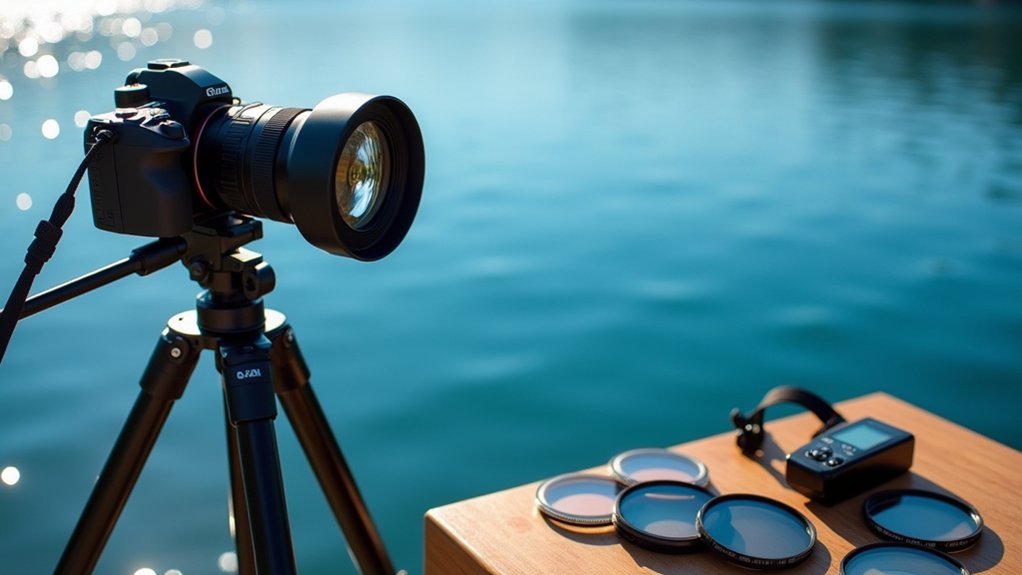
When shooting with polarizing filters, you’ll need to compensate for light loss of up to two stops. Switch to manual focus and exposure, increase your ISO sensibly, and use spot metering after attaching the filter for accurate readings. Mount your camera on a sturdy tripod for longer exposures, and position the filter at a 90-degree angle to reflected light for maximum glare reduction. The right technique will reveal details and colors you never knew existed.
Mastering Camera Exposure For Polarized Light Photography

While standard photography captures light in its unfiltered state, polarized light photography requires a more specialized approach to achieve stunning results. Position your linear polarizing filter at exactly 90 degrees to your light source to maximize its glare-reduction capabilities and enhance color saturation in your images.
When shooting artwork, switch to manual focus to overcome the challenges polarizing filters pose to autofocus systems. Mount your camera on a sturdy tripod for long exposure shots, and adjust your exposure values by experimenting with higher ISO settings initially.
Apply reciprocity laws to fine-tune your shutter speed and ISO for best results in lower light conditions.
Don’t forget to activate your camera’s Long-Exposure Noise Reduction feature to eliminate hot pixels that commonly appear during extended exposures, ensuring cleaner, more detailed final images.
Understanding the Physics of Polarized Light
Polarized light waves vibrate in a single, defined direction, unlike unpolarized light which oscillates in multiple planes simultaneously.
You’ll notice dramatically improved image quality when you position your polarizing filter perpendicular to reflected light, effectively blocking unwanted glare from surfaces like water or glass.
This strategic filter orientation not only enhances color saturation but also reveals details typically obscured by reflections, giving you greater creative control over your final composition.
Light Wave Orientation
Light’s behavior forms the foundation of every photographic principle you’ll master. When shooting, remember that light waves naturally travel in multiple directions. Non-polarized light vibrates in all planes, while polarized light oscillates in just one specific orientation.
This distinction matters because reflected light—the culprit behind unwanted glare—maintains consistent polarization. By rotating your polarizing filter perpendicular (90 degrees) to the light source’s orientation, you’ll effectively eliminate glare from reflective surfaces like water or varnished paintings.
The key is understanding that the filter’s position relative to the incoming light determines its effectiveness. When properly aligned, your polarizing filter blocks waves vibrating in the unwanted plane while allowing others to pass through, revealing details and colors that would otherwise be obscured by reflection.
Filtering Unwanted Reflections
Now that you grasp how light waves orient themselves, let’s focus on applying this knowledge to eliminate unwanted reflections in your photos.
When light bounces off glossy surfaces like varnished artwork, it becomes polarized, creating distracting glare that obscures important details.
By attaching a polarizing filter to your camera, you’ll reduce the amount of unwanted reflections while preserving the light waves you want to capture.
The key is proper orientation—position your filter at a 90-degree angle to the polarized light reflection for maximum effectiveness.
This technique doesn’t just minimize glare; it enhances color saturation and improves contrast throughout your image.
As you rotate the polarizing filter, you’ll see reflections disappear and details emerge that were previously hidden beneath the glare, greatly improving your documentation of artworks and other subjects.
Essential Equipment for Cross-Polarization Photography
Three key pieces of equipment form the foundation of an effective cross-polarization setup.
The perfect cross-polarization system relies on three essential components working in harmony to banish unwanted reflections.
You’ll need a linear polarizing filter for your camera, not circular variants which cause compatibility issues. This filter works alongside specialized lighting to control the amount of light while eliminating unwanted reflections far more effectively than standard ND filters.
Your setup requires:
- Dedicated lamps positioned at 45° angles to your subject, creating the ideal lighting angle for glare elimination
- Laminated polarizing sheets attached to each light source, ensuring consistent polarization across your entire setup
- Filter adapters like the Magfilter for cameras lacking built-in filter threads, allowing you to mount your linear polarizer regardless of your camera model
Remember to eliminate all other light sources during shooting for maximum effectiveness.
Setting Up Your Camera for Optimal Exposure
When working with polarizing filters, achieving ideal exposure requires precise camera configuration beyond standard settings.
Switch your camera to manual mode for complete control over all exposure parameters as polarizers fundamentally function like subtle neutral density filters, reducing light transmission.
Secure your camera on a tripod before attaching the polarizing filter, then establish manual focus on your subject. This prevents focusing difficulties that often occur after the filter darkens your viewfinder.
Experiment methodically with various shutter speeds while observing how the polarizer affects reflections and color saturation.
For extended exposures, activate Long-Exposure Noise Reduction to maintain image quality, particularly when photographing detailed surfaces.
Remember that polarizers may require you to adjust exposure by 1-2 stops compared to your unfiltered settings.
Balancing ISO, Aperture, and Shutter Speed With Polarizers

When using polarizing filters, you’ll need to compensate for the significant light loss of up to two stops by adjusting your exposure triangle settings accordingly.
Your camera’s metering system might struggle to read accurate exposures through polarizers, so consider taking test shots and checking your histogram to fine-tune your settings.
Remember that different angles of polarization affect light transmission differently, requiring you to reassess your ISO, aperture, and shutter speed as you rotate the filter to achieve your desired effect.
Light Loss Compensation Strategies
Photographers using polarizing filters must contend with a significant challenge: the loss of up to four stops of light reaching your sensor.
When working with Circular Polarizing filters, you’ll need to strategically adjust exposure times to maintain proper image quality. These filters fundamentally function as variable ND filters, requiring deliberate compensation techniques.
To effectively counteract light loss:
- Boost your ISO setting sensibly—this increases sensor sensitivity without drastically compromising image quality in well-lit conditions.
- Open your aperture wider to allow more light through—perfect for creating dramatic shallow depth-of-field portraits while maintaining proper exposure.
- Lengthen your shutter speed when shooting static subjects—just remember to use a tripod to prevent unwanted camera shake.
The key is balancing these elements according to your shooting environment and creative vision.
Metering Through Filters
Most modern cameras struggle to accurately assess light conditions through polarizing filters without proper metering techniques. When using polarizing filters, you must meter your exposure after attaching the filter to compensate for light loss. This guarantees your exposure settings—ISO, aperture, and shutter speed—are properly balanced.
| Setting | Adjustment | Consideration |
|---|---|---|
| ISO | Increase | Higher values compensate for light loss but may introduce noise |
| Aperture | Widen | Opens up more light but reduces depth of field |
| Shutter Speed | Slow down | Allows more light but may cause motion blur |
| Metering Mode | Spot/Center-weighted | Focuses on critical image areas with polarizer |
| Histogram | Check frequently | Confirms balanced exposure through polarizing filters |
Always review your histogram after each shot—it’s your best tool for confirming proper metering through filters and guaranteeing ideal exposure settings with polarizers.
Metering Techniques for Polarized Light Conditions
Three distinct challenges make exposure metering particularly tricky in polarized light conditions. Your camera lens can capture remarkably different readings as you rotate a polarizing filter, affecting your exposure settings considerably.
To master this, switch to spot metering mode when photographing artwork to avoid glare interference. Always meter after adjusting your polarizer and utilize a gray card for neutral tonal reference.
- Precision matters – When your spot meter finds the perfect balance between shadow detail and highlight protection, you’ll feel that unmistakable thrill of technical mastery.
- Adaptability wins – Experiment with averaging metering to discover how polarized light transforms your entire composition.
- Challenge yourself – Intentionally bump up your ISO settings to compensate for reduced light, feeling confident as you maintain quality despite challenging conditions.
Compensating for Light Loss With Polarizing Filters

While polarizing filters deliver stunning color saturation and glare reduction, they come with a significant trade-off: light reduction of up to four stops.
This light loss requires immediate exposure adjustments to maintain proper image brightness. You’ll need to compensate by either increasing your ISO setting or extending your shutter speed.
When opting for longer shutter speeds, always mount your camera on a sturdy tripod to prevent camera shake from ruining your shot.
Consider removing the polarizing filter when focusing, as its darkness can hamper your autofocus system’s ability to lock onto subjects. Then reattach it before shooting.
Remove polarizing filters during focusing to avoid autofocus struggles, then reattach before capturing your shot.
Experiment with different lighting angles and filter orientations to find the sweet spot where you achieve the desired polarization effect while maintaining manageable exposure settings.
Advanced Exposure Bracketing for Artwork Documentation
Moving from polarizing filters to specialized documentation techniques, exposure bracketing offers a powerful solution for capturing artwork with complex lighting and tonal ranges.
When photographing artwork, set your camera to RAW format to preserve maximum detail and tonal information. Mount your camera on a stable tripod to maintain identical framing between bracketed shots, ensuring perfect alignment for later merging.
- Revelation: Watch as previously hidden details emerge when you combine multiple exposure levels, revealing textures and nuances invisible to the naked eye.
- Precision: Feel the satisfaction of capturing every brushstroke and color shift exactly as the artist intended.
- Confidence: Experience the assurance of knowing your documentation preserves the artwork’s full dynamic range for future generations.
Use consistent exposure increments for smooth blending in post-processing.
Frequently Asked Questions
How to Master Exposure in Photography?
You’ll master exposure by understanding the exposure triangle, using your camera’s histogram, practicing with manual settings, utilizing depth of field preview, and experimenting with bracketing techniques for various lighting conditions.
What Is the Best ND Filter for Bright Light?
For bright light conditions, you’ll find the ND1000 filter most effective as it reduces light by 10 stops. It’s perfect when you’re seeking longer exposures without overexposure, especially for creative daytime effects.
What Angle Should You Shoot From the Sun With a Polarizing Filter to Get the Best Effect of the Filter?
You’ll get the best polarizing filter effect when shooting at a 90-degree angle to the sun. This perpendicular position maximizes glare reduction and color saturation. Don’t shoot directly toward or away from the sun.
What Is the Best Setting for Light Photography?
For light photography, you’ll want to use a low ISO (100-200), aperture around f/8-f/11, and a tripod for stability. Don’t forget to use manual focus and adjust exposure compensation to control brightness effectively.
In Summary
By mastering exposure techniques for polarized light photography, you’re now equipped to capture stunning details invisible to the naked eye. Remember to compensate for the 1-2 stop light loss when using polarizers, and don’t hesitate to bracket your exposures. With practice, you’ll develop an intuitive feel for balancing ISO, aperture, and shutter speed while eliminating unwanted reflections. Your cross-polarized images will showcase textures and details with remarkable clarity.


Leave a Reply