
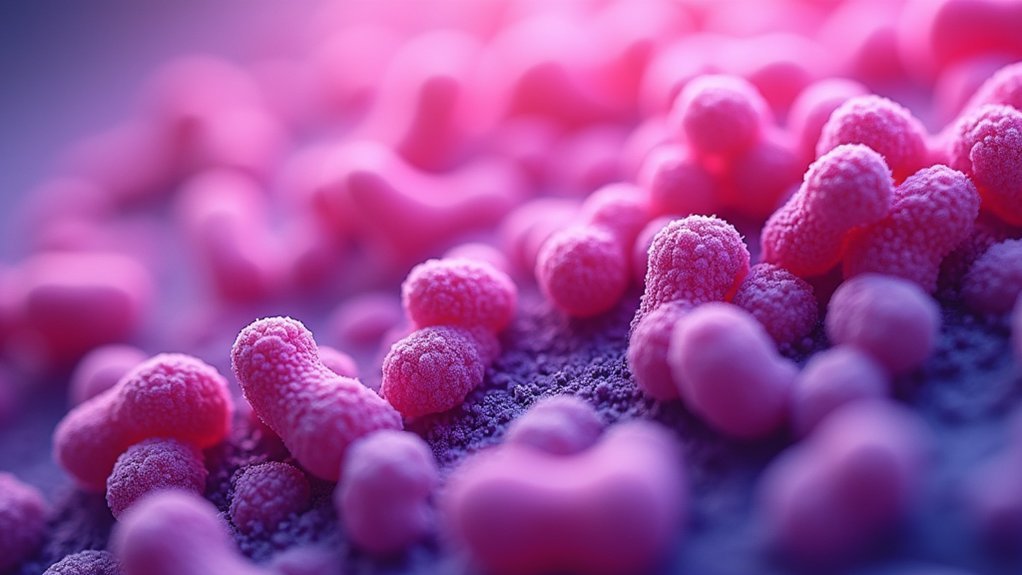
For contrast imaging, you’ll get best results with negative staining (using India ink or nigrosin) that creates dark backgrounds around lighter specimens. Fluorescent dyes offer exceptional contrast by emitting specific wavelengths when excited. Phase contrast microscopy eliminates the need for stains entirely by converting phase variations into visible amplitude differences. For bacterial visualization, combine techniques like Gram staining with acid-fast or endospore methods. The right combination reveals structural details invisible to standard microscopy.
The Principles Behind Phase Contrast Microscopy Staining

While traditional microscopy often requires staining to visualize transparent specimens, phase contrast microscopy revolutionizes this approach by eliminating the need for stains altogether. Developed by Frits Zernike, this non-invasive method converts phase variations in light into amplitude changes, making transparent cell structures visible without chemical intervention.
You’ll find this technique particularly effective for thin specimens (5-10 micrometers) where contrast is generated by small refractive index differences between biological structures and their surrounding media.
Using specialized objectives marked Ph1, Ph2, or Ph3, you’ll achieve high contrast images of live cells in real-time.
Though artifacts like halos may occur at cell boundaries, proper adjustment of your microscope will minimize these issues, allowing you to observe dynamic cellular processes without disrupting their natural state.
Simple Stains vs. Differential Stains for Enhanced Contrast
Unlike phase contrast microscopy, traditional staining methods offer distinct advantages when you need to specifically highlight cellular structures. Simple stains like methylene blue or crystal violet use a single dye to improve contrast, making bacterial morphology more visible under a light microscope.
Differential stains, however, provide superior contrast by distinguishing between bacterial types. The Gram stain, with its four-step staining procedure (crystal violet, iodine, ethanol, and safranin), reveals critical differences in cell wall composition, showing Gram-positive bacteria as purple and Gram-negative as pink.
For specialized applications, acid-fast staining enhances visibility of organisms like tuberculosis bacteria against contrasting backgrounds.
Similarly, endospore staining with malachite green creates dramatic contrast between dormant structures and vegetative cells, aiding identification of certain bacterial genera.
Gram Staining Techniques for Bacterial Visualization
The Gram stain stands as the cornerstone of bacterial identification in microbiology labs worldwide. This differential staining technique separates bacteria into two categories based on their cell wall structure: Gram-positive bacteria retain crystal violet and appear purple, while Gram-negative bacteria take up the safranin counterstaining and display pink.
You’ll need to perform the four-step process over a sink: apply crystal violet, add iodine mordant, carefully time the decolorization with ethanol, and finish with safranin. Timing is critical—improper decolorization leads to misclassification.
When interpreting slides, assess both morphology and cellular arrangement. Look for endospores in Gram-positive bacilli, which appear as clear structures. Always use fresh bacterial cultures to avoid misinterpretation from damaged cell walls in older samples.
Negative Staining Methods for Capsule Examination
For microbiologists seeking to visualize bacterial capsules, negative staining offers an elegant solution where the background, rather than the specimen itself, takes up the stain.
When you’re examining potentially pathogenic bacteria, India ink or nigrosin creates striking contrast, leaving capsules as transparent halos surrounding bacterial cells.
The advantages of this technique include:
- Rapid visualization – capsules appear as clear zones against a dark background in microscopy
- Minimal preparation – the simple procedure requires fewer steps than positive staining methods
- Enhanced identification – the halo effect helps differentiate between encapsulated and non-encapsulated strains
This approach proves particularly valuable in clinical settings where quickly identifying encapsulated pathogenic bacteria can inform treatment decisions without complex staining protocols.
Acid-Fast Staining for Mycobacteria Observation

You’ll need to understand the critical differences between heat-fixation and counterstaining when performing acid-fast staining, as heat facilitates carbol fuchsin penetration through mycobacteria’s waxy cell walls while counterstaining provides necessary contrast.
Fluorescence enhancement methods offer increased sensitivity through auramine-rhodamine dyes that make acid-fast bacteria glow brightly against a dark background under UV light.
The visualization of mycolic acids, which form the basis of acid-fastness, requires these specialized techniques because standard Gram staining can’t penetrate these unique cell wall components.
Heat-Fixation Versus Counterstaining
While both heat-fixation and counterstaining serve important roles in acid-fast staining, they function at different stages of the procedure to achieve distinct objectives.
Heat-fixing occurs first, permanently adhering bacteria to your slide before the staining process begins, protecting cell morphology and preventing sample loss during subsequent steps.
The critical differences include:
- Timing: Heat-fixation precedes all staining, while counterstaining with methylene blue occurs after decolorization.
- Purpose: Heat-fixing secures the specimen, while counterstaining enhances contrast between acid-fast and non-acid-fast bacteria.
- Visualization impact: Without proper heat-fixing, specimens wash away; without counterstain, non-acid-fast cells remain invisible under light microscopy.
You’ll need both techniques for successful acid-fast staining—heat-fixation provides the foundation, while counterstaining delivers the visual differentiation necessary for accurate identification.
Fluorescence Enhancement Methods
Although traditional acid-fast staining techniques effectively identify mycobacteria, fluorescence enhancement methods notably improve detection sensitivity and visualization clarity.
When you’re examining acid-fast bacteria, the combination of carbol fuchsin primary stain and methylene blue counterstain creates striking visual contrast—mycobacteria appear bright pink against a blue background.
You’ll find fluorescence microscopy particularly valuable as a diagnostic tool for early tuberculosis detection. This approach uses fluorochrome-labeled antibodies that specifically bind to mycobacterial antigens, greatly enhancing both specificity and sensitivity.
Unlike the heat-dependent Ziehl-Neelsen method, the Kinyoun technique achieves adequate stain penetration through concentrated solutions without heating.
The enhanced visibility of mycobacteria’s characteristic waxy cell walls through these fluorescence methods allows you to detect infections earlier, enabling prompt clinical intervention.
Mycolic Acid Visualization
Building on fluorescence techniques, acid-fast staining represents one of the most definitive methods for mycobacteria detection in clinical specimens.
This diagnostic technique exploits the unique mycolic acid content of certain bacteria, allowing them to retain carbol fuchsin even after decolorization. Under light microscopy, you’ll see acid-fast organisms appear bright pink against blue non-acid-fast bacteria or tissue.
The Ziehl-Neelsen method offers particular advantages:
- Enhanced contrast – The stark color difference between pink acid-fast bacilli and blue background elements makes identification straightforward.
- Specificity – The unique staining characteristics directly correlate with mycobacterial cell wall composition.
- Reliability – When performed correctly, this technique provides rapid preliminary results for suspected tuberculosis cases.
Remember that proper timing during decolorization is critical—too brief, and non-acid-fast organisms may appear positive; too long, and true positives could be missed.
Endospore Staining Approaches With Phase Contrast

Phase contrast microscopy enhances your endospore visualization when using the Schaeffer-Fulton method, revealing the distinctive green-stained endospores against darker vegetative cells.
You’ll achieve excellent results by applying malachite green during the heat-fixing step, which penetrates the resistant endospore coating while preserving structural integrity.
For the best contrast imaging, you should time the primary stain application for 5-7 minutes while maintaining consistent heat, then counterstain briefly to maximize the differential visibility of endospores.
Schaeffer-Fulton Method Visualization
The Schaeffer-Fulton technique stands as a critical method for visualizing bacterial endospores under phase contrast microscopy. When you’re using this endospore staining approach, heat application becomes essential for malachite green penetration into resistant spores.
The optical system then transforms refractive index differences into brightness differences, enhancing visibility.
You’ll recognize successful staining when:
- Endospores appear distinctly green against pink vegetative cells
- Oval or spherical spore structures become clearly defined within or outside cells
- Contrast boundaries between endospores and cellular material show sharp definition
This differential staining provides definitive bacterial identification markers that wouldn’t be visible with standard bright-field techniques.
The combination of the Schaeffer-Fulton method with phase contrast microscopy offers you unparalleled clarity for examining these highly resistant bacterial structures.
Malachite Green Effectiveness
When staining bacterial endospores for phase contrast microscopy, malachite green proves remarkably effective due to its unique penetration capabilities. As a primary stain, it infiltrates the tough outer layers of endospores, rendering them visible as bright green structures against colorless or pink vegetative cells.
You’ll find that heat application during the staining process is vital, as it facilitates malachite green uptake by the spores. When paired with phase contrast microscopy, this technique enhances visualization by increasing the contrast between endospores and surrounding cellular material without requiring additional stains.
Remember that proper fixation is essential for accurate results. If you don’t apply malachite green adequately or if you over-decolorize your sample, endospores may not be clearly visible, potentially leading to misinterpretation of your microscopic observations.
Timing Optimization Techniques
Successful endospore imaging depends critically on the precise timing of each staining step when using malachite green with phase contrast microscopy.
You’ll need to carefully monitor the heat fixing process to avoid cell damage while guaranteeing proper dye penetration into the tough endospore coat.
For ideal visibility in your phase contrast preparations:
- Apply malachite green with heat for 5-10 minutes, allowing the dye to penetrate the endospore wall while monitoring to prevent overexposure.
- Time your decolorization step precisely—just enough to remove excess stain from vegetative cells without affecting endospores.
- Apply safranin counterstain for exactly 30 seconds to create the perfect contrast between green endospores and red vegetative cells.
This timing optimization approach guarantees your specimens display maximum clarity when viewed under phase contrast microscopy.
Fluorescent Dyes and Their Applications in Contrast Imaging

Revolutionizing the field of biological imaging, fluorescent dyes have emerged as indispensable tools for visualizing cellular structures that remain invisible under conventional staining methods.
When you use dyes like fluorescein and rhodamine, you’ll achieve enhanced contrast imaging through their emission of specific wavelengths when excited.
You’ll find these dyes particularly valuable for tracking dynamic processes in live cells, as they can tag specific proteins, nucleic acids, and organelles.
For greater specificity, combine them with antibodies in immunofluorescence techniques to selectively label target molecules in complex samples.
Fluorescence microscopy offers high sensitivity and resolution, enabling you to detect even single molecules at nanoscale.
Observe nanoscale structures with unparalleled clarity through the powerful sensitivity of fluorescence microscopy.
Be mindful of photobleaching, however, as extended light exposure can diminish fluorescence, requiring careful experimental design.
Optimizing Staining Protocols for Live Cell Imaging
Adapting standard staining techniques for live cell imaging requires a fundamentally different approach than fixed specimen protocols.
When refining staining protocols, you’ll need non-toxic, cell-permeable dyes that maintain cellular functions while enhancing contrast.
To achieve ideal imaging quality in live cell conditions:
- Select fluorescent dyes with high quantum yields like GFP fusion tags for specific protein visualization without compromising cell integrity.
- Use minimal concentrations (1:1000 dilution) to balance signal intensity with cell viability while maximizing contrast.
- Combine specific stains with differential interference contrast microscopy to enhance visual clarity without additional chemical dyes.
Implementing these approaches alongside time-lapse imaging techniques allows you to observe cellular processes in real-time, revealing dynamic structural and functional changes while preserving the live cell environment.
Combining Multiple Staining Methods for Complex Specimens
When examining intricate biological specimens, a single staining technique often fails to reveal the full spectrum of cellular components and structures. You’ll achieve superior visualization by combining multiple stains strategically. For example, pairing Gram staining with endospore staining helps identify bacterial morphology while revealing specialized structures simultaneously.
| Stain Combination | Target Structures | Application Advantage |
|---|---|---|
| Gram + Endospore | Cell walls, endospores | Complete bacterial identification |
| Gram + India ink | Cell morphology, capsules | Virulence factor visualization |
| Gram + Acid-fast | Cell walls, mycolic acids | Mycobacterium differentiation |
| Multiple stains + DIC | Various cellular structures | Enhanced contrast of stained/unstained elements |
For electron microscopy work, use uranyl acetate with lead citrate to highlight cellular membranes and nucleic acids. This combination strategy provides thorough structural detail that single stains simply cannot achieve.
Frequently Asked Questions
Do Stains Increase Contrast?
Yes, stains increase contrast. They enhance visibility of cellular structures by binding to specific components, making them stand out against the background. You’ll see clearer differentiation between various elements in your microscopic specimens.
What Staining Technique Is Most Commonly Used to Differentiate?
The Gram stain is the most commonly used differentiation technique. You’ll find it essential for classifying bacteria as Gram-positive or Gram-negative based on their cell wall structure, directly influencing antibiotic selection in clinical settings.
What Is the Relationship Between Contrast and Staining?
Staining and contrast have a complementary relationship. When you apply stains, they’ll enhance visual contrast by coloring specific cellular structures, making them stand out from their surroundings when you observe them under the microscope.
What Is the Difference Between Simple and Differential Staining Which Is Better Suited for Common Clinical Microbiology Laboratory Applications?
You’ll find simple staining uses one dye for basic cell morphology, while differential staining uses multiple dyes to distinguish cell types based on biochemical properties. Differential staining’s better for clinical microbiology, providing essential diagnostic information.
In Summary
You’ll find that choosing the right staining technique depends on your specific contrast imaging needs. Whether you’re using simple stains for basic visualization or fluorescent dyes for complex specimens, remember to match your method to your specimen type and research goals. By optimizing protocols and potentially combining staining approaches, you’ll achieve the clarity and detail your microscopy work demands.


Leave a Reply