For ideal phase contrast microscopy, set exposure times between 100ms-several seconds based on specimen brightness, while keeping camera gain at minimum levels. Use high numerical aperture objectives for shorter exposures, and regularly check histograms to capture the full range of phase differences. Balance light intensity carefully to prevent phototoxicity and maintain detail. Adjust aperture settings to match your objective’s NA for best resolution and contrast. These calibrations will greatly elevate your imaging precision and experimental reliability.
Understanding Phase Contrast Microscopy Basics
Invisible becomes visible through the elegant science of phase contrast microscopy. When you examine transparent specimens under a conventional light microscope, they often appear virtually invisible.
Phase contrast microscopes solve this problem by transforming phase shifts in light—which your eyes can’t detect—into amplitude differences that you can actually see.
The invisible becomes visible as phase contrast transforms light shifts into detectable amplitude differences before your eyes.
Developed by Frits Zernike in the 1930s, this technique employs specialized components: an annular diaphragm in the condenser and a quarter-wave phase plate in the objective. Together, they create the contrast needed to observe living cells without staining them.
You’ll find this method particularly valuable when working with thin specimens like cultured cells and microorganisms.
The beauty of phase contrast lies in its ability to reveal cellular structures in their natural state—a revolutionary capability in light microscopy.
The Physics of Light in Phase Contrast Imaging
The manipulation of light wavefronts in phase contrast microscopy occurs when your specimen causes phase shifts that translate into amplitude differences visible to your eye.
You’ll notice these effects most prominently when imaging specimens with varying optical densities, as higher density regions create greater phase retardation and appear darker in positive phase contrast.
The interaction between diffracted and non-diffracted light waves creates destructive interference precisely where optical density changes exist, revealing cellular structures that would otherwise remain invisible in brightfield microscopy.
Wavefront Manipulation Mechanics
Understanding the physics behind phase contrast imaging requires delving into the elegant manipulation of light wavefronts. When you use this technique, you’re exploiting how light waves interact with your specimen to generate high contrast images of otherwise transparent structures.
The system begins with an annular diaphragm that focuses a ring-shaped light beam onto your specimen. As light passes through, it separates into diffracted and direct light paths.
The diffracted light experiences a negative phase shift after interacting with cellular structures, while direct light undergoes a positive phase shift via the quarter-wavelength phase plate. This critical difference creates destructive interference when these wavefronts recombine, effectively converting phase differences into amplitude variations you can see.
Proper alignment guarantees minimal artifacts while maximizing visibility of subtle refractive index differences in your specimens.
Optical Density Effects
Optical density emerges as a fundamental property when capturing phase contrast images, directly influencing how your camera renders cellular structures.
When specimens have varying optical densities, they create phase shifts in transmitted light that your imaging system converts into visible amplitude differences.
You’ll notice more optically dense structures appear darker in your images because they absorb more light. To capture these subtle differences effectively, you’ll need to carefully balance your light source intensity with appropriate exposure times.
If you overexpose, you’ll lose vital detail in denser regions; underexpose, and subtle structures remain invisible.
For ideal results, adjust your camera’s exposure controls based on specimen-specific optical density characteristics.
This precision allows you to visualize transparent specimens without staining while maintaining structural integrity—especially essential when imaging living cells that might be sensitive to prolonged light exposure.
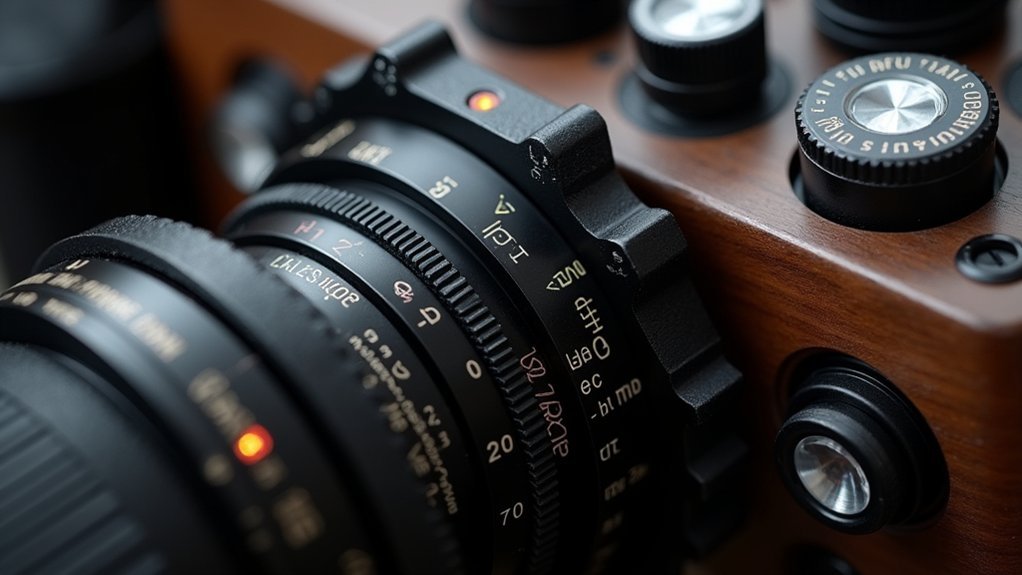
Essential Camera Parameters for Phase Contrast Microscopy
Successful phase contrast imaging depends heavily on properly configuring your camera’s exposure controls to capture the subtle variations in light intensity that make this technique so valuable.
When optimizing your setup, adjust exposure times between 100 ms and several seconds based on your specimen’s brightness, keeping exposure settings that avoid saturation while preserving detail.
Set your camera gain to the minimum level needed for adequate visibility—remember that increasing gain amplifies both signal and noise.
Pair your system with a high numerical aperture (NA) objective lens to capture more light, allowing shorter exposure times while maintaining clarity.
For best results, use a high quantum efficiency camera to improve detection of faint signals.
Check your histogram regularly during imaging to guarantee you’re capturing the full range of phase differences without clipping.
Balancing Exposure Time and Light Intensity
When capturing phase contrast images, the delicate interplay between exposure time and light intensity determines your final image quality.
You’ll need to adjust exposure time to collect sufficient signal while preventing phototoxicity in live specimens. Longer exposures capture more light but may damage your sample.
Your light intensity settings are equally vital—too high causes saturation and loss of detail, while too low results in poor contrast.
Monitor your histogram during acquisition to avoid under or overexposure, ensuring your signal falls within the ideal detection range.
This balance directly impacts your signal-to-noise ratio, which is essential for accurate analysis.
Remember to reassess and adjust these parameters as you move between samples with different optical properties or when experimental conditions change.
Optimizing Aperture Settings for Clearer Images

When optimizing aperture settings for phase contrast microscopy, you’ll need to select an f-stop range that corresponds to your objective’s numerical aperture to maintain resolution while ensuring adequate illumination.
You can control contrast by carefully adjusting the condenser diaphragm, finding the sweet spot where specimen details become clearest without introducing unwanted artifacts.
Matching your aperture settings to both your specimen characteristics and the phase rings in your optical system will dramatically improve image clarity, especially when working with specimens of varying thickness and transparency.
F-Stop Range Selection
Selecting the ideal f-stop range stands as one of the most critical exposure controls in phase contrast microscopy photography.
When working with transparent specimens, you’ll need to balance light transmission with image clarity. Lower f-stop numbers (f/2.8) allow more light to reach your sensor—ideal for poorly illuminated samples—but reduce your depth of field.
Higher f-stops (f/16) increase depth of field but require longer exposure times, which may introduce blur if your specimen moves.
For best results in phase contrast microscopy, you should adjust your f-stop based on each specimen’s transparency and the available illumination.
Be cautious of extremely wide apertures that compromise focus depth and very narrow ones that can cause diffraction artifacts.
Regular adjustments to your f-stop will greatly enhance the visibility of fine structural details.
Diaphragm Contrast Control
The diaphragm serves as your primary contrast control mechanism in phase contrast microscopy, directly influencing image clarity and detail resolution. For ideal results, verify your condenser’s aperture diaphragm aligns with your objective’s numerical aperture (NA). This matching maximizes light utilization while maintaining critical image quality.
You’ll need to find the perfect balance—opening too wide reduces contrast, while excessive closing diminishes resolution through diffraction. When adjusting your diaphragm contrast control, aim for settings that enhance structural details without creating artifacts.
For superior results, use your field diaphragm alongside the aperture objective settings to limit stray light interference. Check your alignment regularly to prevent unexpected quality issues.
This systematic approach to diaphragm adjustment will consistently deliver the crisp, high-contrast images essential for detailed phase contrast microscopy.
Numerical Aperture Balancing
Precise numerical aperture balancing stands at the core of exceptional phase contrast imaging. You’ll achieve ideal resolution and contrast by properly matching your condenser aperture diaphragm to your objective lens NA. When these settings are in harmony, your transparent specimens become clearly visible with minimal halo artifacts.
| NA Setting | Effect | Best For | Common Issue |
|---|---|---|---|
| High NA | Enhanced resolution | Fine details | Light scatter |
| Matched NA | Ideal contrast | Routine work | Requires adjustment |
| Low NA | Increased contrast | Thick specimens | Resolution loss |
| Excessive closure | High contrast | None | Severe resolution loss |
Don’t fall into the trap of closing your condenser aperture too much for contrast—you’ll sacrifice resolution. Instead, make regular adjustments when switching magnifications, ensuring you’re capturing sufficient diffracted light while minimizing stray illumination.
Minimizing Halo Artifacts Through Exposure Control

When working with phase contrast microscopy, halo artifacts often plague image quality by creating bright rings around specimen edges. You can greatly reduce these halo artifacts through proper exposure controls.
Start by avoiding overexposure of your sample, which intensifies these unwanted halos around high phase shift details. Decrease your exposure time to reduce background light intensity while maintaining adequate specimen signal. This simple adjustment often yields immediate improvements in image quality.
Regularly check and realign your condenser annulus and phase plate to guarantee peak performance. Consider inserting a green filter in your illumination path, as this wavelength helps minimize halo formation.
For best results, adjust your objective’s numerical aperture in conjunction with exposure settings to achieve the ideal balance between contrast and resolution.
Calibrating White Balance for Accurate Representation
Accurate color representation in phase contrast microscopy depends heavily on proper white balance calibration.
Proper white balance calibration is the cornerstone of truthful visual data in phase contrast microscopy.
You’ll need to identify a neutral reference point in your image, typically a white or gray standard, to eliminate color casts created by your light source. Different illumination types—whether LED or halogen—produce varying color temperatures that require specific adjustments.
Regular calibration is essential when switching between light sources to maintain consistent image quality.
When properly calibrated, white balance considerably enhances the visibility of cellular structures and prevents misleading color distortions that could affect your analysis.
Take advantage of software tools that offer real-time adjustment capabilities during image capture.
These tools allow you to fine-tune your white balance settings while observing specimens, resulting in more precise color reproduction and ultimately more reliable scientific observations.
ISO Selection Strategies for Different Specimens
You’ll get clearer, more detailed phase contrast images using low ISO settings (100-400) for transparent specimens, as this minimizes noise while preserving subtle structural details.
When working with dimmer biological samples, higher ISO values (800-1600) can help you capture sufficient detail, though you’ll need to balance this against increased noise that may obscure fine cellular features.
Consider your specimen’s characteristics when selecting ISO—transparent samples benefit from lower settings while darker specimens may require higher values, but always test different configurations to find the ideal balance between brightness and noise for your specific microscopy application.
Low ISO Transparency Benefits
Although many microscopy photographers instinctively raise ISO in low-light conditions, maintaining the lowest possible ISO setting proves crucial when capturing transparent specimens with phase contrast techniques.
Low ISO minimizes sensor noise, greatly enhancing image clarity when working with transparent samples that naturally offer minimal contrast.
You’ll find that lower ISO settings allow for longer exposure times without image saturation, perfect for observing living cells and dynamic processes without causing phototoxicity. This approach considerably improves your signal-to-noise ratio, helping you differentiate subtle details in unstained specimens that would otherwise be lost in noise.
When working with phase contrast imaging’s typically low-light conditions, your commitment to low ISO settings guarantees you’ll maintain image fidelity while accurately capturing the fine structural details that make your microscopy work valuable.
High ISO Specimen Tradeoffs
While high ISO settings can brighten phase contrast images, they come with significant tradeoffs that vary based on specimen type. You’ll need to carefully evaluate your specific sample before selecting a high ISO approach.
For thicker specimens, lower ISO values often produce better contrast without distortion, allowing you to preserve structural details that might otherwise be lost. Conversely, when imaging transparent specimens, a higher ISO might help reveal features, but watch for overexposure that could obscure fine details.
Balance your ISO with appropriate aperture settings and exposure times to minimize noise introduction. This is especially critical for live cell imaging, where longer exposures can cause phototoxicity.
Consider conducting preliminary tests with different ISO levels before your main imaging session to identify the best setting that maintains both clarity and sample integrity.
Software Tools for Enhanced Phase Contrast Imaging
Modern software applications have revolutionized the way researchers and microscopists control exposure in phase contrast imaging. These software tools offer extensive control over vital parameters including exposure time, gain, and binning—all of which directly enhance contrast and optimize image brightness for your specimens.
You’ll find that advanced programs now incorporate real-time histogram analysis to prevent over or underexposure during acquisition. Many packages also feature automated adjustments that respond to your sample’s specific characteristics, modifying light intensity accordingly.
For challenging specimens, look for software with built-in noise reduction algorithms that improve signal-to-noise ratios, greatly enhancing image clarity.
The real-time monitoring capabilities in current applications let you immediately visualize exposure adjustments, allowing you to quickly fine-tune settings until you achieve perfect phase contrast results.
Real-time Monitoring and Adjustments During Imaging
Because specimen conditions can change rapidly under the microscope, real-time monitoring represents a critical aspect of successful phase contrast imaging.
You’ll need to make immediate adjustments to exposure time and light intensity to capture ideal signals without damaging your sample.
Check histograms while imaging to assess whether your image is underexposed or overexposed, then adjust accordingly. You can enhance signal visibility by modifying gain settings and binning mode as your specimen’s characteristics change.
Consider implementing a feedback loop for exposure controls to dynamically respond to brightness or contrast variations.
Don’t overlook regular calibration of your camera settings and microscope alignment—these practices guarantee consistent imaging quality and facilitate accurate real-time adjustments during your observations.
This systematic approach to exposure controls delivers superior phase contrast results.
Best Practices for Living Cell Observations
The unique challenges of imaging living cells demand specialized exposure control techniques beyond standard adjustments. When using a phase contrast light microscope for live specimens, you’ll need to minimize light intensity to reduce phototoxicity while maintaining adequate visibility.
Check your image histogram regularly to prevent signal saturation, maximizing both exposure time and contrast. While adjusting gain can reveal finer cellular details, be cautious not to amplify background noise that might obscure important structures.
For best results, utilize objectives with high numerical aperture to maximize light collection and improve your signal-to-noise ratio.
Remember to regularly calibrate your microscope’s phase contrast components to guarantee accurate imaging. These practices will help you capture clear, detailed images of living cells while preserving their viability throughout extended observation periods.
Troubleshooting Common Phase Contrast Exposure Problems
When troubleshooting phase contrast exposure problems, you’ll likely encounter several common issues that can greatly impact image quality.
First, check your illumination settings—improper light intensity leads to over or underexposure, causing detail loss. If you notice uneven exposure across fields of view, realign your phase contrast components immediately.
Adjust exposure time based on specimen thickness; thicker samples need shorter exposures to prevent saturation while thinner ones may require longer times. You should utilize histogram monitoring to guarantee ideal signal distribution, adjusting gain and exposure settings accordingly.
Persistent halos or optical artifacts often indicate mismatched condenser annulus and phase rings. When this occurs, reevaluate their alignment, as incorrect matching inevitably leads to exposure problems and degraded image quality.
These adjustments will considerably improve your phase contrast imaging results.
Frequently Asked Questions
How Do You Get a Good Image Under Phase Contrast Microscope?
To get a good phase contrast image, you’ll need proper alignment of condenser annulus and phase plate, balanced light intensity, optimized exposure time, high NA objectives, and regular maintenance to minimize optical artifacts.
Is Phase Contrast Worth It?
Yes, phase contrast is worth it. You’ll see living cells without staining them, get high-contrast images of transparent specimens, and save money on dyes while monitoring biological processes in real-time.
Is Kohler Illumination Phase Contrast?
No, Köhler illumination isn’t phase contrast itself. It’s a method to achieve uniform specimen illumination that supports phase contrast microscopy. You’ll use this technique to optimize your phase contrast imaging for better results.
What Is the Resolution Limit for Phase Contrast?
Phase contrast microscopy’s resolution limit is typically around 200 nanometers. You’ll find it’s determined by your objective’s numerical aperture (0.25-1.4). Halos around high phase shift details can reduce your effective resolution further.
In Summary
You’ll achieve the best phase contrast images when you master both technical settings and practical techniques. Remember to balance exposure time with light intensity, adjust your aperture for ideal contrast, and don’t hesitate to use software tools for enhancement. With regular practice, you’ll develop an intuitive feel for real-time adjustments that produce crystal-clear images while preserving specimen integrity.


Leave a Reply