
To capture stunning thin section photographs, you’ll need to: select flawless specimens, properly set up your microscope with polarizing filters, master light intensity adjustments, utilize high-resolution camera equipment (20MP+), maintain sharp focus with appropriate aperture settings (f/8-f/16), experiment with polarized light techniques, and enhance images with non-destructive post-processing. Keep ISO low (100-200) and save in lossless formats like TIFF or PNG. These seven steps will transform your petrographic documentation from basic to publication-quality.
7 Steps To Stunning Thin Section Photography

While capturing the mesmerizing world of mineral structures through thin section photography might seem challenging, you’ll achieve remarkable results by following key preparation steps.
Begin with proper thin section preparation, ensuring your sample is flawlessly mounted on glass slides without bubbles or scratches that could compromise image quality.
Flawless sample mounting prevents imperfections that would otherwise diminish the visual integrity of your mineral documentation.
Set up your polarizing light microscope correctly, as it’s essential for revealing the distinctive optical properties that make minerals so visually stunning.
Adjust your camera settings to optimize focus and lighting before capturing multiple angles of the same section to document various textures and mineralogical features.
Don’t skip post-processing—use software to enhance contrast and sharpness while maintaining scientific accuracy.
With attention to these technical details, you’ll transform ordinary rock samples into extraordinary visual data.
Selecting the Perfect Thin Section Specimens
Because the foundation of enthralling thin section photography lies in specimen selection, your choice of rock or mineral samples will ultimately determine image quality and scientific value.
When reviewing your sample number collection, prioritize specimens with distinct mineralogical features and diverse compositions that create striking contrasts under polarized light.
Preparation: The Key Process involves achieving the ideal 30 μm thickness for perfect light transmission.
- Look for specimens with varied textures and mineral assemblages that tell a compelling geological story.
- Choose samples that are completely intact when mounted on the glass slide using proper adhesives.
- Select sections with minimal bubbles, scratches, or thickness variations that could compromise image clarity.
Setting Up Your Microscope for Optimal Imaging

Proper microscope alignment forms the foundation of exceptional thin section photography, requiring you to center your objectives and guarantee your stage moves smoothly without drift.
You’ll need to configure your polarizing filters correctly—placing one below the stage and another above the specimen—to reveal the distinctive optical properties that make thin sections so visually striking.
Don’t forget to test different light intensities and adjust your diaphragm opening to achieve the perfect balance between illumination and contrast for your specific mineral samples.
Microscope Alignment Essentials
The foundation of stunning thin section photography lies in meticulous microscope setup before you even touch the camera. Proper microscope alignment begins with positioning your stage to guarantee it’s perfectly centered on the optical axis.
You’ll need to adjust the stage height carefully, placing your thin section at the ideal distance from the objective lens. Use the fine focus knob with precision to bring your specimen into sharp clarity—this critical step determines whether your final image captures every intricate mineral detail.
- Regularly clean and calibrate your optical components to eliminate dust artifacts that can ruin otherwise perfect images
- Balance your light source intensity to achieve ideal contrast without washing out subtle features
- Incorporate polarizing filters to dramatically enhance mineral textures and birefringence properties, transforming ordinary samples into compelling visual narratives
Light Filter Configurations
With your microscope now properly aligned, mastering light filter configurations will dramatically elevate your thin section photography.
Place one polarized light filter below the stage and another above the objective lens to reveal minerals that would otherwise remain invisible in standard illumination.
Experiment with the upper filter’s angle to maximize contrast between birefringent minerals, allowing their unique optical properties to create striking color patterns.
Add a gypsum compensator plate to enhance these interference colors, particularly useful for distinguishing between isotropic and anisotropic minerals.
Carefully adjust your light intensity before capturing images—too bright washes out details, while too dim obscures critical features.
Different mineral assemblages respond uniquely to polarized light, so don’t hesitate to test various filter combinations until you achieve the perfect balance for your specific specimen.
Mastering Polarized Light Techniques
When exploring the microscopic world of minerals, polarized light techniques transform ordinary thin sections into spectacular displays of color and structure.
You’ll need to properly adjust the polarizers on your microscope to optimize the light path, revealing the birefringence and optical characteristics unique to each mineral. Verify your thin sections are uniformly prepared at approximately 30 µm thickness to maximize clarity and detail in your photography.
- Rotate your thin section at different angles to capture the full spectrum of colors and patterns created by light-mineral interactions
- Position your polarizers at precise angles to filter unpolarized light and enhance visibility of crystalline structures
- Use high-resolution equipment to document textures and properties that tell the geological story of your specimen
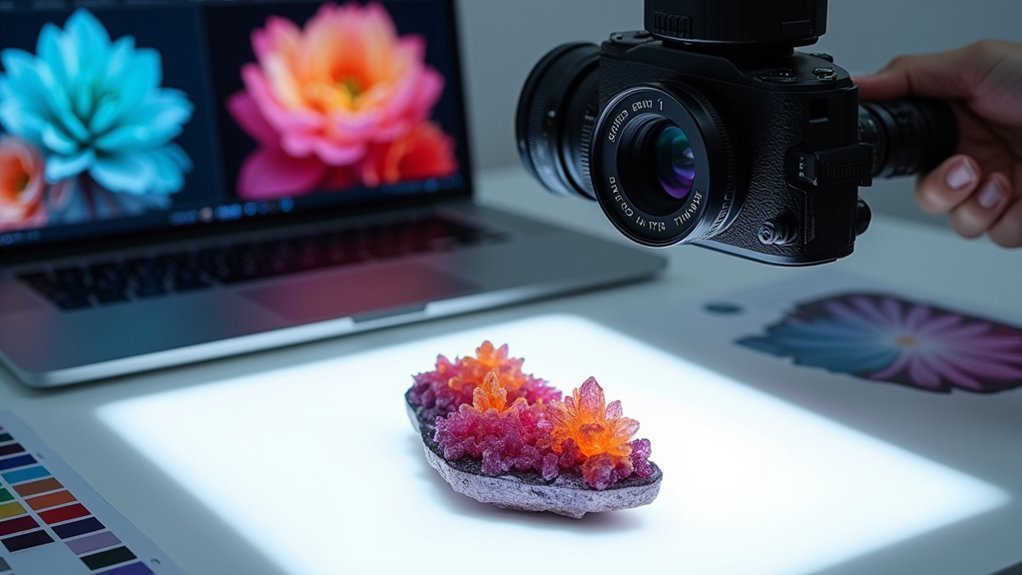
Camera Equipment and Settings for Microscale Detail

Capturing the intricate beauty of thin sections requires specialized photographic equipment and precise camera settings tailored for microscale imaging.
You’ll need a high-resolution camera with at least 20 megapixels to reveal the finest mineral details. Pair this with a macro lens between 50mm and 100mm, which delivers the sharp focus and appropriate depth of field essential for thin section photography.
Set your aperture between f/8 and f/16 to guarantee the entire specimen remains in focus while minimizing lens aberrations. Always mount your camera equipment on a sturdy tripod to eliminate motion blur and maintain perfect alignment with your thin sections.
Keep your ISO low (100-200) to reduce noise, and use even lighting such as ring lights or LED panels to illuminate your specimen without creating unwanted reflections.
Capturing Mineral Structures and Optical Properties
The true magic of thin section photography emerges between crossed polarizers, where minerals transform into a kaleidoscope of colors and textures.
You’ll need to position your thin section (ideally 30 µm thick) between two polarizing filters to reveal birefringence and pleochroism—optical properties that define mineral structures.
Adjust your transmitted light intensity to highlight specific features without washing out delicate details. Your camera settings should prioritize capturing these vibrant optical properties while maintaining crystal-clear focus on mineral boundaries and internal structures.
- Always include a scale bar to provide context for mineral sizes and enable quantitative analysis
- Experiment with partial polarization to reveal subtle pleochroism in certain minerals
- Capture the same field of view with both parallel and crossed polarizers for thorough documentation
Post-Processing Techniques for Enhanced Clarity
Even the most carefully captured thin section photographs benefit from thoughtful post-processing to reveal their full scientific potential.
You’ll enhance clarity dramatically using software like Adobe Photoshop or Lightroom to adjust brightness and contrast, making minerals and textures more visible.
Apply sharpening filters to improve edge definition between closely spaced grains. Remove distracting dust spots with the Clone Stamp or Healing Brush for cleaner presentations.
Don’t hesitate to experiment with color balance and saturation levels to highlight specific mineral characteristics.
For maximum flexibility in future editing, save your processed images in high-resolution formats like TIFF or PNG. These preserve critical details and guarantee your post-processing work remains intact for printing or further analysis without quality degradation.
Frequently Asked Questions
How Do You Prepare a Thin Section?
You’ll cut your rock to 20x30x8mm with a slab saw, glue it to a frosted glass slide with epoxy, grind it to 30µm thickness, apply a cover slip, and cure it on a hot plate.
How to Analyse Thin Sections?
You’ll analyze thin sections using polarized light microscopy to observe optical properties like birefringence and extinction angles. Identify minerals by their interference colors and use stains when needed for enhanced visibility of specific components.
How Do You Cut a Thin Section?
You’ll start by marking your rock, cutting it to a billet with a slab saw, polishing one face, attaching it to a glass slide, then using a trim saw and grinding to reach 30 µm thickness.
What Kind of Microscope Is Used for Thin Sections?
For thin sections, you’ll use a polarizing light microscope (PLM). It’s equipped with polarizing filters that reveal mineral properties when light passes through your samples. Most setups include camera attachments for documentation.
In Summary
With these seven steps, you’ve mastered the art of thin section photography. You’re now equipped to capture the hidden beauty of minerals that most people never see. Remember, practice makes perfect—the more sections you photograph, the better you’ll become at revealing their microscopic secrets. Keep experimenting with different lighting, magnifications, and processing techniques to develop your unique photomicrography style.


Leave a Reply