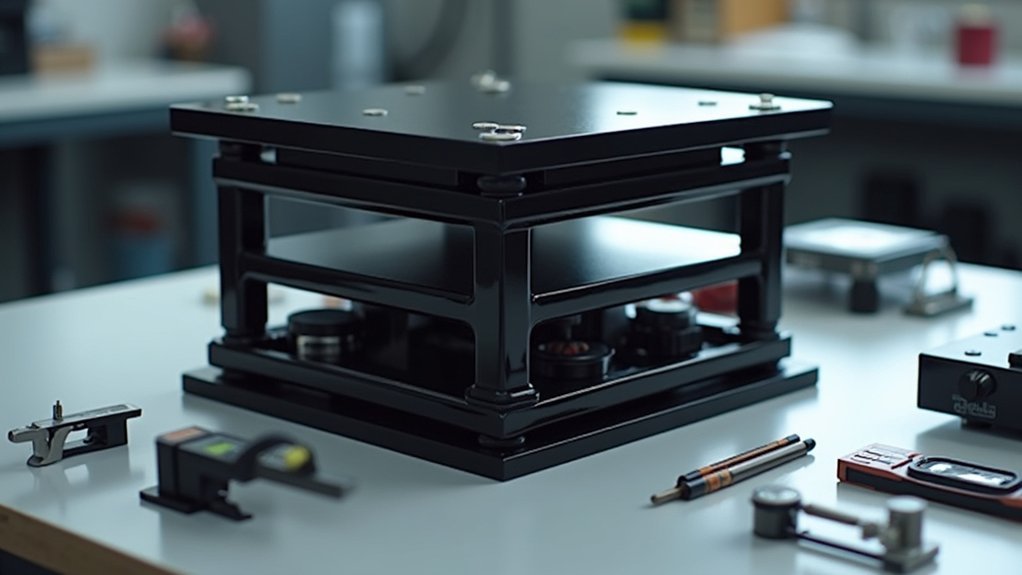
Building a lab-grade vibration isolation table starts with a 3/4-inch plywood base structure, followed by a sand-filled box lined with plastic. Place a granite slab on top of the sand for stability. Add rubber feet underneath to minimize floor vibration transfer. For ideal performance, secure your microscope to the granite using dampening materials between contact points. Test different sand levels for best results in the 5-20Hz range. The following steps will transform your microscopy precision dramatically.
Understanding Vibration Sources in Microscopy
Precision is the cornerstone of successful microscopy work. When you’re operating at magnifications around 1000x, even minimal vibrations can render your imaging results unusable. Your microscope requires strict vibration criteria—often as low as 500 μin/s—for peak performance.
Microscopy at high magnification demands precision where even subtle vibrations can compromise your entire imaging workflow.
You’ll face two main categories of disruption. Internal sources include foot traffic across your lab floor, HVAC system operations, and nearby equipment vibrations.
External sources encompass road traffic, construction work, and railroad activity that transmit through your building’s foundation.
Most problematic vibrations occur in the 5-20 Hz frequency range, precisely where your microscope is most vulnerable. Implementing proper vibration isolation techniques using pneumatic or specialized isolation tables isn’t optional—it’s essential for reliable, high-precision imaging results in your laboratory environment.
Materials and Components for an Effective Isolation System
Building an effective vibration isolation system requires specific materials carefully selected for their dampening properties. Your lab equipment needs a stable foundation that absorbs external vibrations while providing a level working surface.
While professional systems often use a concrete slab base, your DIY solution can achieve comparable results with readily available materials.
- Primary Support Structure – Use 3/4-inch plywood for the table frame, ensuring durability and rigidity to support your sensitive equipment.
- Dampening Elements – Incorporate a sand-filled box with an appropriate liner for vibration absorption, topped with a granite slab or cutting board.
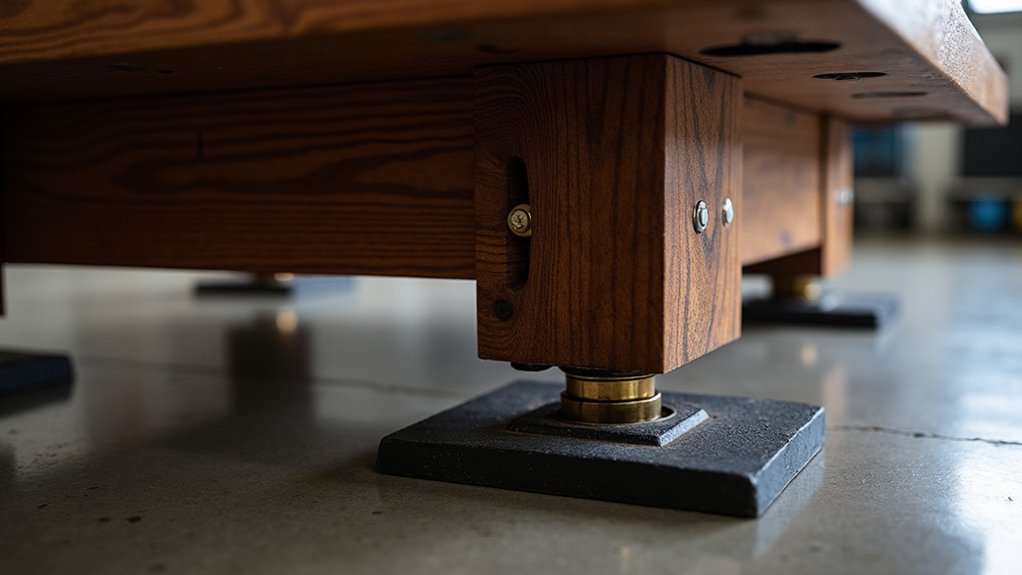
- Isolation Features – Add rubber feet to the table’s bottom to minimize vibration transfer from the floor.
The assembly process requires precise tapering and beveling of table edges for proper structural integrity when joined with wood glue.
Building the Base Structure for Maximum Stability
Four critical steps form the foundation of your vibration isolation table’s stability. Begin by cutting four side panels with tapered edges using a table saw or jigsaw for precise dimensions. Assemble these panels on a flat platform with 1/8-inch spacers to maintain uniform gaps throughout construction.
Install cleats that are slightly shorter than theoretical length and inset by 3/4 inches to secure corners firmly. Finally, bevel the narrower tapered pieces just under 90 degrees for superior joint alignment.
| Component | Specification |
|---|---|
| Side Panels | Tapered edges for snug fit |
| Spacers | 1/8-inch for uniform gaps |
| Cleats | Inset 3/4 inches from edges |
| Tapered Pieces | Beveled slightly under 90° |
Line inner walls with sand liner and fill with sand to dampen vibrations and add weight, completing your stable base structure.
Implementing Dampening Mechanisms and Materials
The heart of an effective vibration isolation table lies in its dampening mechanisms.
You’ll need to incorporate materials that absorb unwanted vibrations, particularly in the critical 5-20 Hz frequency range where most laboratory disturbances occur.
Start by implementing these key dampening elements:
- Steel springs and dashpots – Position these at strategic points beneath your tabletop to provide passive vibration control by absorbing and dissipating energy.
- High-viscosity honey chambers – Create sealed compartments filled with honey to serve as effective dampening media, markedly reducing vibration transmission.
- Sand liner with rubber feet – Add a layer of sand beneath your tabletop for mass and vibration resistance, then attach rubber feet to minimize vibrations from the floor.
Always match your dampening materials to the specific frequency range you’re targeting in your lab environment.
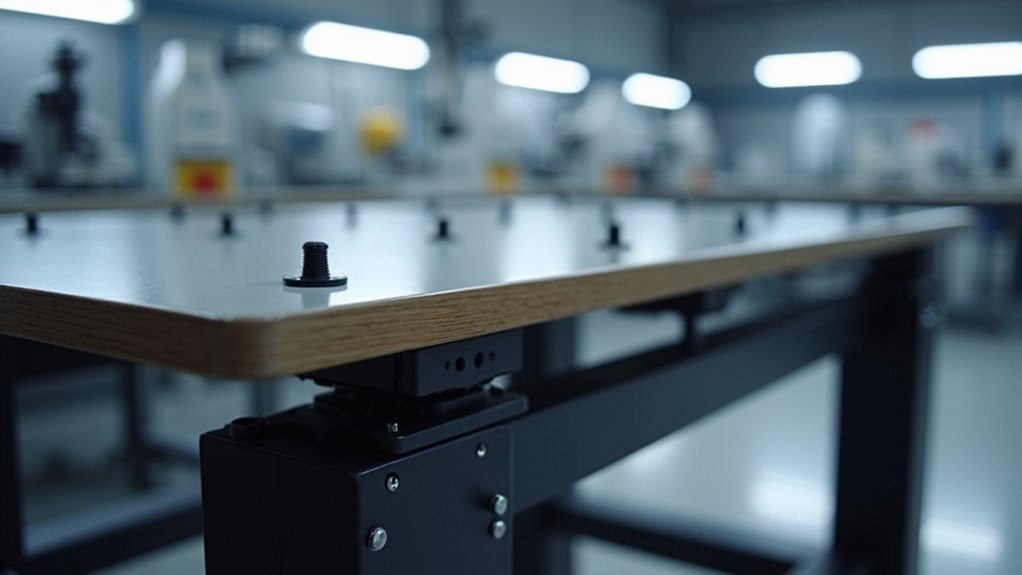
Mounting and Securing Your Microscope Setup
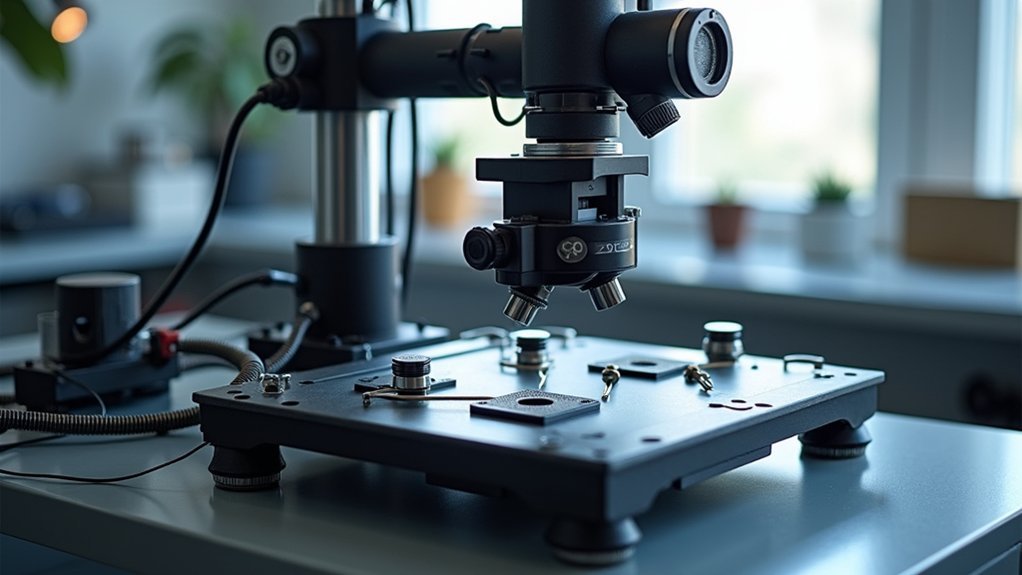
Properly mounting your microscope on the vibration isolation table requires secure attachment to the granite slab using adjustable leveling feet and appropriate clamping techniques.
You’ll need to place vibration-dampening materials like rubber pads between the microscope base and granite surface to absorb any residual vibrations that could affect imaging quality.
Confirm all mounting screws are regularly checked and tightened while maintaining balanced weight distribution to prevent eccentric loading that might compromise your table’s isolation performance.
Mounting and Securing Your Microscope Setup
Once you’ve built your vibration isolation table, mounting your microscope properly becomes critical for achieving ideal imaging results.
Place a granite slab on your table as the foundation for your microscope, then add vibration-damping materials like rubber pads or felt liners between the slab and microscope base to absorb residual vibrations.
- Secure your microscope to the table using bolts or clamps to prevent any shifting during operation, especially when making fine adjustments.
- Adjust the entire setup to eye level for comfortable viewing, which reduces unnecessary movement that could introduce vibrations.
- Perform regular alignment and leveling checks to maintain peak performance and imaging quality.
Remember to periodically inspect all mounting components to make sure they remain tight and secure.
Proper Clamping Techniques
Securing your microscope with the right clamping techniques is fundamental to achieving vibration-free imaging.
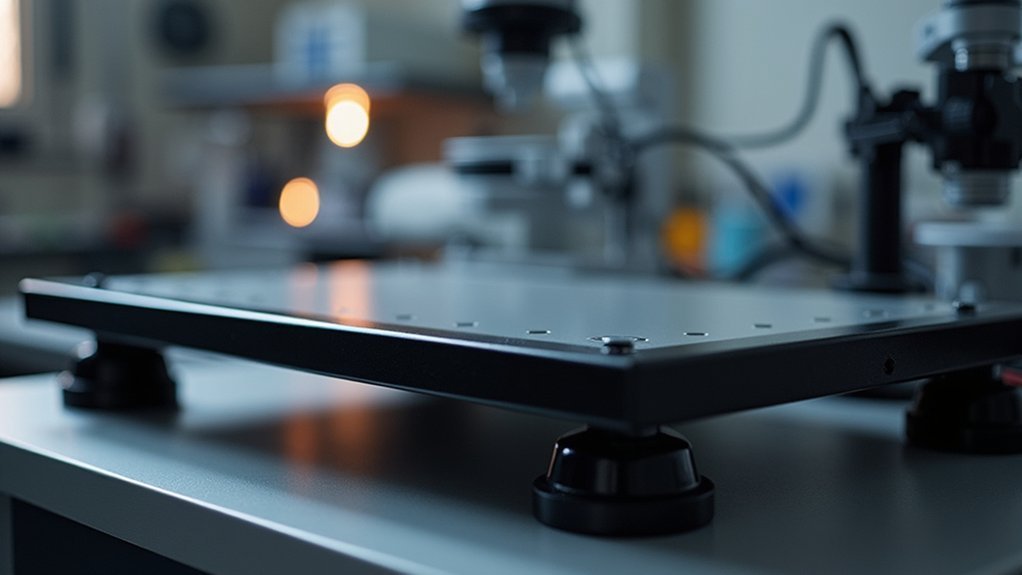
Mount your microscope to the granite slab using brackets or clamps appropriate for your equipment’s weight and dimensions. Place anti-vibration pads or rubber feet beneath the mounting clamps to prevent vibration transfer from the isolation table to your setup.
A band clamp around the microscope base distributes pressure evenly, eliminating subtle movements that might compromise measurement accuracy.
Don’t forget to regularly inspect and tighten all mounting hardware, as connections can loosen over time and cause misalignment issues.
For maximum stability, use a level to verify your microscope sits perfectly horizontal on the surface.
Even slight tilting can distort your results and make your setup more susceptible to unwanted vibrations.
Vibration Dampening Materials
Selecting the right vibration-dampening materials forms the foundation of an effective isolation system for your microscope setup.
You’ll need materials that can absorb and dissipate energy without transferring it to your sensitive equipment.
Start with rubber or neoprene mounts to create a primary isolation layer between your microscope and the table surface. For enhanced performance, incorporate a sand liner within your isolation table—it effectively dissipates vibrations while supporting your equipment’s weight.
For best results:
- Place a floating granite slab on high-viscosity dampening gels that absorb oscillations
- Use stainless steel or coated hardware that won’t transmit vibrations
- Confirm all mounting connections are tight but cushioned with dampening materials
These materials work together to create multiple layers of protection against environmental vibrations that could compromise your imaging quality.
Testing and Fine-Tuning Your Isolation Table
Testing your isolation table properly requires both specialized equipment like seismic accelerometers and practical observations of your sensitive instruments at critical frequencies between 5-20 Hz.
You’ll need to adjust the sand levels inside your table until you achieve ideal damping, watching for improvements in equipment stability during operation.
Strategic placement of your microscope or laser on the granite surface will further enhance isolation performance, so experiment with different positions to find the sweet spot where vibrations are minimized.
Testing Methods
Once you’ve constructed your vibration isolation table, how can you be certain it’s actually working? The answer lies in quantitative measurements using high-precision accelerometers to capture vibration levels before and after placing your equipment on the table.
Test across multiple frequencies, focusing especially on the critical 5-20 Hz range where many sensitive instruments are vulnerable. Always use a fixed reference point to guarantee your measurements accurately reflect the table’s isolation capabilities.
- Measure baseline vibrations on your laboratory floor or existing workbench.
- Take identical measurements with equipment placed on your new isolation table.
- Calculate the vibration reduction ratio between these measurements to quantify performance.
Fine-tune your design by adjusting damping materials like sand or honey in the table’s structure based on your test results, then repeat measurements until the best performance is achieved.
Setting Optimal Sand Levels
Although your isolation table’s framework may be perfectly constructed, the sand level within it plays a critical role in determining its vibration dampening effectiveness.
Start with a 2-inch sand layer beneath your granite slab, aiming for approximately 1 inch of sand after the slab settles into position.
Test different sand levels by adding or removing sand in ¼-inch increments, using an accelerometer to measure vibration response after each adjustment. You’ll need to find the sweet spot where vibrations are minimized without compromising stability.
Remember that equipment weight and distribution will affect your ideal sand level. What works for a microscope might differ from what’s needed for a laser setup.
Plan to check your sand levels periodically, as settling occurs over time and can diminish your table’s performance.
Equipment Placement Strategies
With your sand levels properly calibrated, the next key factor in maximizing your isolation table’s performance lies in strategic equipment positioning.
Always verify that your equipment’s center of gravity sits directly over the table’s center to prevent tipping and maximize stability during operation.
For peak vibration isolation:
- Position heavier equipment toward the center of the table to minimize eccentric loading, which can amplify unwanted vibrations.
- Use vibration sensors to monitor performance in real-time, allowing you to fine-tune placement based on actual data rather than assumptions.
- Test different positions for sensitive instruments like optical microscopes, particularly in relation to the table’s edges where vibrations may be more pronounced.
Regularly reassess your setup as experiments change to maintain isolation efficiency.
Frequently Asked Questions
What Is the Best Material for Vibration Isolation?
For vibration isolation, you’ll find rubber, neoprene, and cork most effective as they absorb and dissipate energy well. Don’t overlook steel springs for load-bearing needs or composite materials for targeting specific frequencies.
Is a Vibration Isolation Block Is to Be Installed in a Laboratory?
Yes, you’ll typically install vibration isolation blocks in laboratories where sensitive equipment needs protection from unwanted vibrations. They’re essential for ensuring accurate results in experiments requiring high precision and stability.
What Materials Are Used for Vibration Isolator?
You’ll find vibration isolators typically use steel springs, dashpots, high-viscosity fluids, rubber, and neoprene. For lab tables, materials include plywood for structure and granite for the stable top surface.
What Is a Vibration Isolation Table?
A vibration isolation table is a specialized platform you’ll use to protect your sensitive equipment from mechanical vibrations. It’s designed with dampening materials that absorb and neutralize unwanted movements that could disrupt your experiments or measurements.
In Summary
You’ve now built a lab-grade vibration isolation table that rivals commercial models at a fraction of the cost. Remember to periodically check your system’s performance and make adjustments as needed. With proper maintenance, your DIY isolation table will provide years of stable imaging conditions, ensuring your microscopy work remains unaffected by environmental vibrations. The effort you’ve invested will pay dividends in improved image quality and research results.


Leave a Reply