
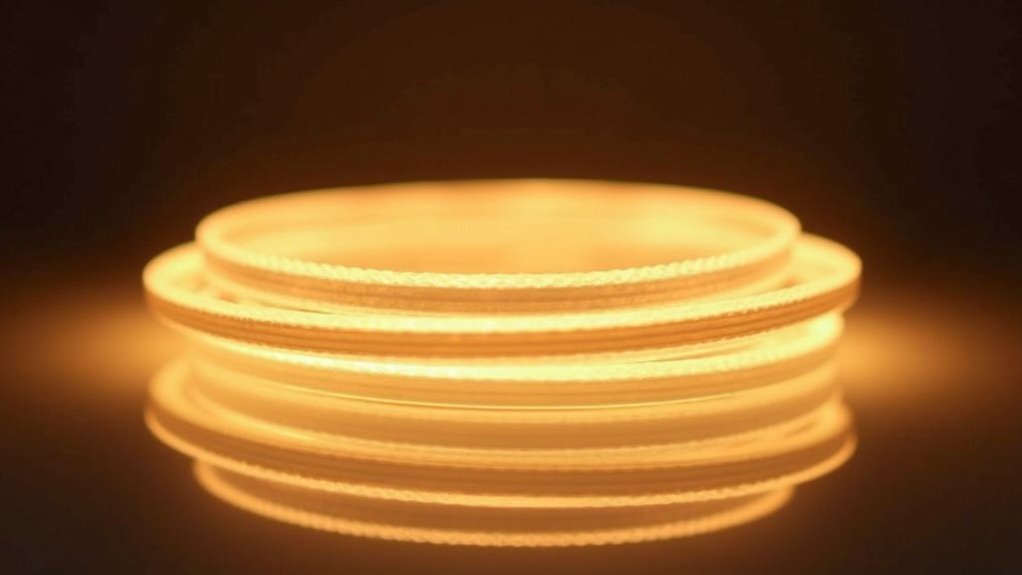
Ring light stacking produces crystal-clear photos by combining multiple images taken at different focal planes with uniform illumination. You’ll get better results by positioning your ring light at eye level, angled 30-45 degrees to minimize shadows and glare. Use a high CRI light (like the Godox Ring 72) at 12-18 inches from your subject for accurate colors. Secure your specimen firmly to prevent motion artifacts and maintain consistent exposure settings. The perfect combination of technique and equipment transforms microscopic details into stunning clarity.
What Makes Ring Light Stacking Photos Crystal Clear?

While many photographers struggle with uneven lighting in macro photography, ring lights transform focus stacking results with their unique illumination properties. The uniform light distribution from a ring light eliminates shadows that typically obscure details, ensuring each photo in your stack maintains consistent clarity.
The Godox Ring 72’s 5600K color temperature provides natural light that accurately renders colors without unwanted casts. You’ll appreciate how this balanced light allows you to shoot at smaller apertures like f/40, greatly enhancing depth of field in your stacked images.
The ability to control left and right LED banks independently gives you precise lighting control for different subjects. This customization minimizes glare while optimizing light positioning, resulting in stacked photos with exceptional detail that require less post-processing correction.
The Science Behind Focus Stacking in Microscope Photography
When you’re capturing microscopic subjects, you’ll face significant depth of field limitations that prevent a single shot from rendering everything in focus.
The focus stacking process addresses this by taking sequential exposures at marginally different focal planes, moving through the subject in tiny increments to guarantee every critical detail is captured sharply in at least one frame.
Specialized software then analyzes this image stack, selects the sharpest portions from each exposure, and compiles them into a single photograph with extended depth of field that reveals microscopic details with remarkable clarity.
Depth of Field Limitations
As you venture into the world of microscope photography, you’ll quickly encounter one of its most significant challenges: extremely limited depth of field.
When you’re working with high magnification, such as 5x macro lenses, your depth of field shrinks dramatically to mere fractions of a millimeter—as little as 0.095mm.
This extreme shallowness means that when you focus on one part of your subject, other areas inevitably fall out of focus. It’s physically impossible for a single shot to capture everything clearly at such close range.
Unlike your eyes, which can adjust to focus at multiple distances, your camera lens has fixed physical limitations.
That’s why focus stacking becomes essential. By capturing multiple images at different focus points and combining them, you’ll overcome these depth of field constraints, revealing details that would otherwise remain blurred.
Sequential Exposure Process
The science behind focus stacking relies on a methodical sequential exposure process that compensates for depth of field limitations.
When you’re capturing microscopic specimens, you’ll need to take multiple images with slight adjustments to the focal plane. Ring lights provide consistent illumination throughout this process, ensuring uniform brightness across all frames.
You’ll want to maintain identical exposure settings while only changing the focus distance. Each captured image reveals sharp details from different planes of your subject. Think of it as creating slices of perfect focus that will later be combined.
The process mimics how your eyes naturally shift focus when examining tiny objects.
With proper technique, you’re fundamentally overcoming the physical limitations of your microscope’s optics, allowing you to produce images with unprecedented clarity that would be impossible with a single exposure.
Software Compilation Methods
Once you’ve captured your series of microscopic images, specialized software takes center stage in the focus stacking process. Programs like Photoshop precisely align each frame, compensating for any subtle camera movements that occurred during your sequential exposures.
The software compilation methods involve two critical steps. First, alignment corrects positioning discrepancies between frames. Then, the blending algorithm intelligently combines only the sharpest portions from each image layer. For best results, you’ll need 5-15 separate images depending on your subject’s complexity and the final print size desired.
During focus stacking, the software evaluates pixel-level sharpness across your entire image series, creating a composite that reveals details impossible to capture in a single exposure. This technique transforms limited depth of field from a frustration into an opportunity for extraordinary microscopic clarity.
Essential Ring Light Equipment for Microscopic Detail
Selecting the right ring light equipment stands at the forefront of capturing microscopic details with stunning clarity. The Godox Ring 72, with its 72 white LEDs, offers the uniform illumination you’ll need when photographing small subjects like jewelry.
Precision ring lighting transforms microscopic subjects into stunning visual narratives, revealing details invisible to the naked eye.
When paired with a macro lens, this setup allows you to shoot at smaller apertures—even f/40—significantly enhancing your depth of field for detailed stacked images.
Look for high CRI ring lights to guarantee accurate color representation in your microscopic photography. The soft, shadow-reducing illumination these devices provide accentuates intricate features without overwhelming delicate details.
For extended field sessions, consider models with lithium battery options like the Godox, which offers longer usage times when you’re capturing those perfect stacked shots away from power sources.
Optimal Light Positioning for Seamless Layer Transitions

Positioning your ring light at eye level with strategic angling creates the even illumination needed for flawless shifts between stacked image layers.
You’ll need to carefully calibrate the distance between your light source and subject, typically starting at 12-18 inches and adjusting based on your specific lens and magnification requirements.
For complex subjects, try arranging multiple ring lights in complementary positions to eliminate stubborn shadows and enhance texture details that improve the definition of each focal plane in your final composite.
Strategic Light Angling
The success of your stacked photos heavily depends on how you angle your ring light relative to your subject. Position your light at a 30-45 degree angle to guarantee it wraps around your subject’s features, enhancing depth without creating distracting glare that could compromise your final composite.
For best results, try placing the ring light slightly above your subject. This strategic positioning casts flattering shadows that accentuate texture and detail, improving clarity across each focus layer.
You’ll notice how this approach highlights intricate features while maintaining consistent light output throughout your session.
Don’t forget to maintain the same brightness level during your entire shoot—this consistency is vital for seamless blending during post-processing.
When properly angled, your ring light creates that even illumination necessary for professional-quality stacked images.
Distance Calibration Settings
While mastering angle technique is essential, your ring light’s distance from the subject dramatically impacts layer shift quality in stacked photography. Position your light 2-4 feet away for ideal illumination, adjusting based on subject size and reflectivity. The perfect distance calibration creates seamless shifts between stacked images.
When setting up your distance parameters:
- Mount your camera on a tripod first, then position your ring light aligned with the subject’s focal point to minimize disruptive shadows.
- Experiment with closer settings for softer shadow detail or greater distances for more even light distribution.
- Regularly check for unwanted hotspots or glare that might compromise your final image quality.
Fine-tuning these distance settings guarantees each layer blends perfectly with the next, creating that crystal-clear result that makes ring light stacking so effective.
Multi-Unit Arrangement Techniques
Once you’ve perfected your distance calibration, a single ring light may still leave gaps in your illumination strategy.
To achieve truly crystal-clear stacked images, you’ll need at least two ring lights positioned at different angles around your subject.
Place your primary ring light at the ideal front position, then add secondary units at 45° angles to eliminate shadows and create uniform light distribution.
You’ll want to match the color temperature across all lights for consistent tonal quality between layers.
Adjust the power settings on each ring light individually—lower intensities for closer units, higher for distant ones—to maintain balanced brightness throughout your image sequence.
Complete your setup with strategically positioned reflectors to bounce light into any remaining shadow areas, ensuring every detail is captured clearly for seamless shifts during the stacking process.
Managing Shadow and Reflection in Stacked Images

Effective lighting control makes all the difference when creating professionally stacked photos. Managing shadows and reflections requires strategic positioning of your ring light at a 45-degree angle to guarantee even illumination across your subject.
You’ll notice immediate improvement in detail clarity when you properly balance the light’s distance—closer for brightness, farther for softer shadows.
For reflection control, especially with glossy objects like jewelry:
- Add a diffuser over your ring light to create uniform light quality without harsh glare
- Adjust brightness settings lower to maintain detail while reducing unwanted reflections
- Mount a polarizing filter on your camera lens to cut through surface shine
Don’t hesitate to experiment with these techniques, as minor adjustments can dramatically improve your stacked image results.
Color Temperature Control for Consistent Multi-Layer Results
When stacking multiple images for a composite photo, maintaining consistent color temperature becomes essential for seamless results. Setting your ring light to approximately 5600K mimics natural daylight, preventing jarring shifts between layers taken at different times.
For precise color temperature control, consider these practical options:
| Method | Effect | Best For | Implementation |
|---|---|---|---|
| Kelvin Setting | Direct control | Consistent batches | Adjust directly on light |
| Clip-on Filters | Color modification | Creative effects | Attach to light rim |
| Fabric Diffusion | Softened light | Reducing harshness | Drape thin material |
| Filter Stacking | Layered effects | Fine-tuning | Combine multiple filters |
You’ll avoid distracting color casts that can ruin an otherwise perfect stack by maintaining uniform temperature across all images. This consistency enhances clarity while preserving the professional quality of your final composite photograph.
Diffusion Techniques to Eliminate Harsh Lighting Boundaries
Harsh lighting boundaries can undermine even the most carefully composed stacked photos by creating distracting hot spots and abrupt shadow shifts. To achieve crystal-clear results, you’ll need to implement effective diffusion techniques that transform harsh ring light into soft, even illumination.
Try placing a thin fabric or professional diffusion filter directly over your ring light to create gentler shifts between light and shadow. Remember that your distance from the subject matters—moving your light further back will naturally soften its effect.
- Larger diffusion surfaces spread light more evenly, minimizing reflections on shiny objects.
- Different materials (from white bedsheets to specialized gels) offer varying degrees of softness.
- Adjusting the diffusion-to-subject distance lets you control the balance between clarity and flattering illumination.
These modifications will elevate your stacked photography from harsh amateur shots to professional-grade images.
Image Layer Quantity: Finding the Sweet Spot for Clarity
With your lighting properly diffused, the next challenge is determining how many images to include in your stack. The ideal range typically falls between three and fifteen layers, depending on your final output size.
For smaller prints, you’ll find that just three images may deliver an image in focus throughout. However, larger prints demand more—often ten to fifteen layers—to maintain crisp details across the entire subject.
Each additional layer you incorporate contributes to a more thorough depth of field, capturing intricate details that might otherwise appear blurry. Your ring light’s uniform illumination enhances this process, minimizing shadows across each layer.
Remember that quality improves considerably with more layers, as each one adds to the overall sharpness and detail preservation, maximizing your stacking technique’s effectiveness.
Software Solutions for Microscope Stack Processing
When processing your microscope stack photos, you’ll need reliable software like Helicon Focus or Zerene Stacker that offers powerful automated algorithms to align and blend your images seamlessly.
These programs provide multi-platform editing capabilities, supporting various file formats and allowing for both automated and manual control over the stacking process.
You can fine-tune your stacked images through adjustable blending modes and retouching tools, ensuring your ring light photography maintains exceptional clarity and detail throughout the entire focal plane.
Popular Stacking Software Programs
Although the quality of your microscope photos depends greatly on proper lighting and technique, choosing the right stacking software ultimately determines your final image quality. Several popular stacking software programs have become essential tools in Macro Photography, each offering unique advantages.
- Helicon Focus employs advanced algorithms to blend images seamlessly, creating exceptionally sharp results with enhanced depth of field.
- Zerene Stacker excels with complex subjects, preserving intricate details that make it a favorite among serious macro photographers.
- Adobe Photoshop provides familiar interfaces for those already using it, while free alternatives like CombineZP offer basic functionality for beginners.
Most options include batch processing capabilities, allowing you to efficiently stack multiple image sets without constant manual intervention.
Your choice should balance output quality requirements against your technical comfort level and budget constraints.
Automated Processing Algorithms
The magic behind focus-stacked microscope images lies in sophisticated automated processing algorithms that transform multiple partially-focused shots into one crystal-clear composite. These powerful algorithms detect and seamlessly blend only the sharpest portions of each image, eliminating blur while enhancing detail.
When you use specialized software like Helicon Focus or Zerene Stacker, you’ll benefit from intelligent systems that automatically correct camera shake and misalignments between frames. The algorithms analyze pixel data to identify precisely which areas are in focus, then combine these regions for maximum clarity.
Modern automated processing algorithms increasingly incorporate machine learning capabilities, improving focus detection accuracy and creating more natural-looking final images. This technology enables you to process multiple stacks efficiently through batch processing, streamlining your workflow while achieving professional results.
Multi-Platform Editing Capabilities
Focus stacking software today offers unprecedented flexibility across operating systems, making microscope image processing accessible regardless of your preferred platform.
Multi-platform editing solutions like Adobe Photoshop and Helicon Focus deliver powerful alignment and blending capabilities while preserving the crystal clarity captured with your ring light.
You’ll benefit from these key advantages:
- RAW format support maintains the highest quality throughout your workflow
- Cross-platform compatibility guarantees seamless shifts between Windows and macOS without sacrificing functionality
- Batch processing features in programs like Affinity Photo dramatically reduce editing time when handling multiple image sets
Specialized software such as Zerene Stacker employs advanced algorithms specifically designed for microscope photography, assuring precise merging of images taken at different focal points for professional-quality results.
Balancing Exposure Across All Focal Planes
When creating stunning stacked images, maintaining consistent exposure across your different focal planes becomes essential for professional results.
Using the ring light provides uniform illumination that guarantees even lighting throughout your entire focus stack, eliminating harsh shadows that could compromise clarity.
A ring light’s uniform illumination ensures consistent, shadow-free lighting—essential for seamless focus stacks with professional clarity.
You’ll want to keep your aperture setting consistent across all shots to prevent unwanted light variations between layers.
Adjust your ring light’s brightness to equalize exposure levels, which helps each focal plane blend seamlessly with the next. This balanced approach prevents distracting bright spots or underexposed areas in your final composite.
For truly crystal-clear results, choose a high CRI ring light that renders colors accurately.
This attention to color fidelity contributes considerably to maintaining exposure balance across all focal planes, resulting in naturally blended, professional-quality stacked images.
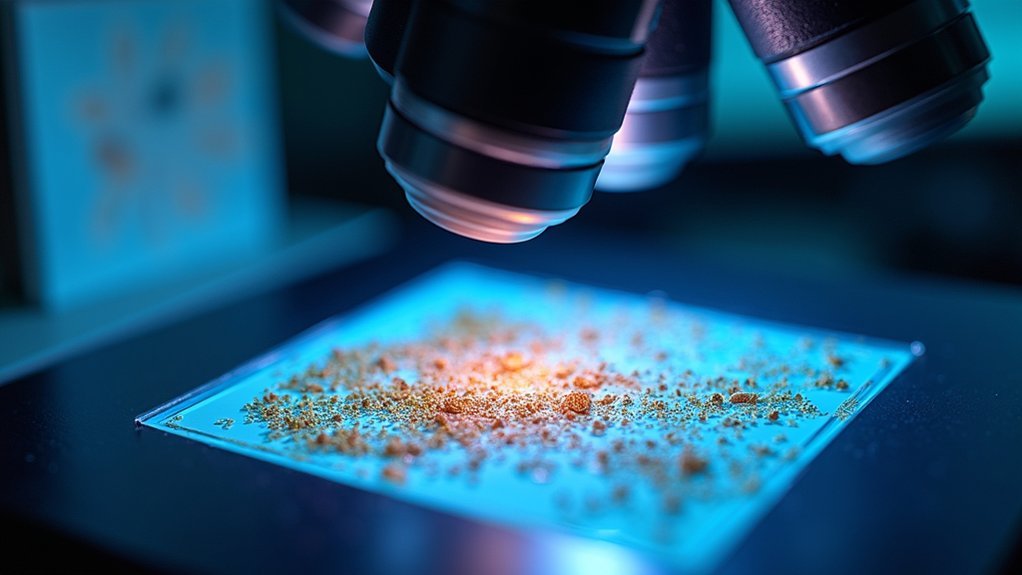
Specimen Preparation for Maximum Light Responsiveness
Proper preparation of your specimens stands as the foundation for achieving exceptional stacked photos with ring lighting. Before mounting your subject, thoroughly clean it to remove dust and fingerprints that scatter light and diminish clarity.
Position your specimen against a consistent background color that enhances contrast—making it more responsive to both ring and natural light conditions.
For ideal results:
- Secure specimens firmly to prevent movement blur during the stacking process
- Angle objects to maximize exposure to the ring light, reducing shadows
- Apply a thin layer of clear gel on transparent specimens to diffuse light evenly
For translucent subjects, consider how natural light might complement your ring lighting setup.
The proper specimen preparation dramatically improves how light interacts with your subject, resulting in crystal-clear final images.
Preventing Motion Artifacts During Multi-Image Capture
With your specimens beautifully prepared, the next challenge emerges: capturing multiple pristine images for stacking without motion artifacts. Even microscopic movements between shots can ruin your focal plane alignment and blur your final result.
| Equipment | Problem | Solution |
|---|---|---|
| Camera | Shake during pressing shutter | Use remote release or timer |
| Tripod | Unstable positioning | Lock all knobs firmly |
| Lighting | Inconsistent illumination | Maintain fixed light position |
| Subject | Minor movements | Secure specimen properly |
You’ll need to implement focus bracketing if your camera supports it, allowing automatic focal plane adjustments without physically moving the camera. Keep your exposure settings and ISO consistent across all images to prevent brightness variations that could introduce misalignment issues during stacking. Remember, stability is the foundation of crystal-clear stacked images.
Post-Processing Workflows for Scientific Precision
Once you’ve captured your set of perfectly focused images, transforming them into a single scientifically precise composite requires rigorous post-processing workflows.
Begin by aligning your images in Photoshop to correct any camera shake, ensuring microscopic details remain intact despite the limited depth of field your camera lens provides.
Next, leverage auto-blending to combine the sharpest elements from each frame, creating unparalleled clarity throughout your subject:
- Apply frequency separation techniques to preserve natural textures while eliminating imperfections
- Implement selective sharpening around critical focal points to enhance visual hierarchy
- Adjust brightness and contrast to optimize the ring light’s illumination effects
These scientific post-processing methods transcend basic editing, allowing you to create images with exceptional detail that would be impossible to achieve in a single shot, regardless of your camera lens quality.
Frequently Asked Questions
Why Are My Photos Not Crystal Clear?
Your photos aren’t crystal clear because you’re likely struggling with poor lighting, camera shake, or incorrect lens settings. Try using a tripod, adjusting your ring light, and mastering focus stacking techniques.
How to Take Good Pictures With Ring Light?
Position your camera in the center of your ring light, adjust brightness to complement your subject, use a tripod for stability, and experiment with distance to find ideal lighting that enhances details without causing glare.
What Does Stacking Photos Do?
Stacking photos combines multiple images taken at different focus points to create one crystal-clear image. You’ll get enhanced depth of field, showing all details sharply—especially useful for macro photography and small subjects like jewelry.
How Do You Make a Ring Light Look Good?
To make a ring light look good, position it at eye level, adjust brightness to avoid glare, experiment with distance, use diffusers for softer effects, and match color temperature to your environment for flattering illumination.
In Summary
You’ve now revealed the secrets to crystal-clear focus stacked photography. By combining proper ring light positioning, careful specimen preparation, and meticulous exposure control, you’ll eliminate shadows and capture every microscopic detail. Remember, successful stacking isn’t just about equipment—it’s your technique that matters most. Master these fundamentals, refine your post-processing workflow, and you’ll consistently produce stunning scientific images with exceptional clarity and depth.


Leave a Reply