
Successful focus stacking for live specimens requires mastering multiple techniques. Set your camera to f/8-f/16 with fast shutter speeds (1/250s+) and use continuous shooting mode. Employ diffused lighting with ring lights to minimize startling your subjects. Capture during early mornings when specimens are less active. Use temporary containment methods and understand subject behavior patterns. Implement movement compensation in post-processing with median stacking. These approaches will transform your macro photography from frustrating to fascinating.
7 Best Stacking Techniques For Live Specimen Photography

When photographing live specimens, particularly insects, focus stacking becomes both an art and a challenge. You’ll need to work quickly, capturing multiple images at different focal points before your subject moves.
Set your aperture between f/8 and f/16 for ideal depth while maintaining image quality.
Finding the sweet spot: an aperture of f/8 to f/16 balances depth of field with overall image sharpness in macro photography.
Modern DSLR cameras with Live View functionality are invaluable, allowing precise focus adjustments without disturbing your subject. Consider using automated focus bracketing systems or a macro slider to guarantee consistent incremental changes between shots.
For restless subjects, try photographing during early mornings when they’re less active, or create a controlled environment using a clear plastic container. This approach keeps specimens calm while you work through the stacking process.
After shooting, use specialized stacking software to combine the sharpest parts of each image into one perfectly detailed composite.
Mastering Camera Settings for Dynamic Subjects
Capturing sharp, detailed images of moving subjects for focus stacking requires precise camera settings and quick reflexes.
You’ll need to select a fast shutter speed of at least 1/250s to freeze motion and prevent blur that would compromise your stacking technique.
Set your aperture between f/8 and f/16 to balance ideal depth of field with image sharpness while avoiding diffraction.
Enable continuous shooting mode to rapidly capture multiple focal planes in succession—essential when your specimen might move at any moment.
Keep your ISO settings between 100-400 to maintain image quality without introducing noise that degrades fine details.
Switch to manual focus and pre-focus on your key point of interest to guarantee consistent alignment across all images in your stack.
This careful setup will dramatically improve your results when photographing dynamic live specimens.
Optimal Lighting Setups to Minimize Subject Movement

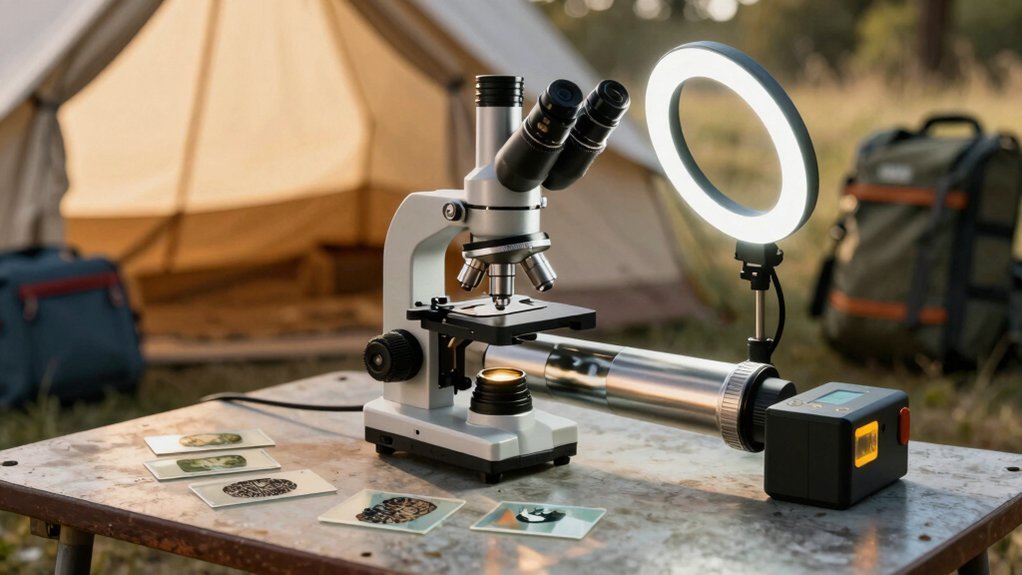
When photographing live specimens for focus stacking, you’ll find ring lights provide consistent illumination that keeps your subject calm and reduces movement artifacts.
Diffused natural light creates a gentle environment that won’t startle insects or small creatures, allowing them to maintain natural positions throughout your shooting sequence.
Equipping your setup with adjustable intensity controls lets you gradually acclimate subjects to the lighting conditions, preventing the sudden movements that can ruin carefully planned stack sequences.
Ring Lights for Stability
The humble ring light stands as a photographer’s secret weapon when tackling focus stacking challenges with moving subjects. Its circular design provides even illumination around your specimen, virtually eliminating harsh shadows that can complicate the stacking process.
You’ll find that ring lights create a calming effect on live specimens through their soft light distribution, reducing the likelihood of sudden movements during your photography session.
Their consistent light output allows you to maintain steady exposure settings, critical for seamless stacking results.
Most modern ring lights offer adjustable brightness levels, letting you fine-tune the illumination without altering camera settings.
For best results, pair your ring light with a diffuser—this combination further softens the light, ensuring your specimens remain comfortable and stationary throughout the extended shooting process required for thorough focus stacks.
Diffused Natural Illumination
Natural light, when properly diffused, offers photographers the ideal illumination for focus stacking subjects that might otherwise move during artificial lighting setups. By positioning your macro lens near windows or under tree canopies, you’ll capture highly detailed images while keeping your live specimens calm and stationary.
- Place a white reflector nearby to soften shadows and create even illumination across your subject’s features.
- Shoot on overcast days when possible—nature’s perfect diffuser provides balanced light that minimizes subject movement.
- Combine lower ISO settings with longer exposures for cleaner images while maintaining the stillness necessary for effective stacking and stitching.
- Set your camera on a tripod to eliminate shake during extended exposure times, ensuring each frame in your stack remains consistently sharp.
Adjustable Intensity Controls
Successful macro photography depends largely on your ability to control lighting without disturbing your subject. Dimmable LED lights with adjustable intensity controls create soft illumination that reduces harsh shadows and prevents startling live specimens during photography sessions.
You’ll achieve better results by gradually increasing brightness levels, giving insects time to acclimate rather than triggering movement with sudden light changes.
Combine diffused LED panels or softboxes with natural light to distribute illumination evenly across your subject. This balanced approach maintains comfortable, consistent lighting conditions essential for detailed focus-stacked images.
Monitor your subject’s behavior continuously and adjust light intensity accordingly. By creating ideal conditions through careful light management, you’ll capture more successful stacked images as your specimens remain calm and stationary throughout the session.
Quick-Capture Methods for Active Specimens

Rapid bracketing technique allows you to capture multiple focus points in quick succession, minimizing the chance your active subject will move before completing your stack.
You’ll achieve excellent results by configuring your camera’s burst mode to automatically vary focus points while maintaining consistent exposure settings.
Timed burst photography complements this approach by letting you predict and capture fleeting moments of stillness, especially during morning hours when insects are naturally less active.
Rapid Bracketing Technique
Five essential seconds can make the difference between capturing or missing a perfect stack of an active insect. The rapid bracketing technique lets you capture multiple images in quick succession, usually within 2-4 seconds.
You’ll need a high-speed external strobe setup with high-capacity batteries to freeze motion and maintain consistent exposure across your macro images.
For the best results when stacking and stitching:
- Adjust your camera’s focal points in small 0.5mm increments to maximize depth of field while ensuring proper image overlap
- Shoot during early morning when insects are calmer and less active
- Use hand-held methods instead of a focusing rail for quicker adjustments as subjects move
- Maintain fine-focus control over your subject area despite specimen movement
Timed Burst Photography
Three essential factors distinguish timed burst photography as the preferred method for active specimens: speed, volume, and probability. By capturing multiple images in rapid succession, you’ll dramatically increase your chances of achieving sharp focus on moving subjects.
Set your camera to continuous shooting mode when photographing live specimens. This setting allows you to take several shots within seconds, maximizing opportunities to freeze motion at the perfect moment.
Combine this with a fast shutter speed—typically 1/1000 second or faster—to eliminate blur even with quick-moving insects.
For consistent lighting across your burst sequence, employ external strobes with high-capacity batteries. Taking advantage of cooler morning temperatures when insects move more slowly further enhances your success rate.
Patience and understanding of insect behavior remain vital companions to your technical approach.
Strategic Timing and Behavior Recognition
When capturing insects through focus stacking, timing becomes your most powerful ally. Strategic timing considerably improves your chances of obtaining sharp, detailed images.
Head out during early mornings when cooler temperatures naturally slow insect movement, allowing for more precise image capture. Understanding behavioral patterns of your subjects will help you anticipate periods of stillness essential for successful stacking.
- Observe natural resting periods after feeding when insects are less likely to move
- Take advantage of overcast conditions when insects aren’t agitated by bright sunlight
- Use a gentle misting technique to encourage specimens to remain stationary in warmer weather
- Learn species-specific behaviors to predict when your subject will pause long enough for multiple exposures
Environmental Controls to Encourage Stillness

Creating the right environmental conditions dramatically increases your chances of capturing perfectly still insects for focus stacking.
Take advantage of early morning hours when cooler temperatures naturally reduce insect activity, giving you longer windows to complete your photography process.
You’ll find that slightly increasing humidity through misting techniques calms live specimens, particularly skittish species that tend to move frequently.
Provide a controlled environment with minimal noise and gentle handling to prevent startling your subjects.
Clear plastic containers offer temporary containment that reduces stress while providing clean backgrounds for your images.
Pay attention to natural behavior patterns of your specimens—understanding when they’re likely to rest will help you time your shooting sessions strategically.
These environmental controls work together to create ideal conditions for capturing detailed, well-stacked photographs.
Post-Processing Techniques for Movement Compensation
Despite our best efforts to control the environment, live subjects inevitably shift during focus stacking sessions, making post-processing movement compensation essential.
Movement happens. Great focus stacking accounts for it rather than expecting perfect stillness.
When your specimen doesn’t cooperate perfectly, you’ll need software solutions to rescue your composite image.
Most stacking software offers automatic image alignment features that can compensate for minor movements between frames. For more challenging cases, you can manually fine-tune alignments in Photoshop or similar editors.
- Utilize “median” stacking methods to average out movement artifacts
- Incorporate multiple frames of the same position to increase your chances of capturing sharp details
- Apply manual alignment adjustments for precise control over troublesome areas
- Enable image stabilization while shooting to minimize the compensation needed in post-processing
These techniques will help you create crisp, detailed composites even when working with fidgety subjects.
Frequently Asked Questions
What Aperture Is Best for Focus Stacking?
For focus stacking, you’ll want to use apertures between f/8 and f/16. This range balances depth of field and sharpness without excessive diffraction. Experiment to find what works best for your specific setup.
What Are the Different Types of Image Stacking?
You’ll find various image stacking types: focus stacking enhances depth of field, exposure stacking balances lighting, panorama stitching creates wide views, HDR imaging captures broader light ranges, and time-lapse stacking documents changes over time.
What Is the Difference Between Focus Bracketing and Focus Stacking?
You’re using focus bracketing when you capture multiple images at different focus points. Focus stacking is when you combine those images into one composite with enhanced depth of field using specialized software.
What Are the Best Settings for Focus Stacking?
For focus stacking, you’ll want to use f/8-f/16 aperture, a tripod with macro slider, capture images with 30-50% overlap, employ external strobes, and process with specialized software like Helicon Focus or Zerene Stacker.
In Summary
You’ve now mastered the essential stacking techniques for live specimen photography. With practice, you’ll effortlessly balance technical precision with the unpredictability of living subjects. Don’t hesitate to experiment with these methods, adapting them to your specific specimens and conditions. Remember, patience is vital—even the most active creatures offer moments of stillness. Your stunning, detailed images will be well worth the effort.

Leave a Reply