
To optimize your field of view, start by matching your sensor size to your optical system's specifications, avoiding vignetting and maximizing coverage. You'll want to adjust magnification settings carefully, maintain proper working distances, and guarantee your pixel density aligns with resolution goals. Use precise camera adapters, implement strategic binning techniques, and calibrate your sampling rate for crisp details. When stitching images, maintain 30% overlap between frames. These fundamentals will release the full potential of your imaging setup.
Sensor Size Selection and Image Resolution

When choosing a camera for astrophotography, your sensor's size plays a crucial role in determining what you'll capture in the night sky. Larger sensors provide a wider field of view, making them ideal for photographing expansive celestial objects.
The right sensor size empowers you to capture more of the cosmos, with larger sensors revealing expansive celestial vistas.
If you're using an APS-C sensor, you'll need to account for its 1.5x crop factor, which narrows your field of view compared to full-frame options.
For peak image quality, verify your sensor size selection matches your telescope's focal length to prevent vignetting. Your sensor's pixel size should align with the telescope's optical resolution to meet the Nyquist criterion.
Don't overlook bit depth – higher values capture more detail and improve dynamic range in your final images. This careful balance between sensor characteristics and optical system requirements will help you achieve sharper, more detailed astrophotographs.
Optimal Magnification Settings
When selecting magnification settings, you'll need to match your objectives to your camera's sensor specifications to maximize image quality and field coverage.
You should consider your working distance requirements, as higher magnifications often mean shorter distances between the objective and specimen.
Finding the right balance between resolution and field coverage is essential – you want enough detail to see your structures of interest while maintaining a practical viewing area that captures sufficient cells or samples.
Match Objectives To Sensors
Matching your camera's sensor to the right objective lens plays a crucial role in achieving best image quality. To avoid vignetting, verify your sensor size aligns with the objective's field number.
When you're selecting magnification, remember that higher power objectives will give you more detail but reduce your field of view.
For ideal sharpness, follow the Nyquist criterion by matching your camera's pixel size to the resolution limit of your objective's numerical aperture.
If you're working with thicker sample vessels, don't forget to adjust the correction collars on your objectives to compensate for optical aberrations.
When calculating your desired field of view, consider both the effective focal length of your telescope and camera to confirm your target fits properly within the frame.
Consider Working Distance Limits
Beyond selecting the right objective and sensor combination, working distance plays a key role in successful imaging.
You'll need to optimize the space between your objective lens and specimen to maintain sharp focus while ensuring enough room for sample manipulation. Higher magnification typically means shorter working distance, which can affect your image quality and handling flexibility.
- Match your objective's numerical aperture (NA) with the appropriate working distance to achieve ideal resolution and contrast.
- Choose objectives with longer working distances when you need to work with thicker specimens or require extra space for manipulation.
- Consider how additional equipment like coverslips or immersion media will impact your working space.
- Remember that delicate specimens need extra clearance to prevent damage during imaging sessions.
Balance Resolution With Coverage
Selecting the right magnification involves a critical trade-off between resolution and field of view (FOV). While higher magnification can reveal finer details, it'll also restrict how much of your target you can capture in a single frame.
To optimize your imaging, you'll need to match your pixel size to roughly half the size of the smallest feature you want to resolve, following the Nyquist criterion. Consider using a focal reducer when you need a larger field of view without compromising too much detail.
Remember that your focal length directly impacts magnification – longer focal lengths provide higher magnification but narrow your FOV.
The key is finding the sweet spot where you're capturing enough detail while ensuring your target fits comfortably in the frame, avoiding excessive cropping that could degrade image quality.
Camera Adapter Compatibility
When selecting a camera adapter, you'll need to match your telescope's port dimensions with your camera's sensor size to prevent image cropping and vignetting.
Your adapter should provide a secure, stable connection between the telescope and camera while maintaining proper optical alignment for sharp, clear images.
Check the manufacturer's specifications to guarantee compatibility with your specific equipment, considering factors like focal length and the type of camera you're using.
Matching Port to Sensor
The compatibility between your microscope's port and camera sensor represents one of the most critical aspects of achieving perfect microscope imaging. When matching port to sensor, you'll need to guarantee proper alignment to prevent vignetting and maintain a full field of view.
Using appropriate couplers or Optovars will help you establish a secure connection between your equipment.
- Measure your microscope port size in millimeters and confirm it matches your camera sensor dimensions
- Install compatible adapters to eliminate light loss and maintain image quality
- Verify your camera's pixel size aligns with the microscope objective specifications
- Consider post-objective magnification options to enhance your imaging capabilities while keeping the optical path clear
Remember to regularly check these connections to maintain peak performance and prevent any degradation in image quality over time.
Optimal Adapter Selection Guide
How you match your camera adapter to your telescope can make or break your imaging success. Your adapter selection must align with both your telescope's focuser diameter and your camera's mount specifications to prevent vignetting and guarantee secure attachment.
When choosing your adapter, you'll need to verify two critical measurements: the focuser size (typically 1.25 or 2 inches) and the back focus distance required for proper focus.
Consider an adapter with adjustable features like tilt or rotation capabilities to fine-tune your alignment during imaging sessions. If you're looking to enhance your field of view, incorporate a focal reducer into your setup – it'll help maintain image quality while minimizing optical aberrations.
Always double-check compatibility with your entire optical train before making your final selection.
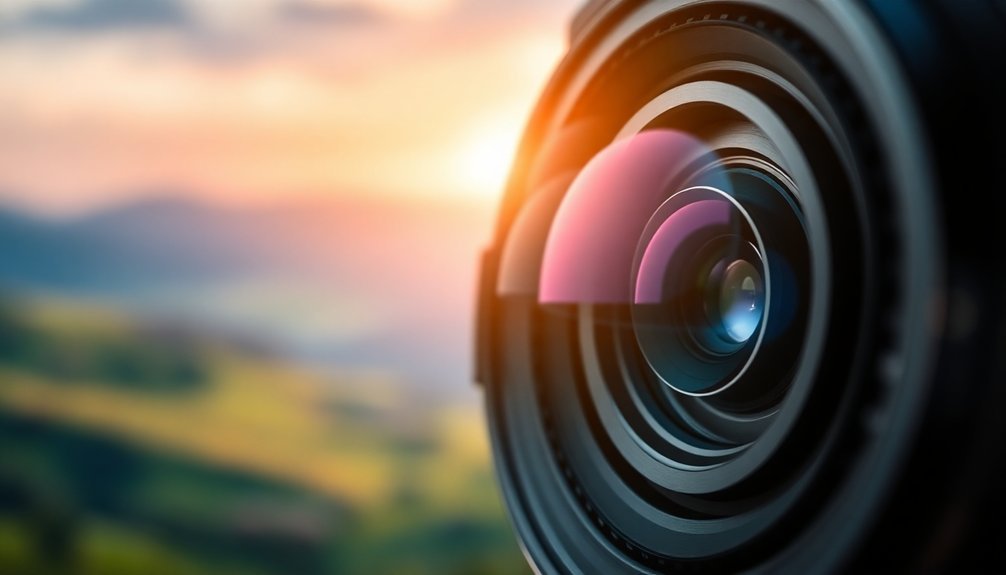
Lens System Configuration

Setting up your lens system properly creates the foundation for successful astrophotography.
A well-configured lens system is the cornerstone of capturing stunning images of the night sky.
You'll need to balance several factors to achieve the perfect field of view for your targets. Your focal length choice directly impacts what you can capture, while focal reducers can help you adapt to different imaging scenarios by effectively shortening your optical system's focal length.
- Match your camera's sensor size with your desired field of view – larger sensors capture wider views.
- Consider using a focal reducer to fit larger celestial objects in your frame.
- Check that your optical system meets Nyquist criteria for your camera's pixel size.
- Select eyepieces that complement your lens configuration for ideal magnification.
Digital Binning Techniques
Understanding digital binning can dramatically improve your low-light imaging results. When you're dealing with dim samples, you'll find that binning combines adjacent pixels to boost your signal-to-noise ratio and speed up image acquisition. You can choose different binning levels, such as 2×2 or 4×4, depending on your specific needs.
Before implementing binning, you'll need to evaluate your target's size and shape carefully. While higher binning levels increase sensitivity, they'll reduce spatial resolution.
To guarantee you're not losing essential details, match your binning settings with your camera's pixel size and follow the Nyquist criteria. This technique is particularly valuable when you're capturing faint biological structures or astronomical objects.
Field Diaphragm Adjustments
While capturing high-quality microscope images can be challenging, mastering field diaphragm adjustments will greatly enhance your results.
You'll notice immediate improvements in image quality when you properly control the light entering your microscope. By adjusting the diaphragm to match your field of view, you'll achieve better contrast and reduce unwanted background noise in your specimens.
- Close the diaphragm completely before focusing on your specimen
- Gradually open it until it perfectly fills your field of view
- Fine-tune your exposure settings to balance illumination
- Check for vignetting and adjust accordingly
Remember to calibrate your field diaphragm regularly as part of your maintenance routine.
You'll see sharper edges and clearer details in your images, especially when working with high-contrast specimens. This simple adjustment can make a significant difference in your microscopy work.
Pixel Density Optimization
To achieve ideal imaging results, you'll need to match your camera's pixel size to your objective lens's resolution capabilities while following Nyquist sampling guidelines.
You can enhance your signal quality through binning, though you'll want to carefully monitor how this affects your spatial resolution.
For the clearest images, make sure your camera's sampling rate aligns with your objective's numerical aperture, typically aiming for 2.5 to 3 samples per resolvable feature.
Match Resolution to Objective
Matching your camera's pixel density to your microscope's objective is essential for capturing ideal image detail.
You'll need to verify your pixel size aligns with the objective's resolution capabilities, meeting the Nyquist criterion for best results. When working with high NA objectives, opt for cameras with smaller pixel sizes to maximize resolution potential.
- Calculate your system's diffraction limit and select a camera that provides at least two pixels per Airy disk.
- Consider binning options for low-light samples while maintaining necessary resolution.
- Choose pixel sizes that complement your objective's NA – smaller pixels work better with higher NA objectives.
- Regularly verify your system's alignment to maintain consistent pixel density enhancement across all imaging sessions.
Remember to calibrate your setup frequently, as this helps maintain the perfect match between your camera's capabilities and your objective's resolution potential.
Sampling Rate Guidelines
Building on proper resolution matching, sampling rate plays a key role in image quality and data accuracy. To optimize your imaging results, guarantee you're using at least two pixels per feature of interest. This sampling rate enables accurate detail capture and reconstruction of your specimens.
When setting up your camera, verify that your pixel size aligns with your objective lens specifications to meet the Nyquist criteria. You'll want to adjust magnification settings based on your target object size.
While binning pixels can improve your signal-to-noise ratio and acquisition speed, be aware that it might compromise detail in smaller specimens.
Don't forget to check your objective lens' numerical aperture for diffraction limits. For detailed analysis, use 16-bit depth imaging formats to preserve pixel intensity information and maintain image quality throughout your research.
Binning Effects Assessment
A thoughtful binning strategy can dramatically enhance your imaging outcomes. You'll need to carefully weigh the trade-offs between improved signal-to-noise ratio and spatial resolution when evaluating binning effects on your image quality. For dim samples, combining adjacent pixels can boost sensitivity, but you'll want to verify you're not losing critical details in your specimens.
- Check that your pixel size meets Nyquist criteria after binning to prevent aliasing.
- Start with 2×2 binning for a 4x sensitivity boost while maintaining reasonable resolution.
- Consider your sample's characteristics – high-density cell assays often benefit from binning.
- Monitor small object visibility, as binning may obscure fine structural details.
When properly implemented, binning can streamline your imaging workflow while maintaining essential data quality for your specific experimental needs.
Sampling Rate Management
Proper sampling rate management forms the cornerstone of high-quality imaging. You'll need to balance your sampling rate with your imaging goals, keeping in mind that higher rates capture more detail but demand greater storage and processing power.
To avoid aliasing, set your sampling rate at least twice the highest frequency in your image data, following the Nyquist theorem. When working with microscopy, match your camera's pixel size to your objective lens, ensuring it meets or falls below the diffraction limit.
For dynamic samples, you'll face a trade-off between frame rate and resolution. If you're working in low-light conditions, consider using binning to boost your signal-to-noise ratio. This technique combines adjacent pixels, allowing faster acquisition while maintaining image quality.
Live Preview Calibration

Once you've established ideal sampling rates, your next step is mastering live preview calibration. This essential tool helps you perfect your framing and exposure times before committing to final shots.
During live cell imaging, you'll want to monitor your histogram display to confirm you're utilizing 50-75% of the dynamic range for best results.
- Check your field of view coverage through the live preview, confirming your target fits properly within the frame.
- Monitor for vignetting effects and adjust your camera position or use a focal reducer when needed.
- Keep an eye on your histogram to maintain proper exposure levels.
- Recalibrate your preview settings whenever you change focal lengths or camera setups.
Remember to use the live preview's real-time feedback to make quick adjustments, confirming you capture the best possible images of your celestial targets.
Image Stitching Methods
When capturing expansive celestial objects that exceed your camera's field of view, image stitching becomes an essential technique for creating detailed, high-resolution composites.
You'll need to guarantee at least 30% overlap between adjacent frames to achieve seamless alignment and prevent gaps in your final image.
Mount your camera on a stable tripod and use a remote shutter release to minimize vibrations. Keep your exposure settings consistent throughout the shooting session to maintain uniform brightness and color across all panels.
For the best results, you'll want to use specialized software like Microsoft ICE or Adobe Photoshop to align and blend your images. These tools help create a seamless composite by automatically matching overlapping sections and adjusting color balance, resulting in a high-resolution final image that reveals intricate celestial details.
Frequently Asked Questions
What Is the Field of View for 10X?
Your 10X objective's field of view is typically 1.8mm in diameter with a standard 25mm eyepiece. You'll get variations based on your specific microscope setup and eyepiece field number used.
How to Increase Telescope Field of View?
You can increase your telescope's field of view by using a focal reducer, choosing a larger sensor camera, selecting low-magnification eyepieces, optimizing optical configuration, and adding a coma corrector for better edge clarity.
What Is a Good Field of View for a Camera?
You'll want a FOV between 1-2° for most astrophotography targets. If you're shooting galaxies and nebulae, choose a camera with a larger sensor and consider using a focal reducer for ideal coverage.
Which Provides the Largest Field of View 10X or 40X?
You'll get a larger field of view with the 10X objective compared to 40X. Since it's a lower magnification, you can see more of your specimen area in a single view.
In Summary
You'll find that mastering field of view techniques transforms your imaging capabilities. By implementing these tips on sensor selection, magnification, adapters, and digital processing, you're now equipped to capture higher quality images with ideal resolution. Remember to regularly calibrate your settings and utilize image stitching when needed. Don't hesitate to experiment with different combinations until you achieve your desired results.


Leave a Reply