For microscope photography, you’ll get the best results with low ISO settings (50-100) whenever possible. Low ISO reduces noise and preserves fine details, particularly important for examining delicate structures and subtle color variations. Pair these settings with effective lighting rather than increasing ISO, which degrades image quality. For translucent specimens, stick to ISO 50-100; opaque specimens may require ISO 200-400. The right ISO approach transforms ordinary microscope images into publication-quality scientific documentation.
Understanding ISO in Digital Microscopy
When capturing microscope images, your camera’s ISO setting plays a critical role in final image quality. Lower ISO values (50 or 100) allow your camera’s sensor to perform at its peak capability, capturing more light intensity and enhancing the dynamic range of your specimens.
You’ll achieve greater contrast at low ISO settings, making fine microscopic details more distinguishable. Higher ISO values introduce unwanted noise that can obscure the delicate structures you’re trying to document. This noise reduction is particularly important when examining subtle color variations or structural elements in your specimens.
For best results, combine low ISO settings with effective lighting techniques. This approach guarantees you’ll capture the full spectrum of brightness levels and colors present in your sample while maintaining the exposure times necessary for sharp, detailed images with superior dynamic range.
The Science Behind Low ISO and Image Quality
Although many photographers understand the practical benefits of low ISO settings, the underlying science explains why these settings are especially essential for microscopy work. When you select ISO 50 or 100, you’re optimizing your camera sensor’s performance at the fundamental level.
These settings create the ideal balance between image quality and noise reduction critical for microscope photography. Low ISO enhances your images’ dynamic range, allowing your sensor to capture a wider spectrum of light intensities. This translates directly to greater contrast and more detailed representation of your specimens.
You’ll notice finer structural elements that might otherwise be lost at higher sensitivities. Since microscopic subjects remain static, you can leverage longer exposure times without introducing motion blur—maximizing light capture while maintaining the pristine clarity that scientific observation demands.
Balancing ISO With Other Exposure Settings
When managing microscope photography, you’ll need to balance your ISO settings with proper lighting to achieve ideal exposure without compromising detail.
You must weigh the tradeoff between increasing ISO for brighter images against the resulting noise that can obscure fine specimen features.
While Auto ISO offers convenience, you’re better off manually setting the lowest possible ISO value and adjusting your light source intensity or exposure time to maintain image clarity.
ISO and Lighting Interplay
The delicate balance between ISO and other exposure settings forms the cornerstone of successful microscope photography. When you’re capturing microscopic specimens, your lighting conditions directly impact what ISO settings you’ll need and ultimately determine your image quality.
| Lighting Type | Ideal ISO | Effect on Image |
|---|---|---|
| LED Ring Light | 50-100 | Maximum detail, no noise |
| Fluorescent | 100-200 | Good detail, minimal noise |
| Halogen | 100-400 | Moderate detail, some noise |
| Natural Light | 200-800 | Variable detail, increased noise |
| Low Light | 800+ | Reduced detail, significant noise |
You’ll achieve the clearest results by using bright, even LED lighting with the lowest possible ISO. This combination allows you to extend exposure time without introducing noise, especially valuable when photographing static specimens where longer shutter speeds won’t create motion blur.
Noise vs. Detail Tradeoffs
Finding the perfect balance between noise and detail represents one of the most critical challenges in microscope photography. As you increase ISO to compensate for low light, you’ll sacrifice image quality through increased noise.
Lower ISO settings (50-100) consistently produce superior results by preserving specimen details and enhancing dynamic range.
To achieve ideal microscope images, consider these exposure setting relationships:
- Lower ISO settings maximize detail preservation and contrast
- Higher ISO introduces noise that obscures fine specimen textures
- Longer exposure times can compensate for low ISO without adding noise
- Advanced lighting techniques allow for lower ISO without excessive exposure times
- The ISO-noise relationship becomes more pronounced in low-light microscopy
You’ll need to balance your ISO with aperture and exposure time, prioritizing detail over speed when capturing critical specimen features.
Auto ISO Considerations
Although Auto ISO offers convenient exposure adjustments in conventional photography, microscopy demands a more deliberate approach to preserve critical specimen details.
When using Auto ISO with your microscope setup, be vigilant about the maximum sensitivity limit programmed in your camera, as excessive ISO can introduce noise that obscures fine structures.
For most microscopy applications, you’ll achieve superior image quality by disabling Auto ISO in favor of low manual ISO settings between 50-100. This approach maximizes dynamic range and detail retention in your specimens.
While Auto ISO might seem helpful when lighting conditions fluctuate, it often compromises color fidelity and contrast—two critical elements in accurate specimen documentation.
If you must use Auto ISO, restrict its upper limit to prevent the camera from automatically selecting sensitivity levels that degrade your microscopic images.
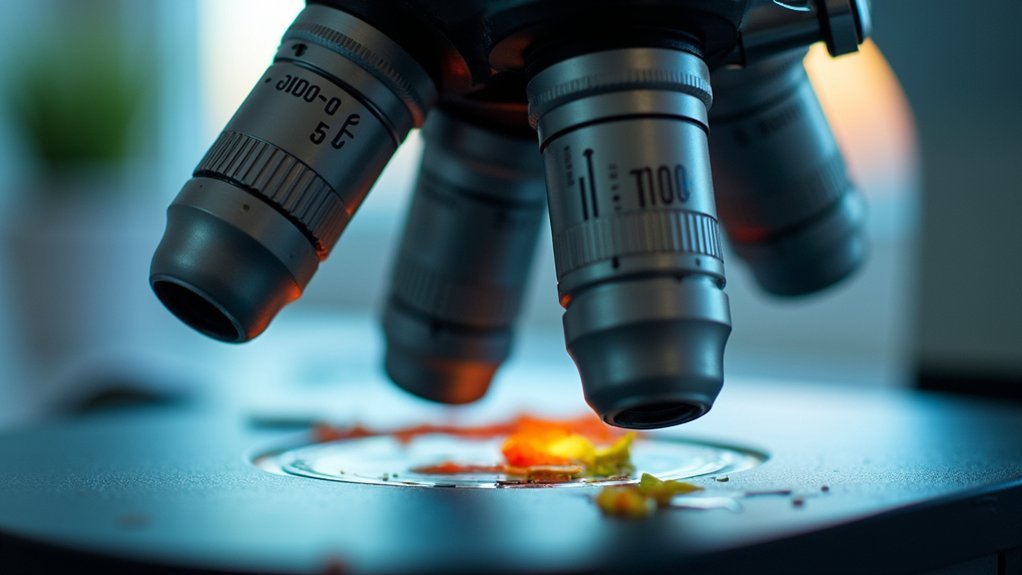
Optimal ISO Ranges for Different Specimen Types
You’ll need to adjust your ISO settings based on whether you’re photographing translucent or opaque specimens, with transparent samples benefiting from ISO 50-100 while opaque specimens may require ISO 200-400.
For capturing fine structural details in high-magnification work, stick to lower ISO values to prevent noise from obscuring critical features.
When working with fluorescence microscopy, you might need to increase ISO slightly to capture faint signals, but remember that higher sensitivity often introduces noise that can mask subtle fluorescent emissions.
Translucent vs. Opaque Specimens
When selecting ISO settings for microscope photography, the transparency of your specimen greatly influences your ideal range choices.
Translucent specimens typically perform best with ISO 50-100, allowing you to capture more light intensity and preserve fine details while maximizing dynamic range.
Opaque specimens, which block more light, may require slightly higher ISO settings (100-200) to achieve proper exposure without compromising image quality.
For both specimen types, consider:
- Lower ISO preserves contrast and fine details
- Specific settings depend on specimen thickness
- High dynamic range imaging helps distinguish subtle color variations
- Lighting conditions affect best ISO selection
- Experimentation is necessary for your particular microscope setup
Remember to adjust your settings based on your specific sample’s characteristics rather than using a one-size-fits-all approach.
Low ISO for Detail
Detail preservation stands as the foundation of effective microscope photography, making low ISO settings invaluable for capturing microscopic subjects. When you’re working with microscopes, low ISO values (50-100) greatly enhance your image quality by maximizing dynamic range and capturing more light intensity variations.
You’ll notice markedly improved contrast with low ISO settings, bringing out fine details that might otherwise be lost. This is especially vital when examining transparent or low-contrast specimens where subtle differences matter.
| Specimen Type | Ideal ISO | Result |
|---|---|---|
| Transparent | 50-100 | Crystal-clear cellular structures |
| Low-contrast | 100 | Enhanced subtle feature definition |
| Opaque | 100-200 | Rich texture and surface detail |
While higher ISO settings might be tempting in dim conditions, they introduce noise that can obscure the very details you’re trying to capture. Instead, adjust exposure time and lighting while maintaining low ISO values.
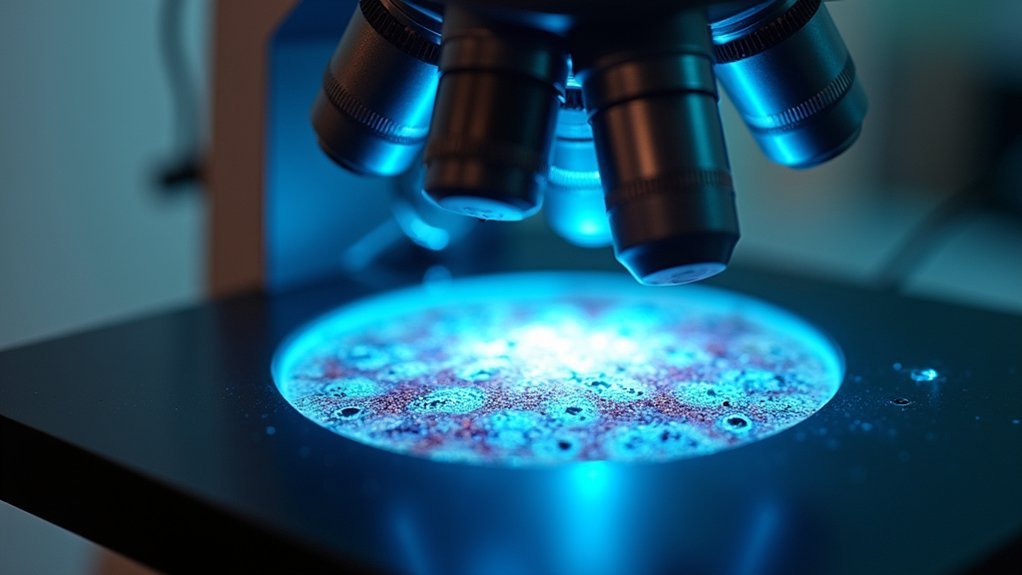
Special Case: Fluorescence Imaging
Fluorescence imaging represents a unique microscopy challenge that requires special consideration of ISO settings. For ideal image quality, keep your ISO between 50-200 when capturing fluorescent specimens. This low-range setting maximizes dynamic range and minimizes noise, allowing you to accurately document the vibrant emissions from your samples.
- Lower ISO (50-200) captures fluorescent colors more accurately
- Dimly fluorescing specimens may require ISO up to 800
- Low ISO settings improve differentiation between weak and bright fluorescent areas
- Extended exposure times at low ISO capture more light without noise
- Balance between ISO and exposure time is critical for quality results
You’ll find that this approach preserves the subtle variations in fluorescence intensity that are essential for detailed analysis, while maintaining the clarity needed for scientific documentation.
How Lighting Conditions Affect ISO Selection
The lighting environment surrounding your microscope specimen dramatically influences your ISO selection strategy. In bright conditions, you’ll achieve superior image quality using low ISO settings (50-100), which maximize dynamic range while capturing more light intensity without noise interference.
When you’re working with LED illumination, take advantage of its stable, bright output to maintain lower ISO values. This minimizes graininess while enhancing specimen visibility without generating excessive heat.
Consider your illumination technique when selecting ISO settings. Transmitted light often allows for lower ISO values than incident lighting. Similarly, bright field microscopy typically permits lower ISO settings than dark field techniques.
Always monitor your ISO carefully in low-light situations. While increasing ISO helps maintain proper exposure, it introduces noise that can compromise detail and clarity in your microscopic images.
Managing Noise at Higher Magnifications
When working with greater magnifications, you’ll need to keep your ISO as low as possible (50-100) to combat the amplified noise that becomes more visible in detailed specimen views.
The relationship between magnification and ISO is inverse—as you increase your view’s power, you should decrease your ISO setting to maintain clarity and preserve the fine details that higher magnifications reveal.
Modern image processing software can help reduce remaining noise artifacts, but starting with the cleanest possible image through proper ISO selection will always yield superior results than trying to fix noise problems in post-processing.
ISO and Noise Management
Although microscope photography demands precision at every level, managing ISO settings becomes particularly critical as magnification increases. When you’re capturing microscopic details, every pixel matters, and higher ISO settings introduce noise that can obscure the very features you’re trying to document.
To maintain ideal image quality:
- Keep ISO as low as possible (50-100) to maximize dynamic range and contrast
- Remember that noise becomes exponentially problematic at higher magnifications
- Consider longer exposure times with low ISO for static specimens
- Utilize image stacking techniques when higher ISO is unavoidable
- Monitor your histogram to verify you’re capturing all available detail
Magnification-ISO Relationship
Understanding how ISO behaves at different magnification levels forms the cornerstone of successful microscope photography.
As you increase magnification, any noise from higher ISO settings becomes dramatically more visible, compromising image quality and obscuring the fine details you’re trying to capture.
You’ll achieve the best results by maintaining the lowest possible ISO settings (50 or 100) at higher magnifications. This approach maximizes dynamic range while preserving critical details that might otherwise be lost in noise.
When you can’t avoid higher ISO values, remember that the magnification will amplify these imperfections.
Consider capturing at lower resolutions with minimal ISO, then enhancing details digitally afterward.
If you must use elevated ISO settings, apply targeted noise reduction during post-processing to restore clarity without sacrificing the structural integrity of your microscopic subject.
Software Noise Reduction
Despite your best efforts to minimize ISO values during capture, microscope photography at high magnifications sometimes necessitates higher sensitivity settings. When this happens, software noise reduction becomes essential for maintaining image quality.
To effectively manage noise in your high-magnification images:
- Shoot in RAW format to preserve maximum data for post-processing noise reduction.
- Use specialized algorithms in Adobe Lightroom or Photoshop to reduce graininess while preserving details.
- Adjust luminance and color noise reduction sliders separately for ideal results.
- Balance noise reduction with sharpness preservation to avoid losing fine details.
- Consider image stacking techniques to average out noise across multiple frames.
Post-processing noise reduction tools can transform grainy, high ISO microscope photos into clean, detailed scientific images.
With practice, you’ll find the perfect balance between noise reduction and detail preservation for your specific microscope setup.
ISO Considerations for Live Specimens vs. Fixed Slides
When choosing ISO settings for microscope photography, you’ll need different approaches for live specimens versus fixed slides.
For live specimens, stick to lower ISO settings (50-100) to preserve dynamic range and minimize noise. This guarantees vibrant colors and fine details while preventing quality degradation that could compromise your observations.
Fixed slides offer more flexibility, allowing ISO values up to 200 without significant detail loss. Since these preparations aren’t moving, you can work with slightly quicker exposure times without introducing motion blur.
Regardless of specimen type, avoid ISO settings above 400, as the resulting noise will reduce image clarity and contrast.
With live specimens, be particularly mindful of balancing ISO with proper exposure time and lighting to prevent thermal stress that could affect the organism’s viability.
Camera-Specific ISO Performance in Microscope Photography
The hardware you’re using plays a major role in ISO performance beyond the basic specimen considerations. Your digital camera’s sensor design greatly impacts how well it handles different ISO settings during microscopic work.
Hardware and sensor design significantly determine optimal ISO settings for microscopy imaging—factors beyond specimen considerations alone.
- Full-frame sensors with 61-240 megapixels excel at low ISO (50-100), delivering superior dynamic range.
- Advanced DSLRs and mirrorless cameras include noise reduction technologies that improve higher ISO performance.
- Camera models vary greatly—what works at ISO 400 on one camera might produce noisy results on another.
- Maximum image quality comes from finding your specific camera’s “sweet spot” ISO setting.
- Newer camera models generally handle higher ISO values better than older generations.
While lower ISO settings (50-100) generally produce the best image quality for microscope photography, you should test your specific camera to determine its ideal performance range under different lighting conditions.
Advanced Techniques for Low-Light Microscopy
Mastering low-light microscopy requires a strategic approach that balances ISO settings with specialized techniques. While maintaining lower ISO settings (50-100) preserves image quality, you’ll need to compensate for minimal light. Implement longer exposure times to allow your sensor to collect sufficient light without increasing ISO, resulting in clearer, more detailed captures.
| Technique | Benefit | Challenge | Solution |
|---|---|---|---|
| Low ISO (50-100) | Reduced noise, better detail | Insufficient light | Longer exposures |
| LED illumination | Targeted lighting | Heat generation | Pulsed lighting |
| Image stacking | Enhanced depth of field | Processing time | Automation software |
| Vibration reduction | Sharper images | Setup complexity | Remote shutter release |
Advanced lighting techniques like LED illumination can dramatically improve specimen visibility without compromising quality. For best results, combine these methods with a stable setup to minimize motion blur during those critical longer exposures.
Impact of ISO on Detail Preservation and Color Accuracy
Building on our low-light techniques, ISO selection stands as perhaps the most influential camera setting for microscope photography quality.
When you choose lower ISO settings (50-100), you’ll immediately notice superior detail preservation and enhanced color accuracy in your microscopic specimens.
Low ISO settings provide these critical advantages:
Low ISO settings deliver superior detail, accurate color, expanded dynamic range, and the clean contrast essential for meaningful microscopic imagery.
- Maximized dynamic range, capturing subtle brightness variations
- Reduced noise, allowing fine structures to remain clearly visible
- More accurate color reproduction for true-to-life specimen documentation
- Enhanced contrast that highlights microscopic details
- Better overall image quality for scientific analysis and publication
Higher ISO settings introduce unwanted noise that obscures the very details you’re trying to capture.
Practical ISO Setting Guidelines for Common Microscopy Applications
When applying ISO settings to real-world microscopy scenarios, you’ll need to tailor your approach based on your specific application and specimens.
For most biological samples, maintain ISO settings between 50-100 to capture cellular details with minimal noise interference. This low ISO range maximizes your dynamic range and preserves color accuracy essential for tissue differentiation.
For histological specimens and stained slides, stick to ISO 100 to accurately represent staining colors and fine structures.
With metallurgical or reflective specimens, you might need to increase to ISO 200, but avoid exceeding 400 as noise will compromise image quality.
Always balance your ISO choices with appropriate lighting techniques—use transmitted illumination, LED light sources, or fiber optics to provide sufficient light while keeping ISO low for superior results.
Frequently Asked Questions
What Camera Settings Are Needed for Microscope Photography?
For microscope photography, you’ll need low ISO (50-100), manual settings, small apertures for detail, slower shutter speeds for proper exposure, and manual focus with a stable setup to capture sharp images.
What ISO Setting Gives the Best Image Quality?
You’ll get the best image quality using ISO 50-100. These low settings enhance dynamic range, capture finer details without noise, and allow your camera’s sensor to perform at its best, resulting in higher contrast and sharper images.
How to Get Good Microscope Photos?
Use low ISO (50-100), bright LED lighting, and fine focus adjustments for sharp microscope photos. Don’t forget to experiment with aperture settings and enhance your images through post-processing for better contrast and detail.
How to Get a Clear Image on a Microscope?
For a clear microscope image, you’ll need proper illumination, fine focus adjustments, a stable setup, and clean optics. Minimize vibrations and use the right objective lens for your desired magnification level.
In Summary
You’ll find that ISO 100-400 works best for most microscopy, preserving detail while minimizing noise. Don’t push beyond ISO 800 unless absolutely necessary. Remember that your specific camera, lighting setup, and specimen type will influence your ideal settings. When in doubt, start low and adjust upward until you’ve achieved proper exposure without sacrificing image quality. Experiment to find your equipment’s sweet spot.


Leave a Reply