For crisp microscope focus stacking, invest in a stable platform with a motorized rail to eliminate vibrations. Use mirrorless cameras with electronic shutters and capture in RAW format. Make precise, incremental focus adjustments (about 1/10th depth per step) and utilize flash units with quality diffusers to freeze motion. Review images immediately, ensuring all focal planes are covered. Position your setup on a vibration-free surface and use remote triggering. These techniques will transform your microscopy results dramatically.
7 Tips For Crisp Microscope Focus Stacking
Mastering focus stacking transforms your microscope photography from flat, partially blurred images to stunningly detailed, fully focused specimens.
To achieve ideal results, invest in a motorized macro rail or adjustable bellows for precise, consistent focus adjustments when capturing your series of images.
Ensure your microscope setup remains completely stable, as even minor vibrations can ruin alignment during the focus stacking process, especially at high magnifications.
Always shoot in RAW format to preserve maximum detail for post-processing.
Use flash units with quality diffusers to freeze motion and eliminate harsh reflections. This lighting approach greatly enhances your final stacked image quality.
Don’t forget to review your series of images immediately after capture, discarding any completely blurred shots while ensuring you’ve captured all necessary focal planes.
Selecting the Right Equipment for Microscope Focus Stacking
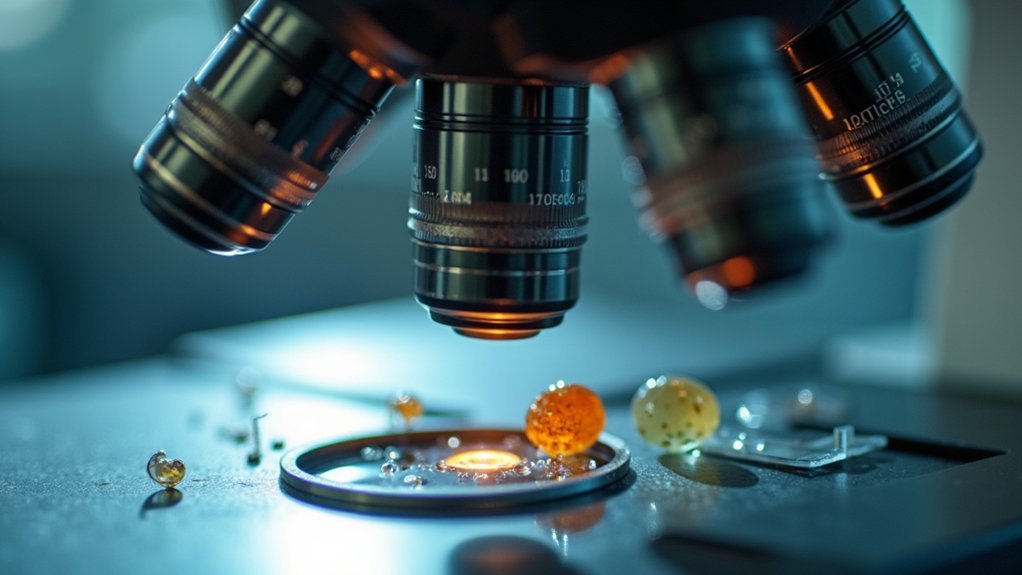
Selecting the right gear makes all the difference in microscope focus stacking results. To overcome the shallow depth of field in microscopy, you’ll need high-quality microscope objectives that capture fine details effectively, though they’ll require more individual shots to keep your entire subject in focus.
| Equipment Type | Essential Features | Benefits | Considerations |
|---|---|---|---|
| Camera | Mirrorless (Canon R3/R5II) | Electronic shutter reduces vibrations | Higher cost |
| Mounting System | CNC rail or linear stage | Precise focus adjustments | Dual manual/motorized ideal |
| Lighting | Flash units or LED lights | Freezes motion during exposure | Requires good diffusion |
| Objective Lenses | High magnification quality | Enhanced detail reproduction | More images needed |
Mount your setup on a stable base to eliminate vibrations. Combine these elements with proper lighting and you’ll achieve remarkably crisp, fully focused microscopic images.
Setting Up a Stable Imaging Platform

Three critical elements form the foundation of successful microscope focus stacking: absolute stability, precise movement control, and vibration elimination.
You’ll need a sturdy tripod or CNC rail to maintain rigid stability during high magnification work, as even tiny movements can ruin your images.
Mount a manual or motorized linear stage to achieve controlled movements through the focal plane. This precision guarantees consistent spacing between stack images.
Position your setup on a vibration-free surface away from foot traffic and mechanical disturbances.
Take advantage of electronic shutters in cameras like the Canon R3 and R5II to minimize camera-induced vibrations.
For additional stability, use a remote shutter release or the camera’s timer function to prevent any physical contact during capture, especially critical at higher magnifications.
Mastering Incremental Focus Adjustments
Once you’ve established a rock-solid imaging platform, the focus shifts to the precise movement between captured frames. The success of your stacked image depends on methodical progression through the focal point range, ensuring each section of your subject appears sharp in at least one frame of your whole series.
- Move in tiny steps – advance approximately 1/10th of the total depth, creating essential overlap between consecutive images.
- Utilize precision tools – employ a macro rail or adjustable bellows for controlled, repeatable adjustments.
- Maintain consistent overlap – aim for one-third overlap between in-focus areas to give stacking software sufficient reference points.
- Progress systematically – work methodically from front to back, allowing sufficient time between adjustments to prevent missed focal points.
Optimizing Lighting and Diffusion Techniques
Proper lighting transforms an ordinary microscope image into a stunning scientific portrait, particularly when executing focus stacking techniques.
Consider using flash units with short durations to freeze motion and enhance sharpness that longer exposures might blur.
While continuous LED lighting offers real-time adjustment advantages, pair it with a silent shutter release to minimize vibrations.
Don’t underestimate diffusion’s importance—conventional materials like table tennis balls often disappoint. Instead, try modified IKEA lamp shades to effectively soften your lighting and eliminate distracting reflections.
Proper diffusion revolutionizes microscopy—abandon table tennis balls for modified IKEA lamp shades that eliminate reflections and transform image quality.
The key is finding ideal distance between your diffusion surface and specimen.
Position your setup to achieve even illumination without hotspots while maintaining sufficient brightness.
Through experimentation with different diffusion materials and lighting positions, you’ll discover the perfect balance for producing crystal-clear, stackable microscope images.
Capturing the Perfect Image Sequence
The cornerstone of successful focus stacking lies in capturing a methodical sequence of images with precise incremental adjustments.
Begin by positioning your subject slightly out of focus, then gradually increase focus to cover its entire depth. You’ll want to take a series of RAW format images with approximately one-third overlap between frames to guarantee seamless stitching in post-production.
- Set up a motorized macro rail for consistent, precise movements between shots
- Start with the focal plane just beyond your subject, then slowly work through it
- Maintain even lighting across your entire subject to prevent shadows that complicate stacking
- Capture more frames than you think you’ll need to guarantee complete coverage for your final image
A stable setup and methodical approach will dramatically improve your microscopy results.
Processing Your Focus Stack in Software

After collecting your sequence of perfectly captured images, you’ll need powerful software to transform them into a single crisp composite. Photoshop makes this straightforward: import your series of photos using File > Scripts > Load Files into Stack.
Once loaded, align your layers via Edit > Auto-Align Layers with the Auto option selected. This corrects any minor shifts that occurred between pressing the shutter button for each image.
Next, use Edit > Auto-Blend Layers with Stack Images selected to intelligently combine the focused areas from each photo.
After blending, flatten the image through Layer > Flatten Image to consolidate all the sharp details.
Finally, crop your image to remove any irregular edges or blurry areas that resulted from the stacking process.
Frequently Asked Questions
What Is the Best Program for Focus Stacking?
For focus stacking, you’ll find Helicon Focus and Zerene Stacker are the top commercial options. If you’re budget-conscious, try Enfuse or ImageJ. Olympus OMD cameras offer built-in capabilities you might already have.
What Is the Best Aperture for Macro Focus Stacking?
For macro focus stacking, you’ll get best results using apertures between f/8 and f/16. These provide ideal sharpness while balancing depth of field and diffraction. Test your specific lens to find its sweet spot.
Where Do You Focus When Focus Stacking?
When focus stacking, you’ll want to start slightly in front of your subject, then incrementally adjust focus through the entire depth, creating overlapping zones of approximately one-third between each image for ideal results.
How Many Shots Do You Need for Focus Stacking?
For focus stacking, you’ll typically need 5-20 shots depending on your subject’s complexity. Start with fewer images and increase as needed, ensuring your focal planes overlap by about one-third for complete detail capture.
In Summary
You’ll achieve stunning microscopic imagery by implementing these seven focus stacking tips. Remember, excellence comes from both technical precision and artistic vision. Start with quality equipment, maintain stability, make deliberate focus adjustments, perfect your lighting, capture thorough sequences, and process with care. With practice, you’ll transform ordinary microscope views into extraordinary scientific art that reveals hidden worlds with remarkable clarity.


Leave a Reply