For successful image stacking, use manual mode with apertures between f/8-f/11 for ideal sharpness without diffraction. Keep ISO low (100-200) to minimize noise and use fixed white balance to prevent color shifts. Set precise focus increments (1-2mm for macro) and employ a sturdy tripod with remote shutter release. Maintain consistent exposure settings throughout your sequence and use live view magnification for precise focusing. These fundamental settings will transform your stacking results from good to spectacular.
10 Best Camera Settings For Image Stacking Success

When attempting focus stacking, the right camera settings can make or break your final image. Set your aperture between f/8 and f/11 to balance depth of field with sharpness while avoiding diffraction issues that compromise image quality.
Keep your ISO low (100-200) to minimize noise across your stacked images. You’ll need a tripod to eliminate camera movement that could misalign your sequence.
Always shoot in manual mode to maintain consistent exposure settings throughout the series. Manual focus is essential—start with the closest subject element and methodically work your way back through the scene.
This controlled approach guarantees each part of your composition receives proper focus without unexpected variations that could disrupt the stacking process.
These technical foundations will dramatically improve your focus stacking results, creating images with front-to-back sharpness.
Optimal Aperture Selection for Maximum Depth of Field
Although many photographers instinctively choose the smallest aperture for maximum depth of field, selecting the perfect f-stop for focus stacking requires a more nuanced approach.
For best results, aim for apertures between f/8 and f/11, which balance depth of field with image quality before diffraction compromises sharpness.
Avoid using extremely small apertures like f/22 or f/32 – while they increase depth of field, they introduce diffraction that reduces overall image quality.
The quest for ultimate depth can backfire—tiny apertures create diffraction that dulls the very details you’re trying to preserve.
The sharpest apertures typically fall two to three stops down from your lens’s maximum aperture, providing excellent clarity for focus stacking.
In macro photography, f/8 often delivers the best combination of depth and detail while minimizing diffraction effects.
Remember to maintain consistent aperture settings across your entire image sequence to guarantee seamless blending during post-processing.
Shutter Speed Considerations to Prevent Motion Blur

Selecting the right shutter speed represents a critical factor in successful focus stacking photography. When shooting handheld, follow the 1/focal length rule—use at least 1/100s for a 100mm lens to prevent motion blur.
In macro settings, faster speeds (1/200s to 1/800s) are essential to freeze subtle movements of small subjects. A tripod is your best ally, allowing for slower shutter speeds (1/30s to 1/60s) while maintaining sharp images throughout your stack.
For handheld shots in bright conditions, aim for at least 1/500s to counteract camera shake.
- Balance shutter speed with aperture for ideal exposure
- Use faster speeds for living subjects that might move
- Consider wind conditions when photographing plants outdoors
- Implement mirror lock-up with slow shutter speeds to reduce vibration
- Test various speeds to find your equipment’s stability threshold
ISO Settings for Noise Reduction in Microscope Stacking
Moving from shutter speed to another key exposure element, ISO selection plays a fundamental role in microscope stacking success.
When capturing images for stacking, you’ll want to keep your ISO settings low—typically between 100 and 200—to minimize noise that can compromise fine details.
Higher ISO values introduce unwanted grain that degrades image quality, obscuring the precise structures you’re trying to document.
By maintaining a low ISO, you’ll achieve superior color accuracy and contrast in your stacked images, which is essential for scientific analysis.
Remember to compensate for the low ISO by adjusting your aperture or shutter speed accordingly to maintain proper exposure.
Pairing these low ISO settings with stable LED illumination will further enhance the clarity and detail in your microscope stacks.
Focus Increment Adjustments for Seamless Transitions

You’ll need precise movement calibration when determining how far to adjust your focus between shots, as inconsistent increments can create jarring shifts in your final image.
For macro work, calibrate your focusing rail to move in 1-2mm increments, while landscape photography allows for larger 5-10mm adjustments.
Map your sequential distances before starting a serious shoot by testing different increment values with your specific subject, as this planning creates smoother blending and prevents missing critical focus areas in your stack.
Precision Movement Calibration
While the camera settings form the foundation of your focus stacking success, precise movement calibration between shots ultimately determines whether your final image will be seamlessly sharp throughout.
Focus stacking works most effectively when you maintain consistent focus increments between each capture. For macro photography, you’ll need particularly small increments (1-2mm), whereas landscapes can tolerate larger adjustments (5-10mm).
- Adjust focus in small steps of 2-4% of your lens’s focus range to guarantee proper overlap
- Invest in a focusing rail for fine-tuned, measurable adjustments
- Override your camera’s autofocus system with manual calibration to avoid inconsistencies
- Document your focus adjustments for repeatability and future refinement
- Modify increment size based on subject complexity—intricate subjects require smaller, more precise steps
Sequential Distance Mapping
Because focus stacking relies on blending multiple images, the distance between each focal point must be carefully calculated to guarantee seamless shifts. The most effective sequential distance mapping technique involves adjusting your focus by approximately one-third of your subject’s depth, ensuring sufficient overlap between shots.
For macro photography, where depth of field is extremely shallow, use smaller increments of 2-3 millimeters between focal points. This precision prevents gaps in your final stacked image. Aim to capture 2-5 photos per scene, systematically varying focus to cover your subject’s entire depth range.
A focusing rail proves invaluable for image stacking, allowing you to make controlled, consistent adjustments between shots.
With proper sequential distance mapping, you’ll achieve the perfect balance of sharpness throughout your composition without the distracting changes that plague improperly stacked images.
White Balance Consistency Across Multiple Exposures
When focus stacking, you’ll need to lock your white balance manually to maintain consistent color across all frames.
Auto white balance can shift between exposures, creating jarring color inconsistencies that make your final composite look unnatural and patchwork-like.
Setting a fixed white balance value appropriate for your shooting conditions (like Daylight or Cloudy) guarantees your stacked images blend seamlessly without distracting color shifts.
Lock Manual White Balance
To guarantee your image stacking produces seamless results, locking your camera’s white balance to manual mode is absolutely vital. When you lock manual white balance, you prevent color shifts between frames that automatic settings might introduce.
For macro photography especially, these subtle variations become pronounced in your final composite.
Set your white balance according to the primary lighting conditions—whether daylight, cloudy, or tungsten—using a gray card or white reference for precision. Shooting in RAW format provides additional flexibility for post-processing adjustments while maintaining the consistency of your original captures.
- Eliminates color temperature variations between sequential shots
- Prevents distracting color casts that can ruin your final composite
- Simplifies post-processing workflow with consistent starting points
- Particularly vital for close-up subjects where color accuracy matters
- Allows you to focus on composition rather than troubleshooting color issues
Auto WB Pitfalls
Why do photographers struggle with image stacking despite careful technique? Often, the culprit is auto white balance.
When AWB remains active during a focus stacking sequence, your camera recalculates color temperature with each exposure, resulting in frustrating color shifts across your final image.
These inconsistencies become particularly problematic when lighting conditions fluctuate slightly during your shooting session. Your meticulously focus stacked images may end up with mismatched tones that require time-consuming corrections.
Instead, select a fixed white balance setting appropriate for your environment—Daylight or Cloudy—before beginning your sequence.
While shooting in RAW format provides post-processing flexibility to correct these issues, you’ll save significant editing time by getting it right in-camera.
Take a test shot with your chosen white balance setting first to guarantee consistent color temperature throughout your entire stacking process.
Exposure Compensation Techniques for Consistent Brightness

Achieving uniform brightness across your entire image stack forms the backbone of successful focus stacking. When lighting conditions vary, proper exposure compensation becomes critical for maintaining consistent brightness throughout your sequence.
Switch to manual mode to lock in your settings and prevent automatic adjustments between frames. Choose a low ISO setting (100-200) to reduce noise while preserving detail and sharpness.
- Set a mid-range aperture (f/8-f/11) to balance depth of field with ideal lens performance
- Use exposure compensation to adjust for changes in ambient light between shots
- Mount your camera on a tripod to eliminate movement that could affect exposure consistency
- Take test shots before beginning your sequence to verify brightness levels
- Review images during the process to catch any unexpected exposure shifts early
Live View Magnification for Precise Focus Control
Live View magnification transforms your focus precision by letting you zoom in up to 10x or more on critical areas before capturing each frame for stacking.
You’ll benefit from pairing this technique with manual focus and focus peaking features to visually confirm exactly where sharpness occurs across your subject.
When you’re working through a focus stack series, mounting your camera on a tripod while using Live View eliminates camera shake and maintains consistent framing as you make those minute focus adjustments.
Focus Accuracy Benefits
When perfecting your focus stacking technique, the magnification capabilities of Live View become indispensable tools for success.
You’ll achieve superior focus accuracy by zooming in up to 10x on your focal point, ensuring each layer in your stack contributes to overall sharpness. This precision is especially vital in macro photography, where depth of field limitations demand meticulous attention to detail.
- Confirm exact focus placement before capturing each frame
- Identify potential focus misalignments that could compromise your final composite
- Enhance detail retention across all focal planes for seamless blending
- Reduce post-processing corrections by getting it right in-camera
- Achieve professional-quality results with sharper shifts between stacked images
Focus Confirmation Tools
How precisely can you nail focus for each frame in your stack? Live View magnification is your secret weapon for achieving perfect focus control during focus stacking sessions.
By zooming in at 10x or higher magnification, you’ll reveal vital details that remain invisible at normal viewing scales—especially essential in macro photography where depth of field is razor-thin.
Many modern cameras from Canon, Nikon, and Sony offer customizable settings that enhance this capability.
Look for focus peaking features that highlight in-focus areas with bright colors, providing instant visual confirmation of sharpness. This tool eliminates guesswork when determining exactly which elements are in focus.
Regular practice with these magnification tools will dramatically improve your ability to capture consistently sharp images across multiple focal planes, regardless of lighting conditions.
Eliminating Camera Shake
Even the slightest vibration can ruin your focus stacking project, making camera stability absolutely critical for success.
To achieve tack-sharp results, you’ll need to eliminate camera shake at every step of the process. Switch to manual focus mode and utilize Live View magnification to zoom in on your subject, allowing for precise focus adjustments without physically touching the lens.
- Secure your camera on a sturdy tripod, ensuring all locks are tight before beginning
- Activate mirror lock-up feature to reduce internal vibrations during exposure
- Use remote shutter releases or your camera’s self-timer to avoid physical contact
- Place your setup on stable ground, away from footfall or environmental vibrations
- Consider a focusing rail for macro work, providing controlled, incremental movements
Flash Synchronization for Even Microscopic Illumination
The ideal microscopic image stack depends critically on your flash synchronization. When capturing multiple images for stacking, you’ll need consistent brightness and exposure throughout your sequence. Set your camera to 1/200s-1/250s for best flash performance without clipping. You’ll achieve better sharpness with manual flash settings rather than automatic modes.
| Flash Type | Benefits | Best Application |
|---|---|---|
| Ring Flash | Even illumination | General microscopy |
| Twin Light | Directional control | Textured specimens |
| Standard Flash + HSS | Higher shutter speeds | Bright conditions |
| Macro Flash | Close working distance | Extreme magnification |
| Diffused Flash | Soft lighting | Reflective subjects |
For professional results, consider high-speed sync when working in bright environments. This technique allows for faster shutter speeds while maintaining proper exposure, eliminating motion blur in your stacked images.
Camera Stability Solutions for Ultra-Sharp Results
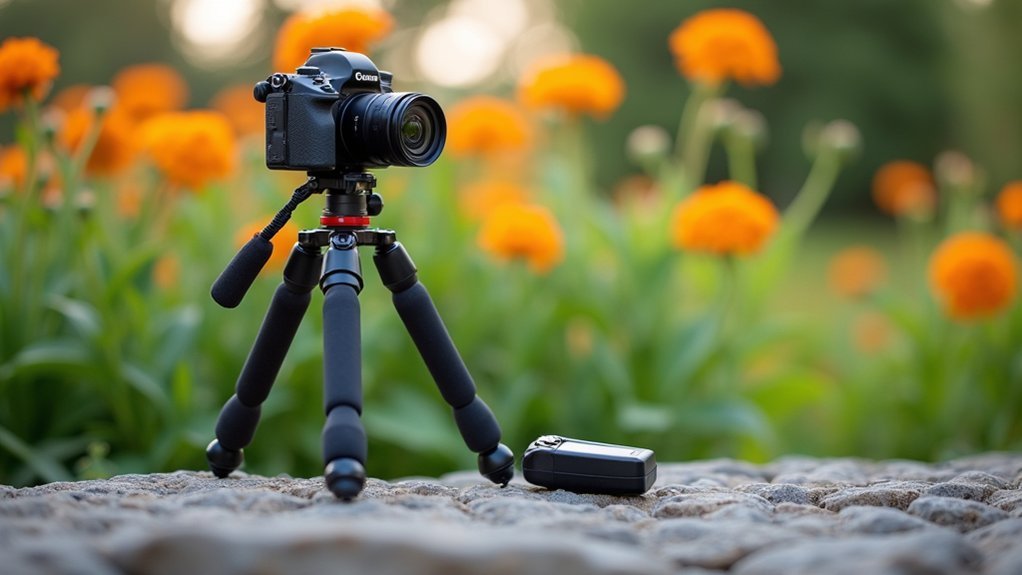
When attempting to create flawless focus stacks, camera stability becomes your most critical technical consideration. Eliminating even the slightest movement guarantees each frame aligns perfectly during post-processing. A robust tripod forms your foundation, while a remote shutter release prevents vibrations that could introduce blur, especially at slow shutter speeds.
For macro photography, a focusing rail enables precise adjustments without disturbing your carefully composed frame.
- Secure your tripod on flat surfaces and add weight in windy conditions
- Use mirror lock-up on DSLRs to further reduce internal vibrations
- Avoid touching the camera during the entire shooting sequence
- Disable image stabilization when using a tripod to prevent compensatory movements
- Consider electronic first curtain shutter to minimize shutter-induced camera shake
Frequently Asked Questions
What Are the Best Settings for Focus Stacking?
For focus stacking, use f/8-f/11 aperture, low ISO (100-200), manual focus, and a tripod. You’ll need to capture multiple overlapping images while gradually shifting focus from near to far elements.
What Aperture Is Best for Focus Stacking?
For focus stacking, you’ll get best results using apertures between f/8 and f/11. This range gives you ideal sharpness while minimizing diffraction effects. Keep your aperture consistent across all images in your stack.
How to Take Photos for Stacking?
To take photos for stacking, use a tripod, set manual mode, start with the closest element, gradually shift focus to farther points, and maintain consistent exposure across all shots for seamless blending later.
Where Do You Focus When Focus Stacking?
When focus stacking, you’ll start by focusing on the closest element, then progressively shift to farther elements. Make certain there’s overlap between focus points as you move through the scene for successful stacking in post-processing.
In Summary
You’ve now mastered the essential camera settings for successful image stacking. By controlling aperture, shutter speed, ISO, focus intervals, and exposure compensation, you’ll capture incredibly detailed photos with maximum depth of field. Don’t forget to use live view magnification for precise focusing and guarantee proper flash synchronization. With your camera properly stabilized, you’re ready to create stunning focus-stacked images that reveal details invisible to the naked eye.


Leave a Reply