
Mastering live specimen illumination requires balancing intensity and temperature. Use LEDs for stability and minimal heat, positioning them at 45-degree angles to enhance dimensionality. Apply gentle diffusers to transform harsh light into soft illumination that won’t stress organisms. For transparent specimens, try backlighting with proper diffusion; for opaque ones, use reflected light with fill reflectors to eliminate harsh shadows. The right lighting technique will reveal intricate structures you’ve never noticed before.
Understanding Light Sources for Live Specimen Microscopy
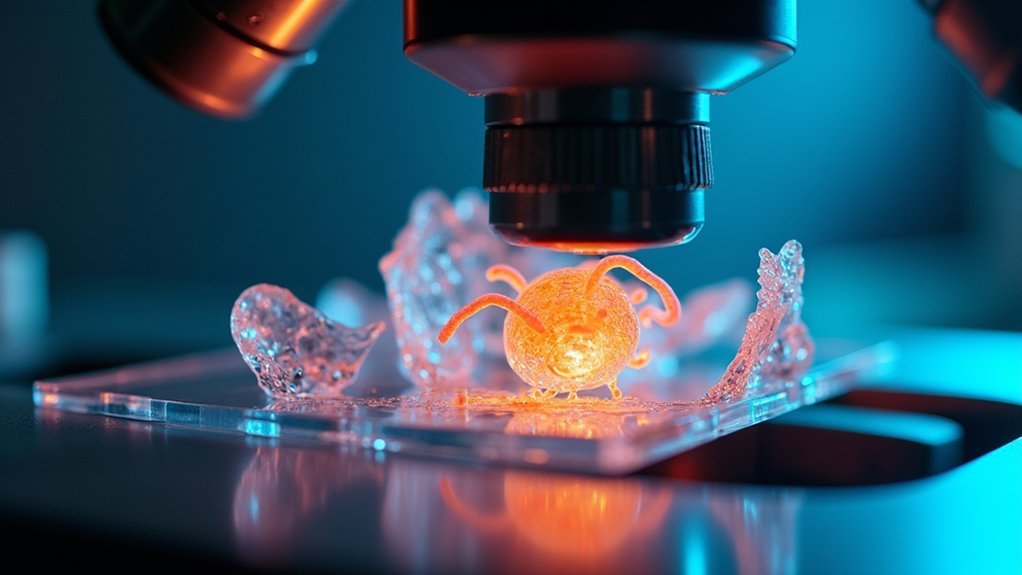
Illumination serves as the foundation of successful live specimen microscopy. When observing living samples, you’ll need to choose between transmitted light for transparent specimens and reflected light for opaque ones. Each approach reveals different cellular structures and dynamic processes.
LED technology has revolutionized microscopy as a light source, offering stability and longevity while minimizing heat that could damage sensitive specimens.
The gentle brilliance of LED illumination protects living specimens while delivering consistent, long-lasting light for detailed observation.
You’ll find that proper adjustment of your microscope’s diaphragm and condenser allows precise control over light intensity, essential for capturing clear images of moving organisms.
For more specialized research, fluorescence microscopy employs specific light wavelengths to excite dyes within your specimens, highlighting particular structures with remarkable specificity.
Mastering Kohler illumination will optimize your light distribution, ensuring even illumination and enhanced contrast throughout your field of view.
Balancing Contrast and Clarity for Delicate Organisms
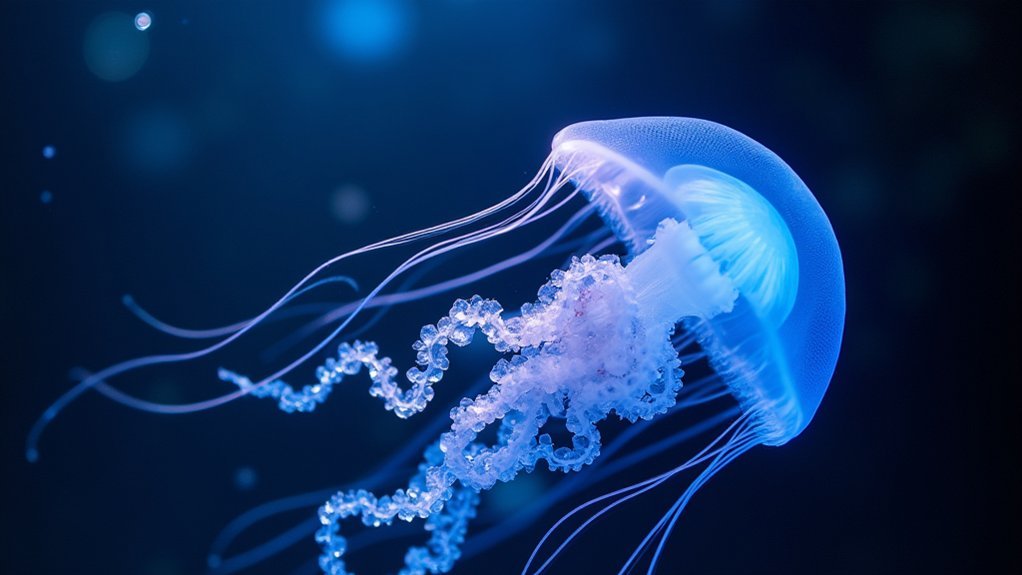
When backlit properly, transparent specimens reveal intricate cellular structures that remain hidden under conventional illumination.
You’ll achieve remarkable depth perception by positioning your light source at oblique angles, creating subtle shadows that enhance three-dimensional features without overwhelming delicate organisms.
Selecting the appropriate color temperature—warmer tones for preserving natural pigmentation or cooler light for enhancing structural details—will dramatically impact your specimen’s visual clarity and biological authenticity.
Backlighting Transparent Specimens
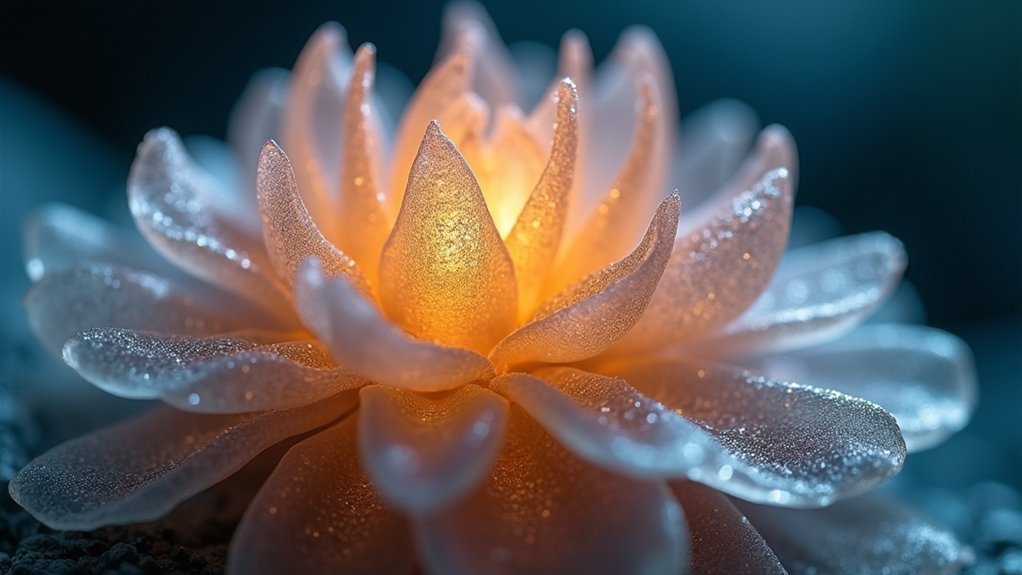
Through careful backlighting techniques, transparent specimens reveal their hidden structures and intricate details that might otherwise remain invisible. When you position your light source behind the specimen, you’ll create striking contrast against a darker background, transforming nearly invisible organisms into detailed subjects worthy of study.
Balance is essential—excessive light intensity will wash out delicate features, while insufficient illumination leaves internal structures hidden.
Try incorporating diffusers to soften your backlighting, creating even illumination that highlights delicate features without harsh hotspots.
Experiment with the angle of your light source; lower positions often enhance internal structures while maintaining clarity.
Don’t overlook your background choice—darker colors dramatically improve contrast for lighter specimens.
With these adjustments, you’ll capture the fascinating complexity of transparent organisms in stunning detail.
Oblique Light Positioning
Moving beyond backlighting, oblique light positioning represents a sophisticated approach for specimen examination, striking a perfect balance between revealing detail and preserving delicate structures.
By placing your light source at a 30-45 degree angle to the subject, you’ll enhance texture visibility without creating harsh shadows that can obscure important features.
This technique proves particularly valuable when working with fragile organisms like insects and small plants, as it minimizes potential damage from direct illumination while maintaining a natural appearance.
You’ll notice how oblique lighting reveals three-dimensionality, defining contours essential for accurate observation.
Adjust the light source distance to control contrast—move closer for stronger definition or farther for softer illumination.
For best results, combine oblique lighting with reflectors to soften shadows and highlight fine details in your live specimens.
Color Temperature Selection
While many microscopists focus primarily on light intensity, color temperature plays an equally essential role in achieving balanced specimen illumination.
When documenting live specimens, your choice of Kelvin measurement directly affects color representation—warmer temperatures (3000K) enhance reds and yellows, while cooler ones (5000K+) emphasize blues and greens.
For most applications, natural daylight balanced lighting (5000K-6500K) offers ideal contrast while minimizing stress on sensitive organisms.
Don’t overlook your camera’s white balance settings; adjusting them to match your lighting techniques prevents unwanted color casts and maintains scientific accuracy.
For specimens with intricate details, soft light sources around 5500K enhance texture visibility without overwhelming delicate features.
Consider experimenting with colored filters to modify color temperature creatively while preserving specimen integrity.
Diffusion Techniques to Minimize Specimen Stress
When photographing live specimens, you’ll need gentle diffusion materials like softboxes or translucent sheets to transform harsh illumination into soft, distributed light that won’t stress your subjects.
Position these diffusers at an ideal distance from your light source to create broader coverage while reducing intensity, which helps maintain specimen comfort throughout your documentation process.
Pairing these techniques with heat reduction strategies, such as working during overcast conditions or using reflectors to bounce light indirectly, will protect temperature-sensitive organisms from overheating while still capturing the detail you need.
Gentle Diffusion Materials
Because live specimens can be easily stressed by harsh direct lighting, gentle diffusion materials serve as vital tools in microscopy and biological photography. Softboxes and diffusion fabrics transform intense light into a softer, more natural illumination that mimics environmental conditions your specimens are accustomed to.
When setting up your lighting, position the light source with diffusion materials at varying angles to achieve ideal coverage while minimizing glare and reflections. This approach not only reduces specimen stress but also enhances your accurate observation capabilities, particularly with transparent or semi-transparent organisms where detail visibility is essential.
Choose diffusion materials that maintain color accuracy to guarantee you’re documenting the specimen’s true appearance. By controlling light quality through proper diffusion techniques, you’ll create conditions that both preserve specimen welfare and improve your imaging results.
Heat Reduction Strategies
Since excess heat can quickly stress or damage delicate organisms, implementing effective heat reduction techniques is essential for successful live specimen imaging.
Start by positioning your lighting setup at a greater distance from the subject and incorporate reflectors to redirect light while minimizing direct heat exposure.
Choose diffusion materials like softboxes or gels that scatter light evenly while absorbing excess heat. Overhead diffusers provide balanced illumination while maintaining cooler temperatures around your specimen.
For extended sessions, switch to continuous lighting options such as LED panels, which run considerably cooler than traditional incandescent bulbs.
Monitor your specimen’s behavior throughout the shoot, looking for signs of stress or discomfort.
You’ll need to adjust your setup immediately if the subject appears affected by the temperature, ensuring both its welfare and ideal imaging conditions.
Directional Lighting Methods for Three-Dimensional Detail
As viewers gaze at live specimens, their perception of depth and texture depends largely on how light interacts with the subject’s surfaces. To enhance three-dimensional detail, position your directional light strategically to create defining shadows that reveal contours and textures.
Side lighting is particularly effective at emphasizing shape and surface features by casting long shadows across your specimen. For a balanced approach, place a key light at a 45-degree angle to enhance dimensionality while avoiding overly harsh contrasts.
When working with translucent specimens, try backlighting to reveal internal structures and create depth.
Don’t hesitate experimenting with different light sources—LED panels and diffused strobes offer precise control over light quality and direction. This flexibility allows you to illuminate complex details effectively, transforming flat observations into visually engaging three-dimensional representations of your live specimens.
Color Temperature Considerations for Accurate Documentation
While capturing form and texture represents one aspect of specimen documentation, accurate color reproduction is equally essential for scientific integrity.
Color temperature, measured in Kelvin (K), greatly impacts how your specimens appear in photographs. Lower values (2000-3000K) produce warm tones, while higher values (5000-6500K) create cooler, bluish light.
For accurate documentation, you’ll need to understand how different light sources affect color balance. Fluorescent lights (4000-4500K) often cast greenish tints that can misrepresent specimen colors.
Using a color temperature meter helps you select appropriate lighting and adjust your camera’s white balance settings accordingly.
Don’t overlook the relationship between your light source and camera settings—they must work in harmony to guarantee scientific records faithfully represent live specimens’ true colors, preventing potential misidentification or inaccurate analysis.
Controlling Heat Output to Protect Living Samples
To effectively protect your living specimens during observation, you’ll need to implement robust heat management strategies that prevent thermal damage to sensitive organisms.
You can minimize heat stress by selecting LED lighting with proper heat sinks, maintaining appropriate distance between light sources and specimens, and incorporating small cooling fans when necessary.
Comparing cooling solutions reveals that passive systems like heat sinks offer silent operation ideal for delicate behavioral studies, while active cooling fans provide more aggressive temperature control for high-intensity lighting setups.
Heat Management Essentials
Protecting live specimens from excessive heat exposure represents one of the most critical challenges when setting up microscopy illumination systems.
You’ll find LED lighting solutions indispensable as they generate minimal heat while providing ample illumination for your samples.
Ensure your light source is placed at an ideal distance from specimens—too close and you risk thermal damage, too far and you sacrifice visibility.
Install heat sinks or cooling fans with high-output lights to efficiently dissipate excess heat during extended illumination sessions.
For precise heat management, regularly monitor specimen environment temperatures using infrared thermometers.
Consider investing in lighting fixtures with built-in temperature controls that automatically adjust output based on environmental conditions.
These precautions maintain the biological integrity of your specimens while still capturing the detailed imagery you need.
Cooling Solutions Comparison
When selecting cooling systems for live specimen imaging, you’ll need to weigh the effectiveness of various heat management approaches against your specific research requirements.
LED lighting offers inherent advantages with considerably reduced heat output compared to traditional bulbs, making it ideal for extended observation sessions.
- Temperature-controlled fiber optic systems provide precise illumination while keeping heat generation at a minimum—perfect for highly sensitive specimens.
- Heat sink and active cooling fan combinations efficiently dissipate accumulated heat from lighting fixtures, preventing thermal damage during longer imaging sessions.
- Reflective heat shields redirect excess heat away from specimens while maintaining ideal lighting conditions.
Monitoring ambient temperature with real-time sensors completes your heat management strategy, allowing you to make immediate adjustments that protect living samples while maintaining proper illumination throughout your research.
Advanced Illumination Patterns for Behavioral Studies
While traditional lighting setups serve basic observational needs, advanced illumination patterns dramatically enhance your ability to document and analyze complex specimen behaviors.
Advanced illumination reveals intricate specimen behaviors that basic lighting simply cannot capture.
You’ll find backlighting techniques particularly valuable as they create strong contrast that reveals intricate details against natural light backgrounds. When studying texture and movement, try side lighting to highlight subtle behavioral cues that might otherwise go unnoticed.
For clearer observations, incorporate diffused artificial lighting through softboxes or reflectors to eliminate harsh shadows and glare.
Fill light strategically placed can balance your photography lighting setup. Don’t overlook the power of colored filters to manipulate light temperature, allowing you to observe specific wavelength-dependent behaviors.
For consistent understanding light patterns during extended behavioral studies, continuous lighting sources provide stable illumination that won’t disrupt your specimens’ natural activities.
Adapting Lighting for Different Magnification Levels
The relationship between magnification and lighting forms the backbone of successful specimen observation. As you move between magnification levels, your lighting strategy must evolve accordingly. At lower powers, ambient light or gentle LED illumination prevents overwhelming your specimen with harsh glare.
- Switch to focused light sources like fiber optic illuminators when increasing magnification to concentrate illumination on essential details.
- Adjust the angle of the light source at higher powers to minimize shadows and reveal intricate structures that direct lighting might obscure.
- Implement polarized light techniques and adjustable light intensity to reduce glare and enhance contrast, especially vital when examining transparent or reflective specimens.
Remember that higher magnifications often require lower light levels to prevent image saturation and preserve the fine details you’re working to observe.
Equipment Selection for Optimal Specimen Visibility
Selecting the right illumination equipment transforms your ability to observe living specimens with clarity and precision. For ideal visibility, choose high-quality LED light sources that provide consistent brightness without overheating your specimens. Ring lights deliver even illumination that minimizes shadows, while fiber optic lighting offers precise control for focused observation.
| Equipment Type | Primary Benefit | Best For |
|---|---|---|
| LED Light Source | Adjustable color temperature | General specimen viewing |
| Ring Light | Even illumination | Minimizing shadows |
| Fiber Optic | Directional precision | Detailed structures |
| Adjustable Stands | Flexible positioning | Various specimen sizes |
| Light Diffusers | Reduced glare | Transparent specimens |
Don’t underestimate the importance of adjustable lighting stands, which allow you to reposition illumination sources to achieve ideal angles. Adding diffusers will soften harsh lighting, creating uniform light spread that enhances visibility of intricate features.
Troubleshooting Common Lighting Challenges With Living Subjects
Observing live specimens presents unique illumination challenges that can frustrate even experienced microscopists. When your subject moves unpredictably, harsh shadows can obscure critical details.
Natural lighting during golden hour provides warm, flattering illumination, but you’ll need alternatives when timing isn’t flexible.
- Use reflectors to fill in shadows when shooting in shaded environments—they’ll bounce light onto your specimen without introducing the harshness that direct lighting creates.
- Monitor your ISO and shutter speed settings carefully to prevent motion blur while maintaining adequate exposure.
- Consider diffused light sources when harsh shadows compromise detail visibility—a simple diffuser can transform stark lighting into soft, even illumination.
Experimenting with different lighting angles helps identify the ideal approach for each specimen type.
Remember that backlighting may require exposure adjustments to preserve subject details.
Frequently Asked Questions
What Is the 3 Lighting Rule?
The 3 lighting rule uses key light (primary illumination), fill light (shadow reduction), and backlight (subject-background separation). You’ll create balanced, professional photos by controlling these three sources to enhance depth and visual interest.
What Are the 4 Types of Lighting?
The four types of lighting you’ll use in photography are key light (main illumination), fill light (shadow reducer), backlight (creates separation behind subject), and background light (illuminates the setting behind your subject).
What Are the 5 Major Types of Lighting Setups Used in Photography?
The five major types of lighting setups you’ll use in photography are key light, fill light, backlight, side lighting, and background light. Each creates different moods and highlights various aspects of your subject.
What Is the 3 Point Lighting Technique?
You’ll use three lights in 3-point lighting: a key light (primary source at 45° angle), fill light (softens shadows opposite key), and backlight (behind subject creating separation and depth).
In Summary
You’ve now mastered key techniques for lighting live specimens under the microscope. By selecting appropriate light sources, controlling intensity, and adapting illumination patterns, you’ll capture more accurate observations while minimizing stress on your subjects. Remember, great microscopy isn’t just about magnification—it’s about revealing detail through thoughtful lighting. Keep experimenting with these methods to continually improve your live specimen imaging results.


Leave a Reply