
For steady time-lapse photography, always use a solid tripod and set your camera to manual mode. Select appropriate shutter speeds (1/60 or longer) and frame intervals based on your subject’s movement speed. Implement vibration isolation using damping pads or weights on your setup. Prevent focus drift by locking focus and allowing equipment to acclimate to ambient temperatures. Consider using wider lenses for post-production flexibility, and apply software stabilization when needed. These fundamentals will transform your shaky sequences into professional cinematic results.
7 Essential Tips For Steady Time-Lapse Photography

When creating time-lapse photography, stability serves as the foundation for professional-quality results. A solid tripod is non-negotiable—it prevents unwanted movement that can ruin your sequence during long exposures.
Always shoot in manual mode to maintain consistent exposure across all frames. Automatic settings cause subtle variations in brightness that translate to distracting flicker in your final video. Pair this with an intervalometer to guarantee each shot happens at precisely timed intervals.
For truly steady time-lapse photography, select shutter speeds of 1/60 second or longer to create smooth shifts between frames.
Consider using a wider lens than your composition requires, giving yourself room for post-production adjustments like panning and cropping. This technique enhances your creative options while maintaining the stability essential for professional results.
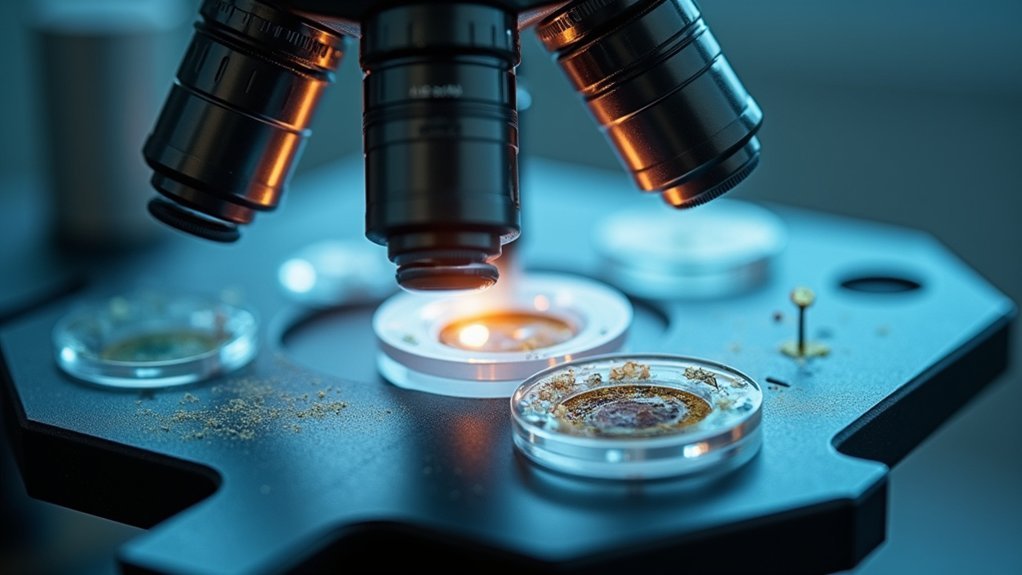
Optimizing Your Microscope Base Stability
You’ll need a proper vibration isolation system to prevent unwanted movement during critical time-lapse microscope photography.
Adding weights to your microscope base creates essential stability that prevents minute shifts that could ruin your sequence.
Selecting the right surface material—whether a dense stone slab, anti-vibration mat, or specialized optical table—dramatically impacts your ability to capture sharp, consistent images throughout extended shooting periods.
Vibration Isolation Systems
Three vital factors determine the quality of your time-lapse microscopy: equipment, technique, and stability.
Even the slightest vibrations can ruin hours of work, which is why vibration isolation systems are necessary for professional results.
Implementing effective isolation will dramatically improve your imaging:
- Use platforms with sorbothane or elastomeric mounts to absorb up to 90% of external vibrations
- Consider active vibration control systems with sensors and actuators for real-time disturbance correction
- Reduce noise in your images by eliminating the microscopic movements that cause blur
- Protect your equipment investment by minimizing mechanical stress on sensitive components
Even when using short exposures, vibration control remains essential.
The stability provided by quality isolation systems guarantees consistent, high-resolution results throughout your entire time-lapse sequence.
Weighted Base Options
Beyond vibration isolation systems, a properly weighted microscope base forms the foundation of exceptional time-lapse photography.
You’ll achieve markedly enhanced stability by lowering your microscope’s center of gravity, which reduces vibrations and guarantees more precise imaging during extended sessions.
Consider adding weight using sandbags, lead weights, or specially designed base plates—particularly valuable when working on uneven surfaces.
Distribute weight evenly across your base to prevent tipping and maintain level positioning throughout your shoot.
For additional stability, invest in a heavy-duty tripod with a weighted center column specifically designed for microscope setups.
Don’t forget to regularly check and adjust your base weight when changing lenses or equipment that might alter the balance of your system, guaranteeing consistent stability for your time-lapse photography.
Surface Material Selection
The foundation upon which your microscope rests plays a crucial role in achieving stable time-lapse imagery. Selecting the right surface material will greatly reduce unwanted vibrations and guarantee your time-lapse sequences remain crisp and professional.
When choosing your stable base material, consider these essential factors:
- Prioritize heavy-duty metal or solid wood bases that naturally dampen vibrations.
- Add rubber or foam padding beneath your microscope for additional shock absorption.
- Confirm your setup rests on a completely flat surface to prevent gradual shifting.
- Avoid lightweight materials like plastic or glass that readily transmit external movements.
For best results, consider investing in a dedicated microscope table specifically engineered to minimize vibrations. This specialized equipment will provide the stability necessary for professional-quality time-lapse photography.
Vibration Isolation Techniques for Microscope Platforms
Choosing between damping pads and springs for your microscope setup can dramatically impact your time-lapse results, with pads offering simple vibration absorption while springs provide longer-term isolation.
You’ll find active stabilization systems worth the investment for critical imaging work, as they continuously detect and counteract environmental vibrations in real-time.
Microscope float tables, though expensive, represent the gold standard for serious time-lapse microscopy by effectively eliminating floor-transmitted disturbances through pneumatic isolation.
Damping Pads vs. Springs
When setting up time-lapse microscopy, vibration isolation becomes critical for capturing clean, steady images.
You’ll need to choose between damping pads and springs based on your specific needs.
Damping pads, made from rubber or foam, excel at absorbing vibrations and providing stability for your microscope platform.
They’re typically easier to install and maintain than spring systems.
Consider these factors when making your choice:
- Precision requirements – Damping pads generally offer better stability for high-precision work
- Environmental conditions – Assess the types of vibrations present in your workspace
- Installation complexity – Pads provide straightforward setup while springs may need adjustments
- Image clarity goals – Both options enhance image quality, but in different vibration scenarios
Proper selection of isolation techniques will greatly improve your time-lapse photography results.
Active Stabilization Systems
Unlike passive damping methods, active stabilization systems represent the cutting edge of vibration control for time-lapse microscopy. These sophisticated systems employ advanced sensors and algorithms to detect and counteract vibrations in real time, guaranteeing your images remain sharp throughout extended recording sessions.
When you’re creating time-lapse videos, these systems dynamically adjust your microscope platform using pneumatic or electromagnetic actuators, maintaining stability even in disturbed environments. You’ll notice considerably improved signal-to-noise ratios and clearer imagery with less distortion.
Combine active stabilization with traditional vibration isolation techniques like air tables or isolated mounts to maximize protection against low-frequency disturbances.
Remember that regular calibration of your active system isn’t optional—it’s crucial for consistent results across multiple imaging sessions. This maintenance guarantees peak performance for all your microscopy work.
Microscope Float Tables
Microscope float tables serve as the foundation for exceptional time-lapse microscopy, working alongside active stabilization systems to create the ideal vibration control environment.
These specialized platforms dramatically improve your stability when capturing critical frames at any exposure time.
For best time-lapse results with improved frames per second capability:
- Select tables with air or water dampening systems that isolate your microscope from environmental vibrations.
- Confirm proper leveling using the adjustable feet to maintain perfect alignment during long exposure sequences.
- Position your table away from foot traffic and equipment that could introduce unwanted movement.
- Consider advanced models with active vibration cancellation technology for ultra-high-resolution work.
The heavy, rigid platform design prevents subtle movements that would otherwise create motion blur, preserving the fine details you’re working to capture.
Selecting the Right Frame Interval for Cellular Movements
How quickly should you capture frames when documenting cellular activity? Your interval choice dramatically impacts the final result. For rapid cellular changes, shorter intervals of 1-2 seconds between photos guarantee smooth, continuous movement when compiled into video. This approach captures the nuanced details of fast-moving processes.
For slower cellular activities, you can extend your intervals to 5-15 seconds. This prevents your video from appearing rushed while still documenting significant changes. Remember to maintain consistent exposure settings throughout to avoid distracting flicker.
Don’t hesitate to experiment with different intervals based on your specific subject. Calculate your total frames needed beforehand (300 frames creates a 10-second video at 30fps).
This planning guarantees you’ll capture the complete cellular narrative without missing critical shifts.
Controlling Ambient Temperature Fluctuations

Temperature variations pose a significant challenge in time-lapse photography, particularly when documenting cellular processes with precision. Ambient temperature fluctuations can cause lens fogging and condensation that ruin your carefully planned sequence.
To maintain consistent image quality throughout your shoot:
- Allow your camera to fully acclimate to the environment before beginning your time-lapse, especially in extreme conditions.
- Use a lens hood to minimize condensation formation on your lens surface.
- Protect your equipment with insulated camera bags or covers to maintain stable temperatures.
- Keep spare batteries warm in your pockets when shooting in cold environments, as battery life drastically decreases in low temperatures.
Avoid exposing your camera to direct sunlight or sudden temperature changes that can cause internal condensation and compromise your time-lapse quality.
Focus Drift Prevention in Extended Microscope Time-Lapses
When capturing extended microscope time-lapses, focus drift presents one of the most persistent challenges that can compromise your entire sequence. To combat this issue, lock your microscope’s focus and stick with manual settings to maintain consistent depth throughout your shoot.
Mount your equipment on a high-quality, stable tripod or specialized microscope stage to eliminate vibrations during long exposures. Temperature fluctuations can cause subtle component shifts, so consider an auto-focusing system that compensates for these changes.
For the clearest still shots, capture images at short 1-2 second intervals, especially with dynamic subjects.
Make a habit of checking and adjusting focus before beginning lengthy sessions, as minor shifts accumulate over time. Even slight focus discrepancies can render hours of work unusable in your final time-lapse video.
Software-Based Image Stabilization for Microscope Footage
Even with the best physical stabilization equipment, microscope time-lapses often require post-processing to achieve truly professional results.
Software-based image stabilization can transform shaky footage into smooth, professional time-lapse movies that showcase your subject with clarity.
- Leverage professional tools like Adobe After Effects or Final Cut Pro, which offer sophisticated stabilization algorithms specifically designed for detailed footage.
- Shoot in high-resolution whenever possible, as stabilization algorithms perform better with more pixel data to work with.
- Balance stabilization strength carefully to avoid excessive cropping, which can remove critical details in high-magnification work.
- Apply stabilization in post-production rather than stressing about perfect steadiness during filming, creating a more relaxed shooting environment while still ensuring professional results.
Frequently Asked Questions
What Are the Best Settings for Timelapse Photography?
For timelapse photography, you’ll want manual exposure mode, 1/60 second or longer shutter speeds, consistent intervals (1-30 seconds based on subject movement), and RAW format to capture about 300 frames for a 10-second video.
How to Get a Smooth Timelapse?
To get a smooth timelapse, use a sturdy tripod, shoot with longer shutter speeds (1/60s+), maintain consistent manual settings, choose appropriate intervals, and batch process your images before final assembly for seamless shifts.
How Many Photos for a 10 Second Timelapse?
For a 10-second timelapse, you’ll need about 300 photos at 30fps, 240 photos at 24fps, or 600 photos at 60fps. Choose intervals based on your subject’s movement speed for smooth results.
How to Take Time-Lapse Photography?
You’ll need a tripod, intervalometer, and camera set in manual mode. Mount your camera securely, choose an interval time, set exposure, focus, and white balance, then let the intervalometer capture frames automatically over time.
In Summary
You’ll see dramatic improvement in your microscope time-lapses by implementing these seven stability techniques. Remember, even tiny vibrations can ruin hours of work. Don’t neglect temperature control and focus drift prevention—they’re just as critical as your physical setup. When all else fails, you’ve got software stabilization as your safety net. Master these essentials and you’ll capture cellular movements with professional-quality results every time.


Leave a Reply