
Use a stable tripod and focus rail for precise adjustments between shots. Position your specimen at a slight angle to enhance visible detail. Maintain consistent lighting across all images using LED ring lights. Make small, incremental focus adjustments with the fine focus knob while using a shutter release cable to prevent vibrations. Capture frames in quick succession with manual camera settings for seamless integration. These fundamental techniques will transform your microscope photography into stunning, dimensional images.
Essential Equipment for Manual Microscope Focus Stacking

Success in manual focus stacking begins with the right tools. To achieve exceptional macro photography results, you’ll need a high-quality compound or stereo microscope that delivers the detailed magnification necessary for creating impressive stacked images.
The foundation of masterful focus stacking lies in selecting precise optical equipment that reveals microscopic worlds in stunning clarity.
Invest in a precise focus stacking rail to make the incremental adjustments that capture each focal plane perfectly. Mount your DSLR or mirrorless camera with a macro lens (not a microphone lens) to the microscope for high-resolution captures essential in product photography.
Consistent lighting is critical—use LED ring lights or adjustable gooseneck lamps to illuminate your subject evenly.
Finally, secure everything on a sturdy tripod or dedicated microscope stand to eliminate vibrations that could blur your images during the stacking process.
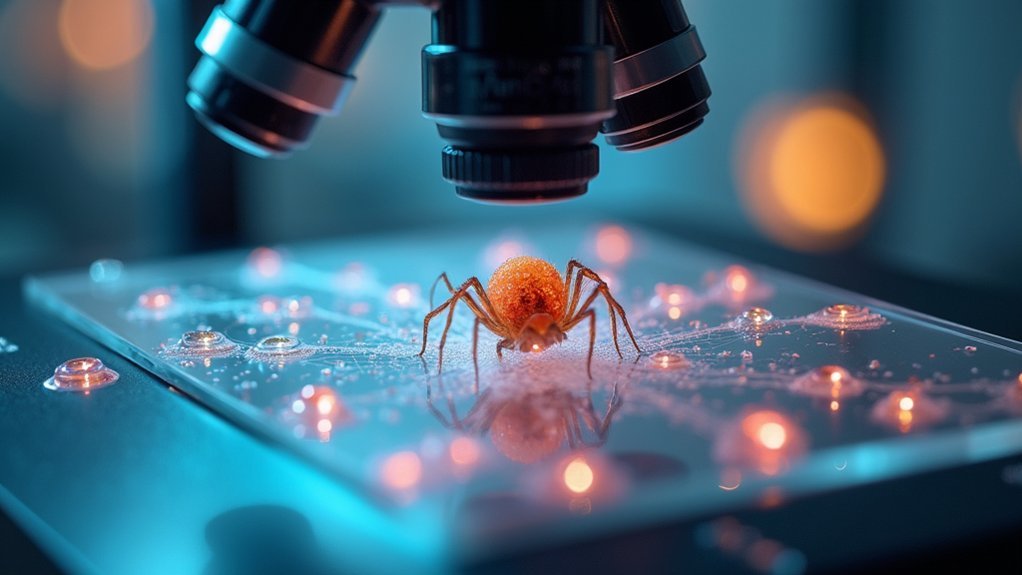
Positioning Your Specimen for Optimal Focus Planes
While capturing crisp, detailed microscope images depends on your equipment, the way you position your specimen ultimately determines the quality of your focus stack.
When using a macro lens with limited depth of field, placement becomes critical for photo stacking success.
- Position your specimen at a slight angle to increase visible detail across multiple focal planes
- Use a focus stacking rail for precise movements between shots, maintaining consistent focal length adjustments
- Leave ample space around your subject for post-processing flexibility
- Set up on a stable surface like glass to capture reflections that add dimension
Hand-Controlled Focusing Techniques for Microscope Photography
Although professional microscope photography often employs automated systems, mastering hand-controlled focusing techniques offers unparalleled precision when capturing minute details.
You’ll achieve superior results by utilizing the fine focus knob to make incremental adjustments between shots.
When performing focus stacking, set your camera to manual mode to maintain consistent exposure across different focus planes.
Attach a shutter release cable to minimize vibrations as you capture each layer. A focus stacking rail provides additional stability, allowing you to move through the specimen in controlled increments.
Work efficiently by capturing images in quick succession as you adjust through the focal planes.
This methodical approach guarantees you’ll have all necessary images to stack later, revealing intricate cellular structures or surface textures that would otherwise remain hidden in a single-plane photograph.
Combining Multiple Microscope Images Without Software
Hand-controlled focusing creates the raw material for remarkable composite images, but you don’t always need specialized software to assemble them. This technique called focus stacking can be done manually with careful preparation and execution.
Start by capturing multiple images at different focal points while maintaining:
- Consistent lighting and exposure settings throughout to guarantee your final composite image looks uniform
- A stable tripod or microscope stage to eliminate unwanted camera movement
- Small, incremental adjustments to your focus knob to capture every detail
- Proper overlap between images for seamless integration
After capturing your series, use a transparent grid overlay to align the printed photographs physically. Position them carefully, adjusting until overlapping areas match perfectly. Then photograph your arrangement to create a detailed, manually stacked composite.
Troubleshooting Common Manual Focus Stacking Challenges
Despite careful preparation, manual focus stacking often presents unexpected challenges that can frustrate even experienced photographers. When your final composite image shows inconsistencies, check for lighting variations between shots—consistent lighting throughout your sequence is essential for seamless blending.
Camera movement is a common culprit behind alignment problems. Always use a sturdy tripod and shutter release cable to eliminate shake. Pay close attention to your incremental focus adjustments; moving too far between shots creates gaps in sharpness that become obvious in the stacked result.
Before processing, review each frame for sharpness and alignment issues. If using manual settings, maintain a constant aperture across all shots to prevent brightness discrepancies.
Catching these problems early saves time and prevents frustration when attempting to salvage problematic stacks.
Frequently Asked Questions
How to Get Sharp Photos With Manual Focus?
To get sharp photos with manual focus, use a tripod, magnify live view, adjust focus in small increments, and use a remote shutter or timer to prevent camera shake. Focus peaking helps identify sharp areas.
How to Do Manual Focus Stacking?
To do manual focus stacking, mount your camera on a tripod, take multiple shots while incrementally adjusting your focus ring from front to back, then blend the images using software like Photoshop or Helicon Focus.
How to Get Clear, Crisp Photos?
For clear, crisp photos, you’ll need a tripod, proper aperture (f/8-f/16), sharp focus, consistent lighting, and a shutter release cable. Don’t forget to minimize camera shake by using your camera’s timer function.
How to Stack Photos on Top of Each Other?
To stack photos, import your images into Photoshop as layers, auto-align them, then use auto-blend or layer masks to combine the sharpest parts. You’ll create one composite image with perfect focus throughout.
In Summary
You’ve now mastered the art of manual focus stacking for your microscope photography. With the right equipment and proper specimen positioning, you’ll capture incredible detail in your images. Remember, practice makes perfect when it’s time to hand-control those focus planes. Don’t worry if you encounter challenges—troubleshoot patiently and you’ll soon produce stunning, crystal-clear photos that reveal microscopic worlds with remarkable depth and clarity.


Leave a Reply