The best camera exposure modes for scientific photography include Aperture Priority for depth of field control, Manual for reproducible results, and Shutter Priority for freezing specimen movement. Other essential techniques include spot metering for microscopic subjects, bracketing for challenging lighting, and Program mode with exposure compensation for quick documentation. You’ll also benefit from matrix metering, custom function settings, and specialized microscope integration modes. These approaches guarantee your scientific images capture critical details with precision and consistency.
10 Best Camera Exposure Modes For Scientific Photography
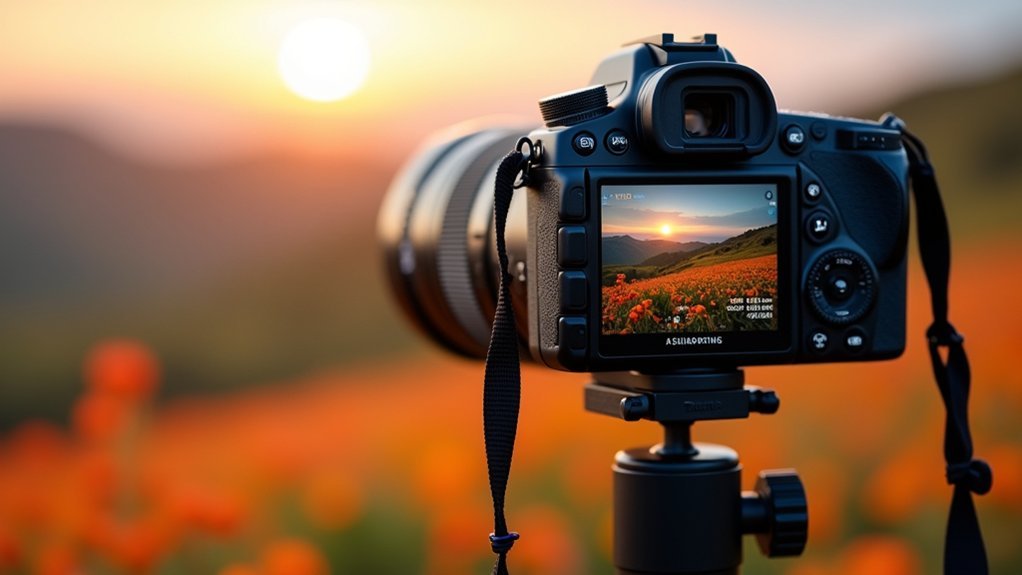
When capturing images for scientific purposes, selecting the right exposure mode dramatically impacts the quality and usability of your results.
Aperture Priority Mode (A/Av) gives you precise control over depth of field, essential when documenting specimens or detailed experimental setups where every element must be sharply focused.
For dynamic scientific processes, Shutter Priority (S/Tv) helps you freeze motion in fast-moving reactions or biological activities, preserving critical moments for analysis.
When accuracy is paramount, Manual Mode offers complete control over all exposure elements, allowing you to maintain consistent settings in controlled laboratory environments.
Don’t overlook Program Mode for fieldwork where conditions change rapidly but consistency matters.
Remember to adjust your ISO thoughtfully to balance exposure needs with image clarity, particularly in dimly lit lab settings.
Understanding Aperture Priority Mode for Specimen Detail Control
Aperture Priority mode gives you unmatched control over depth of field, allowing you to precisely determine which parts of your specimen remain in focus.
You’ll find this especially valuable when you need to isolate specific features of your subject while maintaining proper exposure through the camera’s automatic shutter speed adjustments.
Subheading Discussion Points for “Understanding Aperture Priority Mode for Specimen Detail Control”
Because scientific photography demands exceptional clarity and precision, mastering Aperture Priority Mode (A or Av) can dramatically improve your specimen documentation. This mode lets you control depth of field by setting a specific aperture while the camera automatically adjusts shutter speed for proper exposure.
| Aperture Setting | Application | Benefit |
|---|---|---|
| f/2.8-f/4 | Isolating specimen features | Blurred background, highlighted details |
| f/5.6-f/8 | General specimen photography | Balanced sharpness and background separation |
| f/11-f/16 | Full specimen documentation | Maximum depth of field, front-to-back clarity |
| f/16-f/22 | Extreme macro work | Complete specimen focus (diffraction may occur) |
| Variable | Challenging lighting | Apply exposure compensation (+/-) as needed |
When photographing specimens with intricate details, you’ll want smaller apertures (f/11-f/16) for complete sharpness throughout. This approach guarantees every scientific detail remains crisp and analyzable.
Depth of Field Control
The foundation of compelling scientific photography lies in masterful depth of field control, which aperture priority mode delivers with precision. When you select A or Av on your camera, you’re taking command of a critical component of the exposure triangle while the camera handles shutter speed calculations.
For thorough specimen documentation, select smaller apertures (f/11-f/16) to maximize depth of field, ensuring all structures remain sharp and detailed. Conversely, when you need to isolate specific features, wider apertures (f/1.4-f/4) create a shallow depth of field that separates your subject from distracting backgrounds.
Don’t forget to use exposure compensation to fine-tune your images when lighting conditions prove challenging.
This systematic approach to aperture selection will consistently produce high-quality scientific imagery suitable for research presentation and detailed analysis.
Isolating Specimen Features
When isolating specific features of scientific specimens, aperture priority mode becomes your most valuable tool for detail control. By selecting your desired aperture setting, you’ll control which elements remain sharp while blurring backgrounds that might otherwise distract from key features.
In low light situations, aperture priority automatically adjusts shutter speed while maintaining your chosen aperture, ensuring good exposure without compromising detail.
For thorough specimen documentation, choose smaller apertures (f11-f16) to capture greater depth of field. For highlighting specific structures, wider apertures will isolate those features precisely.
Don’t forget to utilize exposure compensation to fine-tune brightness and reveal subtle specimen details.
While your ISO setting affects image noise, aperture priority helps maintain consistent depth of field across multiple shots—particularly valuable in macro photography where precise focus on intricate specimen characteristics is essential.
Manual Mode: The Gold Standard for Reproducible Scientific Results
Despite its intimidating appearance to novices, manual mode stands as the preeminent choice for scientific photography where reproducibility is essential.
When you’re capturing images for research, you’ll need consistent exposure across multiple shots—something only manual mode can reliably deliver.
By taking control of both aperture and shutter speed, you’re eliminating variables that automatic modes introduce. This control is vital when documenting experiments under controlled lighting conditions.
Manual control eliminates the exposure inconsistencies that plague automatic modes, essential for accurate documentation in controlled research environments.
You can also fine-tune ISO settings to minimize noise, ensuring the highest level of detail in your scientific images.
For best results, pair manual mode with a tripod. This combination enhances stability and precision, producing clearer images that are suitable for rigorous analysis.
The reproducibility this approach offers makes your scientific documentation more credible and your results more verifiable.
Spot Metering for Accurate Microscopic Subject Exposure
Mastering microscopic subject photography requires precise exposure control that standard metering modes simply can’t provide. Spot metering solves this challenge by measuring light from only a specific area of the frame, letting you capture accurate exposures of specimens with varying brightness levels.
When using this technique, position your meter over the most critical part of your subject to avoid exposure errors caused by surrounding elements. This precision is invaluable for scientific photography where color accuracy and detail preservation are essential.
For ideal results, combine spot metering with manual control of ISO and aperture settings. This approach allows you to adapt to each specimen’s unique lighting conditions while maintaining consistent exposure across multiple shots—critical when documenting research findings that require reproducible visual evidence.
Matrix/Evaluative Metering for Complex Biological Specimens
Unlike spot metering’s targeted approach, Matrix or Evaluative metering excels at capturing the full complexity of biological specimens with varied textures and colors. This sophisticated system divides your frame into multiple zones, analyzing each section to determine ideal exposure across the entire scene.
When you’re photographing specimens with translucent edges, reflective surfaces, or uneven illumination, Matrix metering helps balance the dynamic range to preserve both highlight and shadow detail.
It’s particularly valuable when working with backlit subjects or specimens with varying densities.
Shutter Priority Mode for Live Specimen Documentation
When documenting live specimens in scientific photography, you’ll find that Shutter Priority Mode (S or Tv) gives you precise control over capturing movement by allowing you to set speeds of 1/1000s or faster to freeze action effectively.
You can prevent motion blur in active subjects like insects or small animals while the camera automatically adjusts aperture for proper exposure, letting you concentrate on timing rather than exposure settings.
Remember that higher shutter speeds require adequate lighting, so you’ll need to adjust your ISO accordingly when working in limited light conditions to maintain image quality.
Freezing Specimen Movement
Live specimens present a unique challenge for scientific photographers: movement. To effectively document these subjects, you’ll need to master Shutter Priority Mode (S or Tv), which gives you direct control over shutter speed while the camera handles aperture adjustments.
When working with active specimens, select a fast shutter speed—typically 1/500s or faster—to freeze motion and capture crisp details without motion blur. This approach proves invaluable in varying light conditions where you need to maintain documentation quality while adapting to environmental changes.
You can also experiment creatively with different shutter speeds to either completely freeze action or intentionally introduce subtle motion effects.
This flexibility allows you to focus solely on capturing the subject’s behavior while ensuring proper exposure across different scientific photography scenarios.
Lighting Considerations Critical
Three critical lighting factors must be addressed when using Shutter Priority Mode for specimen documentation.
First, you’ll need to balance your selected shutter speed with available light sources. When working in low light conditions, remember that faster speeds require more light to maintain proper exposure.
Second, understand how Shutter Priority Mode automatically adjusts aperture settings to compensate for your chosen shutter speed. This automatic adjustment is particularly valuable when lighting fluctuates during your documentation session.
Finally, pair your exposure modes with appropriate metering techniques. Matrix or evaluative metering works exceptionally well with Shutter Priority Mode, helping you capture accurate exposure even when documenting specimens under artificial lighting.
This combination guarantees fine details remain visible at fast shutter speeds (1/1000s), preventing motion blur while maintaining consistent exposure across your scientific images.
Specialized Microscope Camera Integration Modes
Microscope cameras offer scientists a range of specialized exposure modes tailored for the unique challenges of specimen imaging.
You’ll find both manual and automatic options to optimize your research. Manual mode gives you precise control over shutter speed and ISO, which is essential when capturing detailed images under variable lighting conditions.
For efficiency, most cameras include auto exposure modes that adjust settings based on specimen brightness, streamlining your imaging workflow.
When auto settings don’t quite hit the mark, exposure compensation features let you fine-tune your images to avoid over or underexposure of intricate details.
Many cameras integrate with specialized software that provides real-time “live view” previews, allowing you to adjust settings before capturing final images—ensuring scientific accuracy while saving valuable research time.
Bracketing Techniques for High Dynamic Range Scientific Imaging
Bracketing techniques, especially Auto Exposure Bracketing (AEB), offer microscopy researchers powerful tools for capturing specimens with challenging brightness variations, like reflective cellular structures or fluorescent-stained tissues.
You’ll achieve superior image quality by programming your microscope camera to automatically capture multiple exposures that can later be combined into a thorough HDR composite.
When implementing focus bracketing alongside exposure bracketing, you’re creating multi-dimensional datasets that reveal both depth relationships and tonal nuances critical for accurate scientific analysis.
AEB For Microscopy Applications
When capturing specimens with extreme contrast ranges, Auto Exposure Bracketing (AEB) provides microscopists with a powerful solution for documenting complex structures. This technique automatically captures multiple images at different shutter speeds, ensuring you’ll record both bright highlights and dark shadow details in challenging specimens.
To optimize your AEB workflow in microscopy:
- Set your camera to capture at least three sequential exposures – underexposed, properly exposed, and overexposed.
- Maintain consistent ISO and white balance settings across all bracketed images.
- Use specialized software to combine the bracketed images into a single high dynamic range composite.
- Calibrate your auto exposure bracketing specifically for specimens with varying refractive indices or fluorescent properties.
With AEB, you’ll produce thorough scientific documentation that reveals subtle details across the entire dynamic range of your microscopy subjects.
Focus Bracketing Strategy
Unlike standard exposure methods, focus bracketing enables scientists to capture exceptionally detailed images by recording multiple shots at different focal points. This technique is particularly valuable in macro photography where depth of field is naturally limited.
When implementing focus bracketing, you’ll need to maintain consistent exposure settings across all frames to guarantee seamless image stacking later.
| Focus Bracketing Benefits | Implementation Tips |
|---|---|
| Extends depth of field | Use tripod for stability |
| Reveals microscopic detail | Maintain consistent exposure |
| Enhances image clarity | Set small focus increments |
| Improves scientific data | Use automated features if available |
Many modern cameras include built-in focus bracketing features that automatically adjust focus between shots, streamlining your scientific workflow. For best results, combine your bracketed images in specialized software to create a final composite with complete front-to-back sharpness.
Program Mode With Exposure Compensation for Rapid Laboratory Documentation
For scientists who need to document experiments efficiently, Program Mode (P) offers an ideal balance between automation and control. Your digital camera will select initial exposure settings while you maintain the flexibility to adapt to changing lab conditions.
When using Program Mode with exposure compensation, you’ll benefit from:
- Quick adjustments – Modify exposure on the fly without switching modes, keeping pace with dynamic laboratory conditions.
- Consistent settings – Maintain your ISO, metering, and white balance across all documentation images.
- Focus on research – Let your camera handle exposure decisions while you concentrate on capturing critical experimental moments.
- Adaptation to light changes – Easily compensate for varying lab lighting without missing important documentation opportunities.
This approach streamlines your scientific photography workflow while maintaining the technical quality necessary for accurate documentation.
Custom Function Settings for Standardized Research Photography
While Program Mode offers flexibility for rapid documentation, achieving truly replicable scientific results requires standardized camera settings across your research team.
Begin by disabling auto ISO features and setting a fixed value (100-200) to minimize noise in detailed images.
Configure your camera’s exposure settings by selecting Aperture Priority mode for precise depth of field control while allowing automatic shutter speed adjustments. This combination maintains consistent exposure across varying conditions without compromising subject isolation quality.
For accurate representation of scientific subjects, set your metering to Spot or Center-weighted mode to concentrate exposure readings on critical areas.
Complement these settings with Auto White Balance to guarantee color consistency regardless of lighting environment.
These customizations create a standardized photography protocol that enhances the scientific validity of your visual documentation.
Frequently Asked Questions
What Is the Best Camera for Botanical Photography?
You’ll need a full-frame camera with at least 20MP resolution and excellent low-light performance. Look for models compatible with 90-105mm macro lenses to capture intricate plant details with beautiful bokeh.
What Mode Do Professional Photographers Shoot In?
Professionals typically shoot in Aperture Priority for depth of field control, Shutter Priority for action shots, and Manual Mode for complete creative control. You’ll find many pros also use Program Mode in unpredictable situations.
What Is the Benefit of Using P Mode for Learning Photography?
P Mode helps you learn photography by automating exposure settings while letting you control ISO and white balance. You’ll grasp the relationship between aperture and shutter speed as you experiment with your camera’s control dial.
What Camera Setting Should You Experiment With to Get Better Exposure When Shooting an Event Like a Prom or Wedding Reception That’s Dimly Lit?
You should experiment with higher ISO (800-1600), wider apertures (f/1.4-f/4), and exposure compensation (+1 or +2). Don’t forget to use a flash with bounce techniques for softer lighting in dim venues.
In Summary
You’ve now explored the essential exposure modes for scientific photography, from aperture priority’s specimen detail control to manual mode’s reproducibility. Whether you’re working with microscope integration or capturing high dynamic range images, selecting the right exposure technique is vital. By mastering these specialized modes, you’ll produce consistent, accurate, and publication-worthy scientific images that effectively document your research and findings.


Leave a Reply