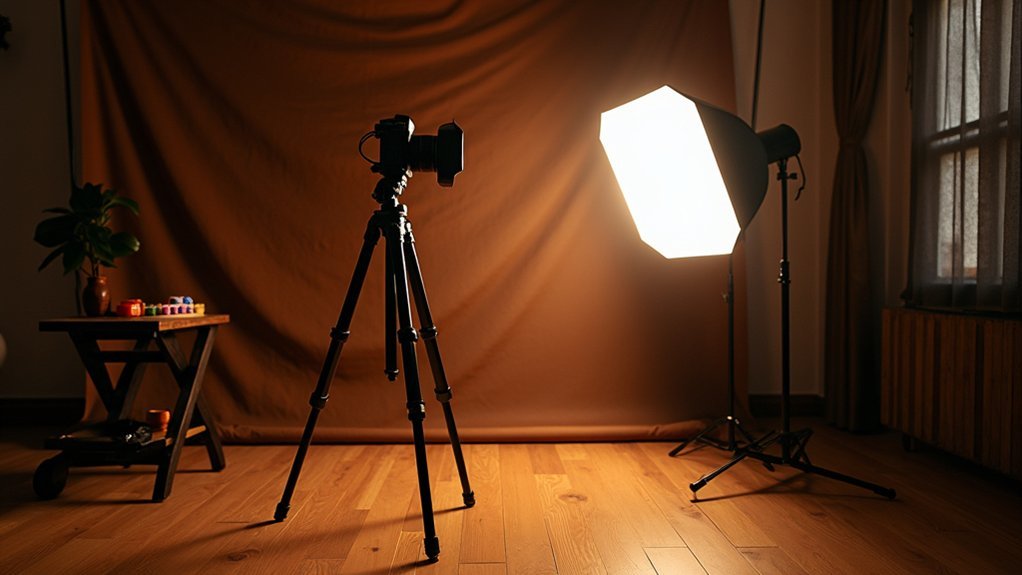
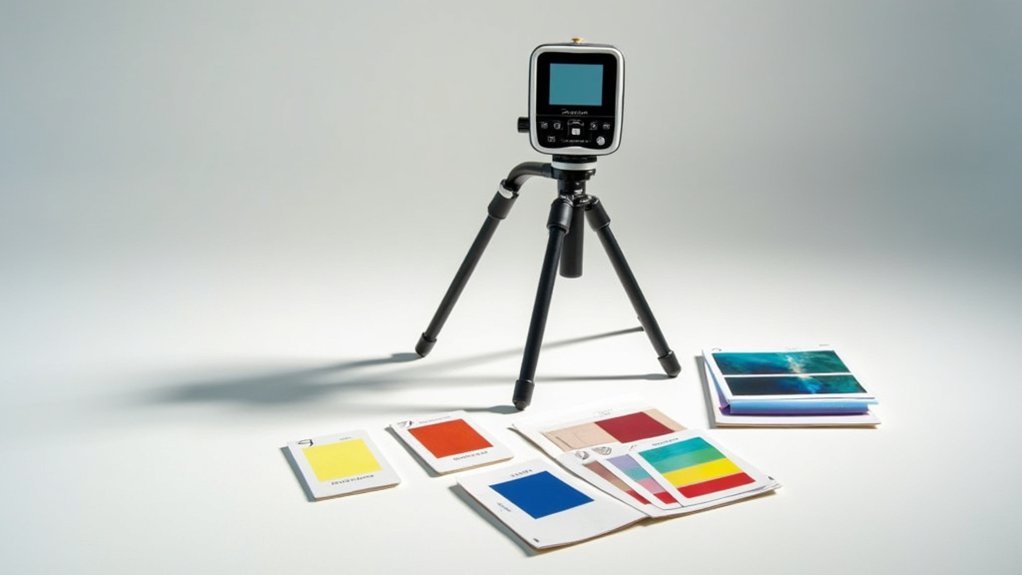
Setting up your incident light photography system starts with positioning your handheld meter at the subject’s location. Point the white translucent dome directly at your camera to capture three-dimensional light representation. Take separate readings for each light source, placing your main light at a 45-degree angle and setting fill lights one stop lower. Adjust your camera’s aperture and shutter speed to match meter values. Proper documentation of successful setups will guarantee consistency in your future photography work.
Setting Up Your Incident Light Photography System
When you’re ready to achieve precise exposures in your photography, positioning your incident light meter correctly is the critical first step.
Place your handheld incident meter at your subject’s location with its white translucent dome pointed directly at your camera. This dome captures a three-dimensional representation of light falling on your subject, delivering accurate exposure readings.
For complex setups, take separate incident light readings for each light source to guarantee balanced lighting. This metering technique is particularly valuable when working with multiple lights or mixed lighting conditions.
Once you’ve collected your readings, adjust your camera’s aperture and shutter speed to match the meter’s recommended values.
With regular practice, you’ll develop proficiency in these metering techniques, resulting in consistently accurate exposures across various lighting scenarios.
Understanding Incident Light Metering Fundamentals
Unlike reflective metering systems built into most cameras, incident light metering measures the actual light falling onto your subject rather than bouncing off it. This provides more accurate exposure settings regardless of your subject’s color or reflectiveness.
To use your incident light meter effectively, position it at your subject with the white dome facing your camera. This translucent dome simulates a three-dimensional subject, capturing the lighting conditions as your subject experiences them.
You’ll find incident metering particularly valuable for portraits and fashion photography where proper exposure is essential. The meter becomes an important photography kit component in challenging lighting situations where camera meters might be misled.
With regular practice, you’ll quickly interpret readings and adjust settings confidently, achieving consistent results across various lighting conditions.
Selecting the Right Incident Light Meter for Microscopy
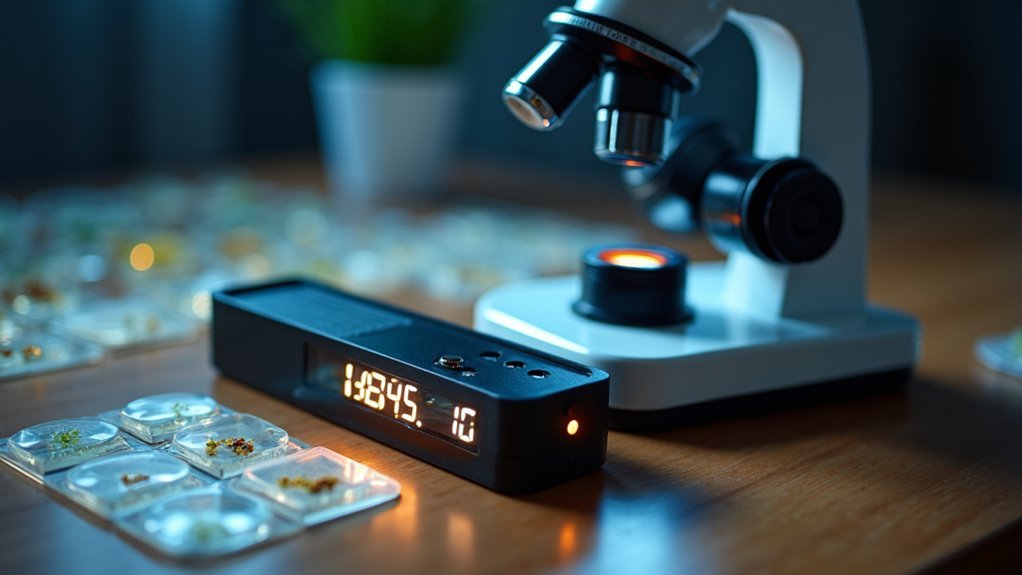
Although microscopy presents unique lighting challenges, selecting the right incident light meter can dramatically improve your imaging results. When choosing your incident meter, prioritize models that deliver accurate readings in low light environments, as you’ll often work with dim, delicate specimens.
| Feature | Why It Matters | Recommended Models | Benefit |
|---|---|---|---|
| White translucent dome | Simulates 3D subjects | Sekonic L-758DR | Consistent measurement |
| Reflective capabilities | Versatility in readings | Gossen Ultra-Pro | Measures both incident and reflected light |
| Fast response time | Rapid adjustments | Sekonic L-758DR | Captures changing conditions |
| Low-light sensitivity | Accuracy in dim settings | Gossen Ultra-Pro | Precise measurements of faint specimens |
Look for meters that combine these essential features with easy readability, allowing you to make quick adjustments as your microscopic subjects and lighting conditions change.
Positioning Your Light Sources for Optimal Sample Illumination
Since proper lighting dramatically affects the quality of microscopic images, strategic positioning of your light sources becomes essential for revealing crucial specimen details.
Strategic lighting isn’t merely decorative—it’s the fundamental tool that unveils critical microscopic details invisible to casual observation.
When setting up your main light, place it at a 45-degree angle to your sample to create dimension and depth in your microscopic photography.
Use your incident light meter to measure light falling on the specimen, pointing the dome toward the camera for accurate readings.
Position your fill light at a lower intensity—typically one stop less than your main light—to soften shadows without flattening detail.
Remember that light intensity diminishes dramatically with distance; doubling the distance reduces light by a factor of four, affecting your exposure settings.
Take separate meter readings for each light source, adjusting their positioning until you achieve balanced illumination across your entire specimen.
Configuring Illumination Angles for Three-Dimensional Specimens
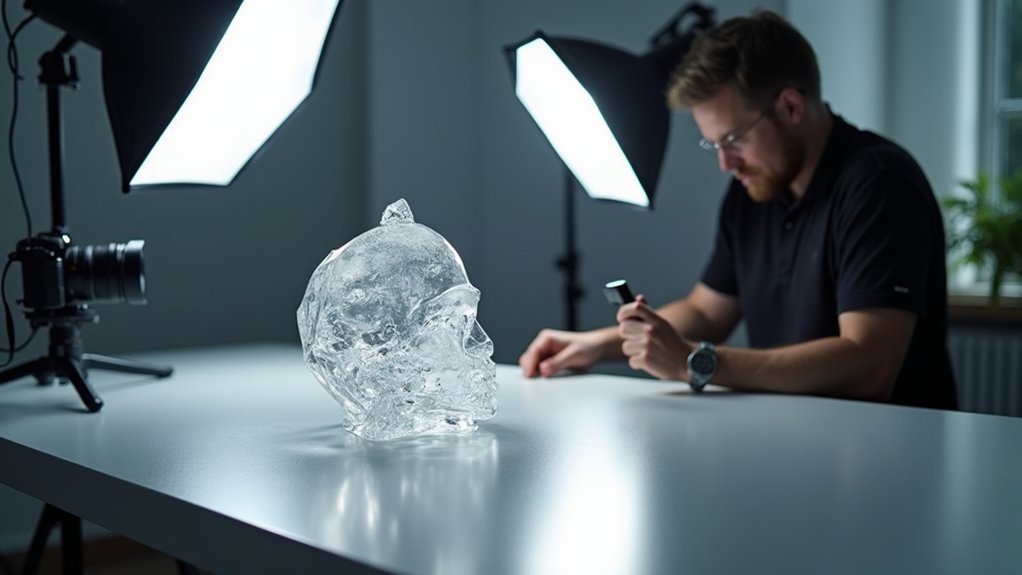
The three-dimensional nature of many microscopic specimens presents unique lighting challenges that go beyond basic illumination principles. Properly configuring your light angles guarantees details are highlighted while maintaining natural depth perception.
- Position your incident meter at the specimen’s location with the dome facing the camera to accurately measure light falling on your three-dimensional subject.
- Establish your key light first, placing it higher than your fill light and measuring by pointing the dome directly at it.
- Add fill light at approximately one stop less than your key light to create a balanced 2:1 lighting ratio.
- Regularly check your exposure settings as you adjust light angles, making sure shadows remain soft while still conveying the specimen’s dimensionality.
Creating Effective Lighting Patterns for Microscopic Detail
Microscopic photography demands precise lighting techniques that reveal even the most elusive details invisible to the naked eye. To achieve this, position your incident meter at the subject with the dome facing the camera, ensuring accurate exposure readings unaffected by reflective surfaces.
Experiment with lighting patterns by adjusting your light sources’ angle and distance to highlight fine textures. When working with multiple lights or high-contrast scenes, attach a flat diffuser to your meter to maintain detail in both shadows and highlights.
For consistent results across different lighting conditions, regularly practice comparing incident meter readings under various setups. This practice will refine your technique, allowing you to confidently capture microscopic details that would otherwise remain hidden, regardless of complex lighting environments.
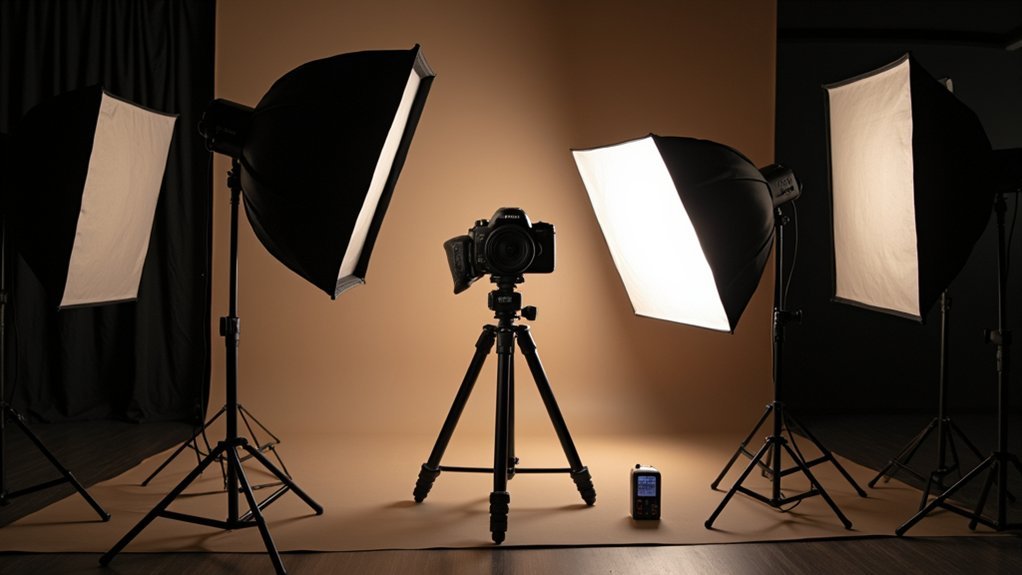
Calibrating Your Incident Light System for Accurate Exposure
Proper calibration of your incident light metering system forms the foundation of consistent exposure in all photographic situations.
Precise incident meter calibration ensures reliable exposure results regardless of shooting environment.
Your incident light meter must be positioned correctly—dome facing toward the camera from your subject’s position—to guarantee accurate readings of the light falling on your subject.
- Take multiple readings under varying lighting conditions to identify inconsistencies and fine-tune your camera settings.
- When using multiple light sources, measure each one individually, keeping your fill light one stop below your main light for a balanced 2:1 ratio.
- Practice regularly with your meter to develop intuitive understanding of correct positioning and reading interpretation.
- Account for any light modifiers in your setup, as they’ll affect both the quality and quantity of light reaching your subject.
Calibrating properly guarantees predictable, accurate exposure across all your photographic work.
Managing Reflective Surfaces in Microscopic Specimens
When photographing microscopic specimens, you’ll need polarizing filters to combat the reflective nature of glass slides by positioning one filter on your light source and another on your lens to eliminate glare without compromising exposure accuracy.
Proper sample preparation includes using specialized anti-reflective coatings on slides and coverslips, which greatly reduces unwanted light scatter that can obscure fine specimen details.
You can further enhance image clarity by adjusting your incident light angle to position illumination where it won’t create hotspots, while maintaining your meter’s dome orientation toward both the light source and specimen for ideal results.
Polarizing Filter Techniques
Although many specimen details can be lost to unwanted glare and reflections, polarizing filters offer an elegant solution for microscopic photography. When examining specimens with reflective properties, these filters effectively control unwanted light while enhancing color saturation and contrast.
- Use circular polarizers (not linear) to avoid interfering with your camera metering and autofocus systems.
- Position your light source at a 90-degree angle to the specimen for maximum polarizing effect.
- Rotate the filter gradually while viewing through your camera to find the ideal angle for glare reduction.
- Adjust your exposure settings to compensate for the 1.5-2 stop light reduction caused by the filter.
Remember to experiment with different angles and rotation positions to achieve the perfect balance between reflection control and detail preservation in your microscopic photography.
Non-glare Sample Preparation
Successfully capturing microscopic specimens with highly reflective surfaces requires thoughtful preparation before you even begin imaging. Apply non-glare coatings or matte finishes to minimize reflections while enhancing light transmission through your specimens.
| Technique | Application | Benefit | Challenge | Solution |
|---|---|---|---|---|
| Non-glare coatings | Surface treatment | Reduces shine | May alter texture | Use minimal amounts |
| Polarizing filters | Light path setup | Cuts reflections | Light intensity loss | Adjust exposure time |
| Side lighting | Light positioning | Avoids direct glare | Shadow creation | Use multiple sources |
| Diffusers | Between light and sample | Softens illumination | Reduced contrast | Adjust distance |
| Sample cleaning | Pre-imaging prep | Removes contaminants | Delicate surfaces | Use appropriate solvents |
Clean your specimens thoroughly to eliminate contaminants that create unwanted reflections. When direct approaches aren’t sufficient, combine techniques—pair diffusers with polarizing filters for particularly challenging reflective samples.
Balancing Multiple Light Sources for Even Illumination
When balancing multiple light sources, you’ll need to properly sync your flash ratios by measuring each light independently with your incident meter pointed toward the camera.
Maintaining color temperature harmony across different light sources prevents unwanted color casts that can compromise your image quality and complicate post-processing.
You can achieve professional results by ensuring your key light is properly synced with fill lights at appropriate ratios while using color correction gels to match the temperature of all lighting elements in your setup.
Sync Flash Ratios
Three essential steps govern balanced illumination when working with multiple light sources.
First, use your incident meter to measure the main light source, pointing the dome toward the camera.
Next, measure your fill light, ensuring it registers one stop less than your key light to create that ideal 2:1 ratio.
Finally, adjust your exposure settings based on these readings.
- Distance matters – doubling the distance from your light source decreases light intensity by four times
- Set fill light one to two stops lower than your key light to properly lift shadows
- Take final readings with the main light in its shooting position
- Point the meter dome at the camera, not at the light source, for accurate measurements
Remember: balanced illumination comes from proper measurement and thoughtful light placement, not guesswork.
Color Temperature Harmony
While proper flash ratios guarantee balanced illumination, the color of your light sources adds another dimension to your incident light photography. You’ll need to match color temperatures (measured in Kelvin) to avoid unwanted color casts. Your incident meter with color temperature functionality is invaluable here, helping you measure and adjust each light source for consistent results.
| Light Source | Color Temperature | Balancing Method |
|---|---|---|
| Daylight | ~5500K | Reference standard |
| Tungsten | ~3200K | Gels/filters |
| Studio Strobe | Variable | Flash settings |
| Fluorescent | 3000K-6500K | Custom WB |
| Mixed | Varies | Selective gelling |
When combining multiple light sources (strobes with ambient light, for example), analyze each source individually. Use a white balance card during your shoot—this calibration tool will help ascertain accurate color temperature harmony both in-camera and during post-processing.
Adjusting Incident Light for Various Sample Types
Different subjects demand specific incident light approaches to achieve ideal exposure. When using your incident meter, always position the dome facing your camera at the subject’s location to accurately measure incoming light.
- Portrait Setup – Measure key light at the subject’s chin at f/16, then set fill light one stop less for a balanced exposure that flatters facial features.
- High-Contrast Scenes – Prioritize measuring sunlit areas to preserve highlight detail while maintaining shadow information.
- Multiple Light Sources – Take separate incident readings for each source and average them for consistent exposure across the entire scene.
- Aperture Adjustments – Use your meter readings to set aperture values that maintain your desired depth of field while ensuring proper balance between main and fill lights.
Controlling Contrast With Directed Light Techniques
Mastering contrast in incident light photography hinges on your ability to manipulate the relationship between key and fill lights. Aim for a 2:1 ratio, with your fill light positioned one stop below the key light to achieve balanced, professional results.
Use incident meters to measure light falling directly on your subject, not reflected light. This helps you avoid blown highlights while maintaining proper exposure across all lighting conditions.
When adjusting contrast, remember that doubling the distance between your light source and subject reduces intensity by four times.
For softer shadows, incorporate diffusers or reflectors near your directed light sources.
The Duplex Method can refine your technique by averaging readings from both incident and reflective meters, giving you precise control over contrast in complex setups.
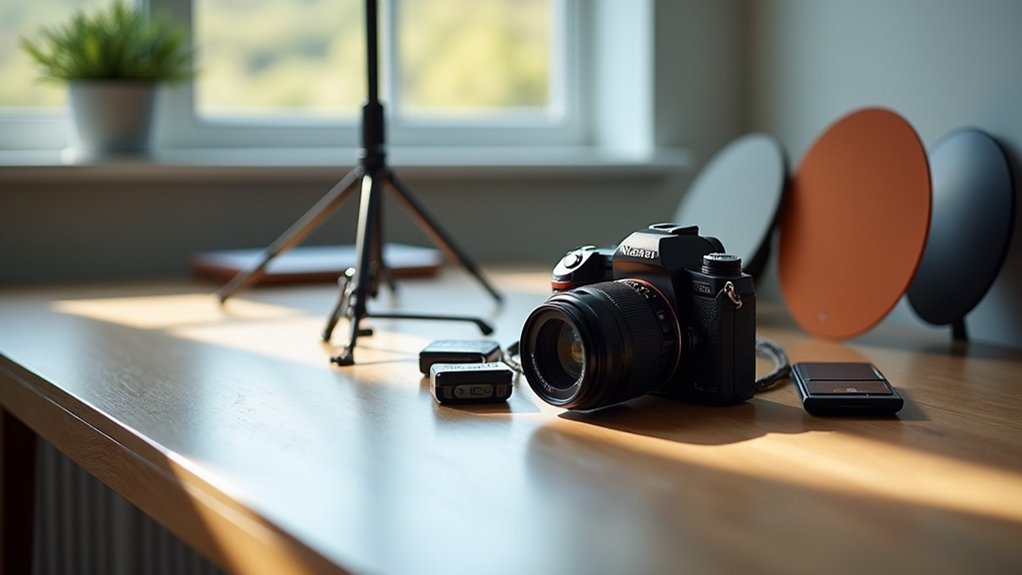
Documenting Lighting Setups for Experimental Reproducibility
Once you’ve established effective contrast techniques, your next step is creating detailed records of successful lighting arrangements. Document each setup thoroughly by noting light positions, modifiers, and metering readings for both key and fill lights. This documentation guarantees you can reproduce your best work consistently.
Thorough documentation of light positions, modifiers and meter readings ensures your best setups remain reproducible rather than accidental.
- Record all exposure settings including aperture, shutter speed, and ISO values for each successful configuration.
- Photograph your lighting setup from multiple angles to create visual references.
- Note ambient conditions like time of day and weather that might influence results.
- Maintain a log of adjustments made during the shoot to track how changes affect outcomes.
This methodical approach transforms lighting experimentation from guesswork into reproducible technique, building your professional toolkit with each documented setup.
Frequently Asked Questions
What Is the Best Setting for Light Photography?
For light photography, you’ll want to position your incident meter at the subject, facing the camera with a white dome. Measure key and fill lights for balanced exposure, maintaining a 2:1 ratio for ideal results.
Where to Point Incident Light Meter?
Point your incident light meter toward the camera with its dome facing the lens. Position it at your subject’s location, particularly at their face for portraits, to accurately measure the light they’ll receive.
What Is Incident Light in Photography?
Incident light is what falls directly onto your subject rather than reflecting off it. You’ll get more accurate exposure readings with this method, especially when photographing subjects with varying reflectivity.
What Metering Should I Use for Landscape Photography?
For landscape photography, you’ll get the best results using spot metering or matrix/evaluative metering. Spot metering helps you capture specific areas, while matrix balances the exposure across your entire scenic composition.
In Summary
You’ve now mastered the fundamentals of incident light photography for microscopy. Remember to document your lighting configurations for future sessions, and don’t hesitate to experiment with different angles and intensities. With practice, you’ll develop an intuitive feel for how light interacts with your specimens. Your newfound skills will transform your microscopy work from simple documentation to compelling visual storytelling.


Leave a Reply