To optimize fluorescence microscope camera settings, adjust exposure time to reach 70-80% saturation while monitoring your histogram to avoid overexposure. Keep gain settings low to minimize noise, and select appropriate binning modes based on your resolution needs. Use cameras with high quantum efficiency (95%+) that match your fluorophore emission spectra. For live cells, maintain exposure times under 100ms to reduce phototoxicity. The right balance between these parameters will reveal remarkable clarity in your microscopy images.
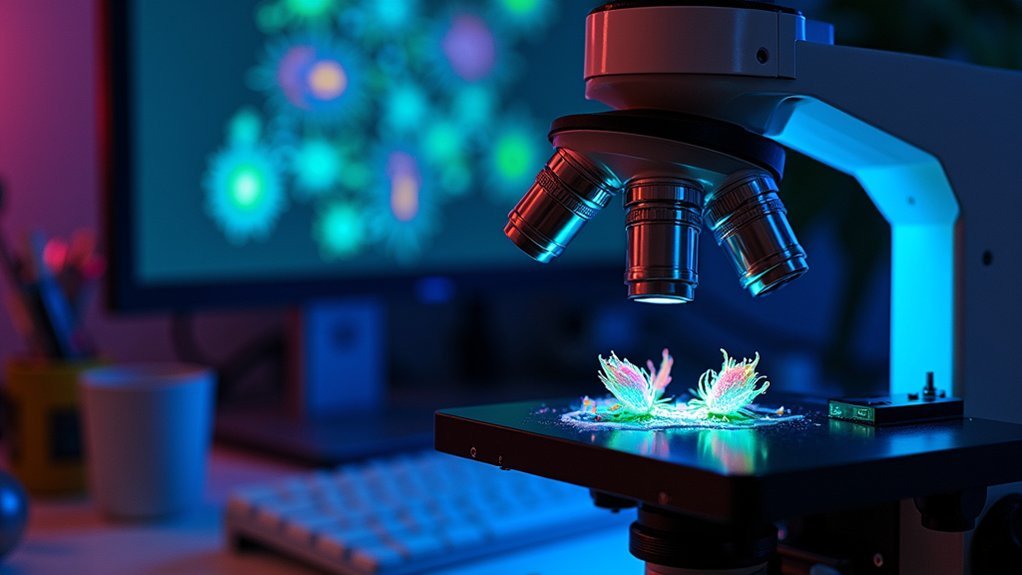
Optimize Fluorescence Microscope Camera Settings For Better Images
When capturing fluorescence microscopy images, proper camera settings can make the difference between mediocre and exceptional results. Start by adjusting exposure time to maximize dynamic range—aim for the brightest pixel reaching 70-80% of saturation capacity. This guarantees you’re capturing the full signal intensity range without losing data.
Proper exposure is the cornerstone of quality fluorescence imaging—maximize your dynamic range without sacrificing data integrity.
Use your camera’s histogram to verify proper exposure; crowding at the low end indicates underexposure, while a cliff at the high end reveals saturation.
For live cell imaging, balance excitation light intensity with exposure duration to minimize phototoxicity while maintaining adequate signal.
Adjust gain and binning strategically—higher gain amplifies both signal and noise, while binning boosts signal-to-noise ratio at the cost of resolution.
Document your settings to maintain consistency across imaging sessions.
Understanding Signal-to-Noise Ratio in Fluorescence Imaging
Signal-to-noise ratio (SNR) represents the foundation of quality fluorescence microscopy. When you’re capturing fluorescence images, SNR quantifies how well your actual signal stands out from unwanted background noise. Higher SNR values translate directly to better image quality and more reliable analytical results.
To improve your SNR, focus on two key strategies: maximize your signal and minimize your background noise. Use high numerical aperture objectives and optimize excitation light intensity to strengthen your true signal. Remember that camera gain settings won’t help your SNR since they amplify both signal and noise equally.
Background noise comes from multiple sources—autofluorescence, light reflections, and electronic camera noise. Addressing these issues is vital, especially when conducting quantitative analyses of gene expression or protein localization where distinguishing true signals is essential.
Balancing Exposure Time and Phototoxicity
When imaging live specimens, you’ll face a critical trade-off between longer exposures that yield stronger fluorescence signals and the risk of phototoxicity that can damage or kill your cells.
You should aim to use the minimum effective exposure time and light intensity needed to capture essential details while preserving cellular viability throughout your observation period.
Modern fluorophores that offer enhanced brightness and stability can help you achieve this balance, allowing for shorter exposures and reduced phototoxicity without compromising image quality.
Exposure-Phototoxicity Trade-offs
Although acquiring bright, detailed fluorescence images is desirable, you’ll face a critical balancing act between exposure settings and cellular health. Longer exposure times boost fluorescence signal strength but increase phototoxicity risk, potentially compromising cell viability during live imaging.
| Parameter | Lower Exposure | Higher Exposure |
|---|---|---|
| Signal strength | Weaker, may miss details | Stronger, better contrast |
| Phototoxicity | Minimal cell damage | Significant stress/death |
| Photobleaching | Reduced fluorophore degradation | Rapid signal loss over time |
| Acquisition speed | Faster time-lapse imaging | Limited temporal resolution |
To optimize this trade-off, use the lowest effective exposure time that captures necessary detail. Modern, brighter fluorophores can deliver strong signals with shorter exposures. Monitor your samples continuously and adjust settings based on specific sample characteristics and experimental requirements.
Minimize Cellular Damage
Protecting cellular viability remains paramount while pursuing high-quality fluorescence images. To minimize phototoxicity, keep exposure times under 100ms for live-cell imaging while still capturing necessary details. By reducing excitation light intensity to the lowest effective level, you’ll decrease photodamage without sacrificing signal detection.
- Use anti-fade reagents during sample preparation to mitigate fluorescence fading, enabling shorter exposure times while maintaining image quality.
- Monitor cell health continuously during imaging sessions to identify signs of distress and adjust settings accordingly.
- Balance exposure time with light intensity by following live-cell imaging guidelines that optimize both cellular health and image quality.
These strategies help you achieve the delicate equilibrium between capturing clear fluorescence signals and preserving cell viability—ensuring your research yields meaningful results from healthy specimens.
Optimizing Camera Gain for Fluorescence Detection
Finding the perfect balance in camera gain settings represents one of the most critical adjustments you’ll make when optimizing fluorescence microscopy.
While higher gain amplifies your fluorescence detection, it simultaneously increases background noise, potentially degrading your signal-to-noise ratio.
You’ll want to set your camera gain to the lowest level that still captures adequate signal. Monitor your histogram carefully to guarantee pixel values remain within the dynamic range—avoid saturation that eliminates valuable detail.
Never adjust gain in isolation; consider it alongside exposure time and excitation intensity to minimize phototoxicity in live samples.
For reliable results across experiments, regularly calibrate your system using fluorescence standards.
This disciplined approach guarantees you’re capturing genuine biological signals rather than artifacts, ultimately producing cleaner, more reproducible fluorescence images.
Selecting the Ideal Binning Mode for Your Application

Beyond gain adjustments, your choice of binning mode greatly impacts image quality and data interpretation in fluorescence microscopy.
Binning combines adjacent pixels to enhance signal-to-noise ratio in low-light conditions, though at the cost of resolution.
When selecting the best binning mode, consider:
- Your experimental requirements—use higher resolution (no binning) for detailed structures or 2×2 binning for improved sensitivity when fine details aren’t critical
- Light intensity—low fluorescence signals benefit from increased pixel size through 2×2 or 4×4 binning configurations
- Camera capabilities—check your specific model’s binning options as limitations may affect image quality
The most suitable binning mode strikes a balance between sensitivity and resolution.
For dim samples, you’ll gain better detection with binned pixels, while bright specimens allow unbinned acquisition for maximum spatial detail.
Maximizing Quantum Efficiency With Proper Wavelength Selection
Choosing a camera with a quantum efficiency curve that aligns with your fluorophores’ emission spectra will dramatically improve your signal detection capabilities.
You’ll achieve ideal results by selecting fluorescent dyes that emit in the 500-650 nm range, where most scientific cameras reach their peak QE of 95% or higher.
Wavelength-Matched Camera Selection
When you’re selecting a fluorescence microscope camera, the quantum efficiency (QE) at your fluorophore’s emission wavelength will greatly impact your imaging success.
Ideal wavelength-matched camera selection guarantees you capture the maximum signal from your samples, dramatically improving image quality.
- Check the camera’s QE curve and aim for 95% efficiency at your fluorophore’s emission spectrum, particularly within the 500-650 nm range where most common dyes emit.
- Match your camera’s peak sensitivity to your fluorophore’s emission peak to maximize signal-to-noise ratio, making targets easier to distinguish.
- Consider the specific wavelengths of all fluorescent dyes in your experiments when selecting equipment—this strategic approach reduces background noise and enhances detection of weak signals.
QE Curves Matter
Understanding quantum efficiency curves represents the cornerstone of capturing high-quality fluorescence images. Your camera’s QE indicates how effectively it converts photons into measurable photoelectrons—the higher this value, the more sensitive your detection system becomes.
When you select fluorescent dyes, verify they emit within your camera’s peak QE range (ideally above 90%) to enhance signal detection. By aligning your fluorophores’ emission wavelengths with your camera’s best wavelength sensitivity, you’ll dramatically improve the signal-to-noise ratio in your images.
Always check your camera’s QE curve documentation and adjust your camera settings accordingly. This wavelength-specific refinement lets you capture even weak fluorescence signals that might otherwise go undetected.
Spectral Range Optimization
To maximize your fluorescence imaging quality, proper spectral range selection forms the foundation of efficient photon collection. Your camera’s quantum efficiency varies across wavelengths, making it essential to match your fluorophores with regions where your camera performs best.
- Check your camera’s QE curve and select fluorophores with emission peaks that align with the highest QE regions (ideally 95%+) to dramatically boost signal strength.
- Even bright samples can produce poor images if their emissions fall in low-QE regions of your camera’s spectral range.
- Optimize your imaging conditions by selecting appropriate filters and light sources that work within your camera’s peak sensitivity wavelengths.
This wavelength-matching approach in fluorescence microscopy guarantees you’ll capture even faint signals from low-abundance targets with maximum efficiency.
Using Histograms to Determine Optimal Exposure Settings
Histograms serve as essential diagnostic tools for achieving ideal exposure in fluorescence microscopy imaging. By examining the graphical distribution of pixel intensity, you’ll quickly recognize whether your image is properly capturing the full dynamic range of your fluorescence signal.
When you see a well-distributed histogram spanning across multiple intensity values, you’ve likely achieved peak exposure. If pixels crowd at the lower end, your image is underexposed; if they reach the right edge, you’re overexposing and losing data through saturation.
Make adjustments to your exposure settings while monitoring the histogram in real-time. This practice guarantees you’re capturing maximum signal intensity without pixel saturation.
Consistent use of histogram analysis across different samples also enables more reliable quantitative comparisons in your fluorescence microscopy work.
Adjusting Dynamic Range for Accurate Image Representation
You’ll need to carefully analyze your histogram to guarantee fluorescence data isn’t lost at either end of the intensity spectrum.
Check that your brightest pixels aren’t clustered against the right edge, which indicates signal saturation and loss of valuable quantitative information.
Remember that proper dynamic range adjustment preserves both dim structures and bright features, allowing for accurate comparisons between experimental conditions.
Histogram Analysis Essentials
When examining fluorescence microscopy images, understanding histogram analysis becomes essential for achieving ideal image quality and accurate data representation. Your histogram reveals the distribution of pixel intensities throughout your image, serving as a diagnostic tool for exposure accuracy and dynamic range optimization.
- Check histogram shape carefully—left-shifted patterns indicate underexposure with crowded low signals, while right-end saturation reveals overexposure that risks detail loss.
- Adjust exposure times while monitoring your histogram to guarantee signal intensity spans appropriately across the available dynamic range without clipping.
- Perform regular histogram checks between samples to maintain consistency across your imaging session.
Prevent Signal Saturation
Signal saturation represents one of the most significant threats to quantitative fluorescence microscopy, as saturated pixels permanently lose valuable intensity information. To preserve your data’s integrity, monitor your image histogram for clipping at the right edge—this indicates pixels have exceeded your camera’s dynamic range.
| Setting | Adjustment to Prevent Saturation |
|---|---|
| Exposure time | Reduce for bright samples until peak intensity < 255 (8-bit) |
| Gain | Maintain at levels that optimize signal-to-noise ratio |
| Dynamic range | Aim for histogram distribution across 75-80% of available range |
| Brightness | Adjust for dimmer samples rather than increasing exposure |
When imaging specimens with varying fluorescence intensities, prioritize capturing the brightest regions without saturation. You’ll always be able to enhance dim areas during post-processing, but saturated data cannot be recovered after acquisition.
Managing Thermal Noise Through Camera Cooling
Although often overlooked, thermal noise represents one of the most significant challenges in fluorescence microscopy imaging.
Active camera cooling dramatically reduces dark current noise, improving your image quality and enhancing the signal-to-noise ratio in your fluorescence imaging experiments.
- Monitor and adjust cooling parameters regularly to maintain ideal operating temperatures that minimize thermal noise and maximize sensitivity for detecting faint fluorescent signals.
- Prevent hot pixel formation by keeping temperature fluctuations under control—these artifacts can severely compromise the clarity and accuracy of your microscopy data.
- Follow manufacturer guidelines for cooling settings to guarantee your camera performs consistently throughout extended imaging sessions.
Choosing the Right Pixel Size for Your Imaging Needs
While thermal management addresses noise sources in your camera system, pixel size represents a fundamental parameter that determines what your microscope can actually resolve.
You’ll need to align your pixel size with your optical system’s resolution to satisfy Nyquist criteria for accurate imaging.
Consider your experimental needs when selecting: larger pixels capture more light, improving signal-to-noise ratio and sensitivity in low-light conditions, but potentially sacrifice resolution.
Pixel size selection requires thoughtful compromise—optimize for sensitivity or resolution based on your specific imaging requirements.
Smaller pixels reveal finer structural details but may require longer exposure times or brighter samples.
Your fluorescent dyes also influence this choice, as different fluorophores have varying brightness levels.
For ideal results, balance pixel size with your camera’s quantum efficiency—high QE cameras with appropriately sized pixels deliver superior image quality with greater data accuracy.
Configuring USB and PCIe Connections for Reliable Acquisition
When setting up your fluorescence microscope camera, the connection interface you choose directly impacts image acquisition reliability and speed. For standard imaging applications, USB 2 or USB 3 connections offer convenient setup with sufficient bandwidth for most acquisition settings.
For high-resolution imaging that demands superior performance:
- Install a dedicated PCIe card specifically for your camera to prevent resource sharing that could compromise reliable data transfer.
- Regularly check and disable power-saving modes on your PCIe controller card through device manager to maintain consistent communication.
- Consider high-speed interfaces like CoXpress or Cameralink when handling large data streams from advanced cameras.
Choosing quality components from reputable manufacturers guarantees your imaging system maintains peak performance throughout extended acquisition sessions, particularly when capturing time-sensitive fluorescence phenomena.
Minimizing Photobleaching Through Strategic Imaging Parameters
Photobleaching poses a significant challenge in fluorescence microscopy, gradually degrading your valuable signals and compromising experimental results. To combat this issue, always use the lowest effective illumination intensity and shortest exposure time that still captures adequate signal intensity for your samples.
Minimize light exposure—your fluorescent signals will thank you with longer, more consistent performance throughout imaging experiments.
Incorporate anti-fade reagents in your mounting medium to extend the lifespan of fluorescent signals during imaging sessions. For live-cell experiments, shorter exposure times are particularly essential to prevent light-induced damage while maintaining image quality.
Carefully adjust your camera’s gain settings to optimize dynamic range without unnecessarily amplifying background noise, as higher gain can accelerate photobleaching.
When documenting dynamic processes, implement time-lapse imaging with brief intervals, allowing fluorophores recovery time between captures to minimize cumulative photobleaching effects.
Setting Up Multi-Channel Imaging for Colocalization Studies
Successful colocalization studies depend on precise multi-channel imaging setups that accurately capture the spatial relationships between different fluorescent targets.
You’ll need to install appropriate filters to prevent spectral overlap that could compromise your colocalization analysis.
When configuring your system:
- Optimize exposure time for each channel independently to maximize dynamic range without saturating pixels
- Select high numerical aperture objectives to increase signal collection and resolution of closely positioned targets
- Adjust camera gain and binning settings to balance sensitivity with resolution across all channels
Regularly monitor your signal-to-noise ratio throughout imaging sessions to guarantee background interference doesn’t compromise data quality.
A higher SNR translates to more reliable colocalization results, helping you distinguish true biological relationships from imaging artifacts.
Frequently Asked Questions
How Can You Improve the Quality of an Image on a Microscope?
You can improve microscope image quality by maintaining consistent settings, using histograms to check exposure, optimizing signal-to-noise ratio, selecting appropriate camera settings, and implementing active cooling to reduce noise.
What Fluorescent Technique Can Improve the Spatial Resolution of the Light Microscope?
Super-resolution techniques like STORM and PALM can break the diffraction limit. You’ll achieve 20-50nm resolution by tracking individual fluorophores that switch on and off, revealing cellular structures with unprecedented clarity.
What Is the Best Camera for Fluorescence Microscopy?
For fluorescence microscopy, you’ll want a back-illuminated sCMOS camera with high quantum efficiency (95%+). They offer the best balance of sensitivity, low noise, and speed, though EMCCDs excel in extremely low-light conditions.
How Are Images Focused Under a Fluorescence Microscope?
You’ll focus fluorescence microscope images by adjusting the focus knob to align your specimen with the objective lens. Use phase contrast first, then apply immersion oil with high NA objectives for sharper fluorescent visualization.
In Summary
You’ll achieve dramatically better fluorescence images by optimizing your camera settings. Remember to balance exposure time with phototoxicity, adjust gain appropriately, and select the right binning mode for your specific application. Don’t overlook pixel size and connection configurations. By fine-tuning these parameters, you’ll maximize your signal-to-noise ratio while minimizing photobleaching—ultimately capturing clearer, more reliable data for your fluorescence microscopy research.


Leave a Reply