For sharper darkfield images, guarantee your condenser’s NA exceeds your objective’s, center the condenser properly, match opaque stops to objective lenses, and adjust condenser height for even illumination. Keep optical components clean, prepare thin specimens on quality slides, control light intensity carefully, and use fine focus adjustments for detail. Eliminate glare by proper alignment and maintenance. Master these techniques and your microscopy results will dramatically improve with practice.
10 Dark Field Condenser Tips for Sharp Images

Five essential factors determine the quality of your darkfield microscopy images.
First, verify your condenser’s numerical aperture exceeds your objective’s NA to create proper contrast in the light path. Select specialized condensers like cardioid or paraboloid designs that produce ideal hollow light cones for superior illumination.
Keep your condenser perfectly centered and clean to prevent dust particles from creating unwanted glare that diminishes image clarity.
Choose appropriate spider stops based on your objective magnification—16-18mm for 10x and 20-24mm for higher powers.
Finally, use slides of approximately 1mm thickness and maintain spotless optical surfaces throughout the entire light path.
These practices eliminate scattering artifacts that would otherwise compromise your image’s sharpness and detail resolution.
Aligning Your Condenser for Optimal Contrast
Proper alignment of your darkfield condenser serves as the foundation for creating stunning high-contrast images. Begin by centering the condenser directly under the stage, as misalignment will introduce glare that diminishes image quality.
For effective darkfield microscopy, ascertain your condenser’s numerical aperture exceeds that of your objective lens, maximizing the light produced and enhancing specimen contrast.
Adjust the condenser height precisely until you observe an even hollow cone of light illuminating your specimen without any stray light interference.
The precise positioning of your condenser creates that perfect hollow light cone essential for revealing specimen detail with stunning clarity.
Always verify that the central opaque stop matches your specific objective lens, as this critical component blocks zeroth order light and reveals fine specimen details.
Don’t overlook regular cleaning of all optical components—dust particles scatter light unpredictably and can considerably degrade the sharpness of your darkfield images.
Selecting the Right Numerical Aperture Combinations
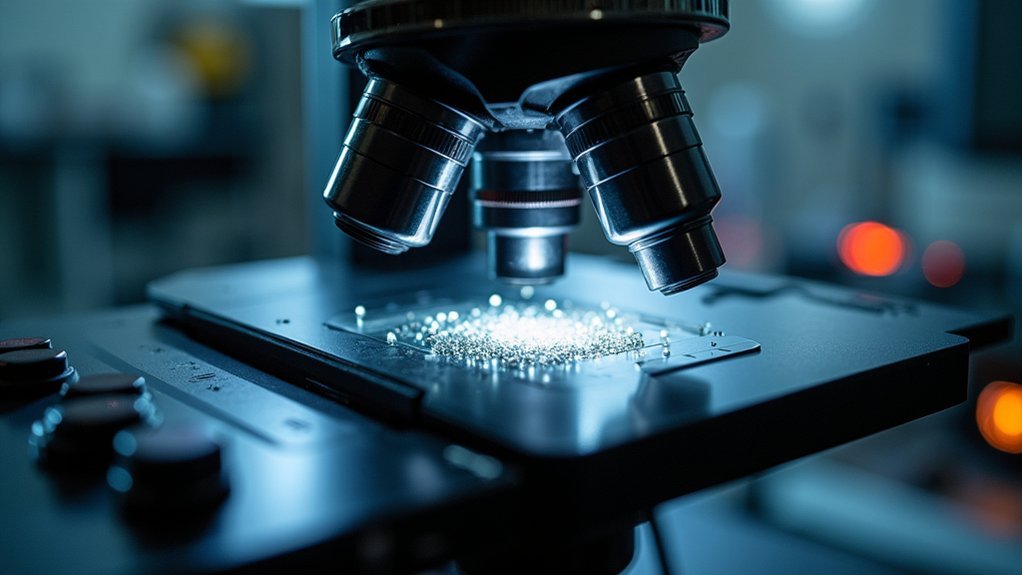
When setting up your darkfield microscope, you’ll need to match your condenser’s NA to exceed your objective lens’s NA (which should be 0.65 or less) to prevent unwanted glare.
You can quickly identify glare issues when your specimen appears washed out or lacks the characteristic bright objects against a dark background.
Using the appropriate spider stop size for your magnification further eliminates central light interference, ensuring your specimens stand out with crisp, high-contrast details.
NA Matching Matters
Understanding the relationship between your objective lens and condenser numerical apertures constitutes the foundation of successful darkfield microscopy. For ideal results, always guarantee your darkfield condenser’s NA exceeds that of your objective lens. This critical ratio controls the direction of light as it passes through the front lens and creates the perfect focal point for specimen illumination.
Select objective lenses with an NA of 0.65 or less for darkfield work, as higher values often compromise contrast. When setting up your microscope, adjust the open aperture lever to match your objective’s NA, preventing unwanted glare and enhancing image clarity.
For best results, use a darkfield slider specifically designed for your microscope model, and maintain proper condenser alignment to avoid aberrations from dust or misaligned optics.
Avoid Glare Issues
Controlling glare stands as the primary challenge in darkfield microscopy, directly impacting your image quality and specimen contrast. To overcome this obstacle, always verify your darkfield condenser’s numerical aperture exceeds that of your objective lens.
Select objective lenses with NA of 0.65 or lower for best results. You’ll need to match the open aperture lever to your objective’s NA to minimize unwanted light reflection.
For different magnifications, use appropriate spider stops: 16-18mm for 10x and 20-24mm for 20x/40x objectives.
Don’t overlook proper alignment and regular maintenance of high NA condensers. Dust particles on misaligned components create distracting glare points.
Some microscopists even place black paper beneath their stage to absorb stray light that might otherwise reflect upward and compromise your darkfield imaging.
Proper Specimen Preparation Techniques
Mastering proper specimen preparation forms the foundation of successful darkfield microscopy. Your slides should consistently measure 1 mm thick (± 0.1 mm) with immaculately clean surfaces, as even small particles will appear bright and distracting in your images.
Always prepare thin specimens to minimize diffraction artifacts that can degrade image quality. Select mounting media with refractive indices that complement your specimen type to maximize contrast and visibility under darkfield conditions.
The secret to exceptional darkfield imaging lies in minimizing diffraction through ultrathin specimens and precisely matched mounting media.
When mounting specimens, verify even distribution and eliminate air bubbles, which create unwanted bright spots in your images.
Remember to pair your central opaque stops with appropriate objectives—each combination requires specific sizing to effectively block zeroth order light while preserving detail and reducing glare.
These precision techniques will greatly improve your darkfield microscopy results.
Mastering Light Source Intensity Control
You’ll need to set your illuminator to high intensity when working with darkfield microscopy, as proper specimen visualization depends on light scattered from your sample.
Adjust your microscope’s light intensity control knob in small increments until you achieve the perfect balance where specimens appear bright against a dark background without creating glare.
Regular cleaning of optical components prevents unwanted light scattering that can compromise your carefully calibrated intensity settings.
Subheading Discussion Points
The art of achieving perfect darkfield images hinges considerably on how well you control your light source intensity. You’ll need to balance brightness to prevent glare while maintaining sufficient illumination to highlight specimens against the dark background.
| Setting | Purpose | Result | Best Practice | When to Adjust |
|---|---|---|---|---|
| Low Intensity | Reduce glare | Enhanced detail | Use for highly reflective specimens | When image appears washed out |
| High Intensity | Improve visibility | Better contrast | Required for translucent specimens | When background isn’t dark enough |
| Medium Intensity | Balanced viewing | Ideal clarity | Standard starting point | During initial setup |
| Variable Control | Fine-tuning | Precision imaging | Adjust incrementally | When focusing on specific features |
| Diffused Light | Softened illumination | Reduced harsh shadows | Use with dense specimens | When details appear too harsh |
Remember to clean optical components regularly to maintain light transmission efficiency and prevent scattered light that can diminish image sharpness.
Optimizing Illuminator Brightness Settings
While perfect darkfield microscopy depends on multiple factors, proper illuminator brightness settings form the cornerstone of exceptional image quality.
You’ll need a high-intensity light source to effectively visualize specimens against the dark background, but avoid overwhelming brightness that creates glare and obscures fine details.
Start by positioning your aperture lever to match your objective’s numerical aperture, ensuring only oblique rays illuminate the specimen.
Then observe your sample while gradually adjusting the illuminator brightness until you achieve ideal contrast with minimal background noise. This methodical approach reveals intricate structures that might otherwise remain hidden.
Remember to regularly calibrate your light source to maintain consistent brightness levels—fluctuations can greatly impact image quality and compromise your observations during extended microscopy sessions.
Preventing Light Saturation
Mastering light saturation control represents perhaps the most critical challenge in darkfield microscopy, as excessive illumination quickly transforms delicate specimen details into washed-out bright spots.
You’ll need to carefully adjust your light source intensity to avoid this common pitfall that obscures fine structural elements.
Deploy neutral density filters when working with light-sensitive specimens to maintain contrast while reducing potentially damaging brightness.
Pay close attention to the numerical aperture of your objective lens, ensuring it aligns with appropriate illumination levels to prevent glare.
Don’t overlook the importance of clean optics – dust particles scatter light and contribute to unwanted brightness.
For ideal results, use a spider stop or central opaque stop that matches your objective, effectively blocking direct light that would otherwise saturate your image.
Choosing Appropriate Slide Thickness and Quality

Because darkfield microscopy relies on scattered light against a dark background, your slide preparation considerably impacts image quality. Select slides approximately 1 mm thick (± 0.1 mm) to guarantee ideal illumination and clarity in your darkfield images.
You’ll need meticulously clean optical surfaces, as even minor dirt particles scatter light and appear as bright spots that can be mistaken for specimen details. Prepare thin specimen sections whenever possible—they’ll minimize diffraction artifacts and produce sharper images.
Your mounting media’s refractive index should match your specimen’s properties to avoid introducing distortions.
Before capturing images, always verify proper alignment between your slide and condenser setup. This attention to detail prevents focus inconsistencies and reduces unwanted glare from dust particles that might compromise your observations.
Centering the Opaque Stop for Even Illumination
The opaque stop sits at the heart of your darkfield system, functioning as the critical component that blocks direct light while allowing oblique rays to illuminate your specimen.
The opaque stop serves as the critical heart of darkfield microscopy, blocking direct light while permitting specimen illumination by oblique rays.
Precise centering is essential for even illumination across your entire field of view. To properly center your opaque stop, use the condenser’s centering screws to adjust until you achieve uniform brightness.
Any misalignment will cause glare and uneven illumination that compromises image quality. Ensure your darkfield condenser’s numerical aperture exceeds that of your objective lens for peak results.
Regular cleaning of the opaque stop prevents dust-related illumination variations. Remember to verify your microscope slide thickness is approximately 1 mm (± 0.1 mm) to maintain proper alignment and minimize diffraction artifacts during observation.
Eliminating Unwanted Glare and Reflections
Glare can transform an otherwise perfect darkfield image into a frustrating blur of scattered light and reduced contrast. To eliminate this problem, make certain your darkfield condenser aligns properly with your objective lens’ numerical aperture (NA). This alignment prevents stray light from degrading image clarity.
Select the appropriate opaque stop size for your objective lens—16-18mm works well for 10x objectives, while 20-24mm suits 20x/40x objectives. These stops effectively block zeroth order light that causes unwanted reflections.
Don’t overlook cleanliness—thoroughly clean all optical surfaces since even tiny dust particles scatter light and introduce glare.
When focusing, adjust the specimen stage height carefully using the coarse adjustment knob to avoid off-focus glare.
Finally, invest in high NA darkfield condensers that direct oblique light more effectively, minimizing aberrations for clearer images.
Cleaning and Maintaining Your Darkfield Equipment
Pristine optical components form the foundation of exceptional darkfield microscopy. Clean your condenser and objective lenses regularly with lens paper and appropriate solutions to prevent dirt from appearing as bright spots in your images.
Proper alignment of your darkfield condenser is essential—center it correctly to avoid glare from dust particles that can degrade image quality. Verify that numerical aperture settings match your objective lenses to guarantee ideal results.
Align your condenser precisely—proper centering and matched numerical apertures create stunning darkfield images free from distracting dust glare.
Don’t neglect routine maintenance checks on internal components like the spider stop, as imperfections can impair light projection and clarity.
After use, store your equipment in a dust-free environment and use protective covers to prevent contamination.
These simple maintenance habits will greatly enhance your darkfield imaging results and extend the life of your valuable equipment.
Fine-Tuning Focus for Maximum Detail Visibility
You’ll achieve striking detail in darkfield microscopy by mastering precise Z-axis adjustment techniques to find the ideal focal plane.
For best results, start with the coarse adjustment knob to bring your specimen into view, then switch to the fine adjustment knob to perfect the focus on specific structures.
Enhance edge contrast by ensuring your condenser NA exceeds your objective’s NA and by maintaining properly cleaned, aligned optical components that maximize light scattering from your carefully prepared thin specimens.
3 Subheading Discussion Points
When viewing specimens through a darkfield microscope, achieving crisp detail depends largely on precise focal adjustments. You’ll need to master both coarse and fine focus knobs to place your specimen exactly within the ideal focal plane.
Remember that specimen thickness matters greatly—keep your samples under 10 micrometers whenever possible to reduce unwanted light scattering.
- Start with a clean setup – Regularly clean all optical surfaces as dirt particles appear exceptionally bright in darkfield and can mask important details.
- Check your slide thickness – Use slides approximately 1 mm (± 0.1 mm) thick to maintain clarity and prevent diffraction artifacts.
- Align your condenser properly – A misaligned high numerical aperture condenser creates glare from dust particles that severely degrades image quality.
Precise Z-Axis Adjustment
Three essential millimeters separate extraordinary darkfield images from mediocre ones—the tiny range in which your Z-axis adjustment operates. This critical positioning guarantees your specimen occupies the ideal focal plane for maximum detail visibility.
You’ll need to master the fine adjustment knob for subtle stage height modifications, especially when working with transparent specimens. These minor tweaks reveal otherwise hidden details and minimize diffraction artifacts.
Always maintain the standard 1 mm (± 0.1 mm) slide thickness for consistent focusing performance.
Don’t overlook your darkfield condenser’s alignment—improper centering directly impacts Z-axis focus quality, causing unwanted glare and reduced image clarity.
When imaging thin specimens, your precision in Z-axis manipulation becomes particularly important. Each microscopic adjustment brings different structural elements into sharp relief.
Edge Contrast Enhancement
Edge contrast represents the defining characteristic of exceptional darkfield imagery. To achieve striking specimen outlines, verify your condenser’s numerical aperture exceeds that of your objective lens, maximizing oblique illumination.
After coarse adjustments, use the fine focus knob for precise focusing that reveals delicate specimen details.
For best edge definition:
- Prepare specimens approximately 1mm thick to minimize diffraction artifacts that can obscure fine structural details.
- Meticulously clean all optical components and slides, as dust particles scatter light and diminish contrast quality.
- Adjust the darkfield condenser’s diaphragm ring to control illumination intensity, finding the sweet spot where edges appear crisp and well-defined.
These adjustments will transform ordinary observations into striking high-contrast images that highlight structural features invisible in brightfield microscopy.
Frequently Asked Questions
What Are the Problems Associated With Dark Field Microscopy?
You’ll encounter problems in dark field microscopy including condenser misalignment causing glare, thick specimens scattering light, incorrect objectives with high numerical apertures, contaminants creating bright artifacts, and imprecise condenser centering affecting image quality.
What Is the Resolution Limit of a Dark Field Microscope?
Your dark field microscope’s resolution limit is typically 200-300 nanometers, determined by the formula 0.61λ/NA. You’ll achieve better resolution with higher numerical aperture objectives and shorter light wavelengths.
What Should You Do if Your Microscope Seems Very Dark When Looking Through It?
You should check your condenser alignment, guarantee correct slider insertion, adjust the aperture lever to match your objective’s NA, clean optical components, and increase your light source intensity for better visibility.
How to Achieve Dark Field Microscopy?
To achieve dark field microscopy, you’ll need to insert a darkfield slider, use objectives with NA below 0.65, align the condenser properly, and guarantee oblique illumination by blocking central light from reaching your specimen.
In Summary
You’ve now mastered the essentials of dark field microscopy! Remember, it’s not just about having the right equipment—it’s how you use it. Keep practicing these techniques and you’ll consistently capture stunning high-contrast images with brilliant details against dark backgrounds. Don’t hesitate to experiment with different settings as you continue to refine your microscopy skills.



Leave a Reply