
For ideal cross-polarized photography, mount a linear polarizer on your light source at 0° and a circular polarizer on your camera lens at 90°. Use low ISO (100-200), mid-range aperture (f/8-f/11), and slower shutter speeds to compensate for 3-5 stops of light loss. Position lights at 45° angles, 12-24 inches from your subject. Shoot in RAW with custom white balance using a gray card. These fundamentals will help you capture stunning, glare-free images with vibrant color detail.
Understanding the Principles of Cross-Polarization

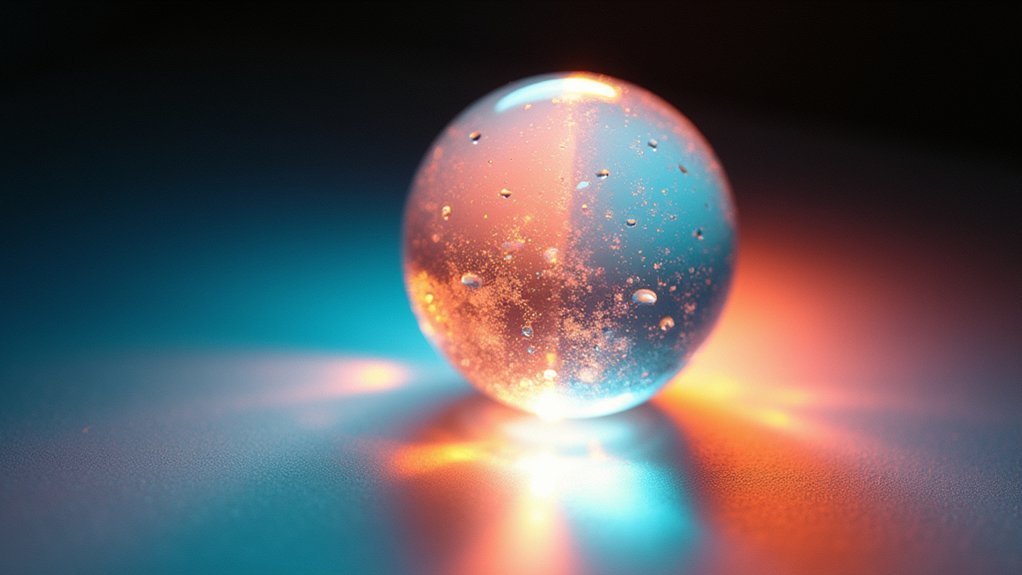
While many photographers struggle with unwanted reflections on shiny subjects, cross-polarization offers a powerful solution to this common problem. The technique involves strategically placing polarizing filters on both your light source and camera lens to control polarized light.
Cross-polarization eliminates unwanted reflections by strategically positioning filters on both light source and lens.
For ideal results, attach a linear polarizing filter to your light source and a circular polarizing filter to your camera lens. Position the filter on your light at a 90-degree angle relative to your lens filter—this orientation is vital for maximum glare reduction.
Remember that cross-polarization reduces light intensity by 3.5 to 5 stops, so a tripod is essential for stability.
To guarantee consistency across multiple sessions, mark the orientation of your polarizing filters on both lights and lens for easy setup in future shoots.
Essential Equipment for Polarized Light Microscopy
To set up an effective polarized light microscopy system, you’ll need two high-quality polarizing filters—one placed at the light source (oriented at 0°) and another on the microscope’s objective or camera adapter (rotated to 90°).
For best results, position your light source directly beneath or behind your specimen, ensuring even illumination without creating unwanted shadows or reflections.
Your specimens must be prepared as thin, uniform slices mounted on glass slides to maximize light transmission and reveal the distinctive birefringent patterns that make polarized microscopy so valuable.
Polarizing Filter Selection
The selection of proper polarizing filters forms the cornerstone of successful polarized light microscopy photography. For ideal results, you’ll want to use linear polarizing filters for your light source and circular polarizers for your camera lens. This combination delivers superior glare reduction and enhanced image quality.
Position your lens polarizer at 90 degrees relative to the light source polarizer to effectively eliminate unwanted reflections. Invest in high-quality filters from reputable brands like B+W or Hoya for better polarization efficiency and color accuracy.
Ensure your polarizing films are correctly sized and securely attached to your light source, providing complete coverage to block unpolarized light.
During setup, regularly check filter alignment as even minor shifts can compromise your cross-polarization effectiveness across photography sessions.
Light Source Positioning
Proper positioning of light sources dramatically influences the success of polarized light microscopy photography.
You’ll achieve the best results by placing your light sources at 45° angles to your subject, which minimizes unwanted reflections while maximizing the cross-polarization effect.
Ensure each light source has correctly oriented polarizing filters—typically perpendicular to your lens polarizer. Use multiple polarized light sources for even illumination and thorough glare reduction across your entire specimen.
For ideal control, eliminate competing ambient light so only your polarized sources illuminate the subject.
Test your setup by viewing through your camera’s monitor or viewfinder, making incremental adjustments until reflections disappear. This methodical approach lets you fine-tune the polarization effect, revealing details and contrast that would otherwise remain hidden under conventional lighting conditions.
Specimen Slide Preparation
Successful polarized light microscopy depends heavily on meticulous specimen slide preparation techniques that can make or break your photographic results. You’ll need to create thin, transparent sections to minimize light scattering when using polarizing film and filters on the lens.
| Preparation Factor | Effect | Solution |
|---|---|---|
| Thickness | Affects clarity | Cut ultra-thin sections |
| Mounting medium | Causes unwanted birefringence | Match refractive index to specimen |
| Orientation | Alters color patterns | Position at ideal angle to polarizer |
| Coverslip quality | Creates artifacts | Use bubble-free glass |
| Cleanliness | Reduces contrast | Keep polarizing film dust-free |
Select mounting media with refractive indices close to your specimen to prevent artificial birefringence. Position your sample at the correct angle relative to the polarizing filters—this orientation considerably impacts observed color patterns and contrast. Remember to regularly clean your polarizer filters to maintain ideal image quality.
Optimizing Camera Settings for Maximum Clarity
When capturing images with polarizers, precise camera settings become vital for achieving crystal-clear results. Set your ISO low (100-200) to minimize noise while working with your polarizing filter. This guarantees the maximum effect is preserved without digital artifacts compromising your images.
For ideal results:
- Use a moderate aperture (f/8-f/11) to maintain sharpness across your entire subject while providing sufficient depth of field.
- Select appropriate shutter speeds (often 1/10s or longer) to compensate for the light reduction caused by cross-polarization.
- Switch to manual focus for precise control, especially important in macro photography where minute details matter.
Always mount your camera on a sturdy tripod to eliminate movement during longer exposures, as stability directly impacts the clarity of your polarized images.
Light Source Positioning and Intensity Control
Strategic positioning of light sources creates the foundation for effective polarizer photography. You’ll achieve ideal results by placing your lights at 45° angles to your subject, maintaining a distance of 12-24 inches for proper exposure. This angle minimizes unwanted glare while maximizing the effectiveness of your polarizing setup.
Attach linear polarizing filters to all light sources to guarantee only polarized light reaches your subject. Remember that cross-polarization techniques reduce brightness considerably—typically by 3.5-5 stops—so you’ll need to adjust your light intensity accordingly. If your lights offer variable power settings, increase them to compensate for this light loss.
For the cleanest results, eliminate all ambient light sources during your shoot. This guarantees that only your controlled, polarized light illuminates the subject, producing the distinctive contrast and reflection control that makes this technique valuable.
Selecting the Right Polarizing Filters
When setting up your polarized photography system, you’ll need to distinguish between linear polarizers (ideal for light sources) and circular polarizers (best for camera lenses).
Your filter quality directly impacts your results, so invest in reputable brands like B+W or Hoya rather than budget options that can introduce unwanted artifacts.
Remember to properly orient your filters perpendicular to each other to achieve maximum glare reduction and the richest colors in your final images.
Linear vs. Circular Filters
How can you choose between linear and circular polarizing filters for best results? The decision hinges on your specific setup and shooting needs.
Linear polarizers work best on light sources to minimize reflections, while circular polarizers are ideal for camera lenses, especially with autofocus systems.
When setting up crossed polarizer photography, remember:
- Mount the linear polarizer on your light source, aligned parallel to your lens’s circular polarizer for maximum glare reduction.
- Use the circular polarizer’s rotating ring to fine-tune the polarization effect based on your subject’s surface properties.
- Choose circular polarizers for cameras with autofocus systems, as linear options may interfere with metering functions.
Your specific shooting environment and subject material should ultimately guide your filter selection, as different surfaces respond uniquely to each polarizer type.
Quality Matters Tremendously
After understanding the differences between linear and circular polarizers, your next consideration should focus on filter quality. When placing a polarizer on the lens, remember that quality matters greatly—it directly affects light transmission and image clarity.
Choose respected brands like B+W or Hoya to guarantee peak performance. Linear polarizers typically outperform circular options for cross-polarization setups, delivering superior results with specialized lighting.
| Brand | Filter Type | Best Use Case |
|---|---|---|
| B+W | Linear | Studio work |
| Hoya | Linear | Product photography |
| Rosco | Film | Background materials |
| Tiffen | Circular | Landscape photography |
| NiSi | Circular | Architecture photography |
Always match your filter size to your lens diameter to prevent vignetting. High-quality polarizers enhance color saturation and contrast, transforming ordinary shots into vibrant, detailed images with minimal glare.
Specimen Preparation Techniques

The proper preparation of specimens forms the foundation of successful cross-polarization photography. Before you position your filter or adjust your flash, verify your specimens are clean and dry to minimize unwanted reflections.
Place them on a flat, non-reflective base to control light behavior and enhance image quality.
For best results with your specimens:
- Position them at a slight angle to your light source to reduce direct reflection and improve filter effectiveness.
- Choose contrasting backgrounds for transparent or glossy subjects to enhance detail visibility.
- Test various lighting configurations before final capture to determine the ideal setup.
For challenging specimens, you’ll find that proper preparation greatly reduces post-processing work and creates images with richer details and more accurate color representation.
Achieving Perfect Filter Alignment
Proper alignment of your polarizing filters stands as the most critical factor in creating stunning cross-polarization photographs. Position your linear polarizer on the light source perpendicular to the circular polarizer on your camera lens to maximize glare reduction.
Use a mirror to verify your setup’s effectiveness by rotating the lens polarizer until reflections appear darkest. When working with multiple light sources, make certain all polarizing films align uniformly in the same direction for consistent results.
Fine-tune by rotating your lens polarizer while looking through the viewfinder—even slight adjustments can dramatically improve image quality by minimizing unwanted highlights and reflections.
After achieving ideal alignment, mark the positions of your polarizers to streamline future setups and maintain consistency in your cross-polarization photography workflow.
Exposure Compensation in Cross-Polarized Imaging

When working with cross-polarized setups, you’ll immediately notice a significant reduction in light reaching your sensor—typically between 3.5 to 5 stops of light loss.
This dramatic decrease requires deliberate exposure compensation to prevent underexposed images.
To effectively manage exposure when using polarizing filters:
- Monitor your histogram after attaching filters and adjust exposure compensation accordingly—often requiring +2 to +3 stops.
- Consider switching to manual mode for precise control over aperture and shutter speed settings rather than relying on automatic metering.
- Test different compensation values based on subject reflectivity—highly reflective surfaces may need additional adjustment.
Always take test shots with your polarizing filters in position before committing to a full shoot, as camera metering systems often struggle to accurately evaluate scenes through crossed polarizers.
Color Management and White Balance Considerations
When shooting with polarizers, you’ll encounter significant color balance shifts that require careful white balance adjustment.
Your polarizing filters can introduce unexpected color temperature changes, creating cooler or warmer tones depending on filter orientation and lighting conditions.
To maintain accurate color reproduction, set a custom white balance using a gray card under your shooting conditions, or select an appropriate preset that matches your lighting environment.
Color Balance Shifts
Although polarizers enhance contrast and reduce glare, they can greatly impact your image’s color temperature and balance. When using crossed polarizers, you’ll notice color balance shifts that require careful management to maintain accurate reproduction.
To minimize unwanted color casts:
- Set your white balance correctly before shooting, as polarizing filters affect light temperature differently depending on their angle and position.
- Shoot in RAW format to preserve maximum information for post-processing adjustments without quality loss.
- Use a color checker card in your test shots to establish a reliable reference point for consistent calibration.
Test different angles between your polarizers, as their interaction with light can greatly shift color hues.
Compare results from multiple polarizer brands to identify which produces the most neutral color rendition for your specific lighting conditions.
Filter-Induced Temperature Changes
Beyond the color balance shifts we’ve discussed, polarizing filters directly impact your image’s color temperature in predictable ways.
Circular polarizing filters typically produce cooler tones, particularly enhancing blues in your photographs. This filter-induced temperature change requires careful white balance management to maintain accurate color reproduction.
To combat these shifts, take test shots with and without your polarizer before committing to your main composition. Using a gray card to establish a baseline can prove invaluable for consistent results.
When possible, set a custom white balance on your camera to counteract the polarizer’s color cast automatically.
If you’re shooting in changing conditions, remember that polarizers affect different lighting scenarios uniquely. You’ll likely need to adjust your white balance settings throughout your session to compensate for these temperature variations.
Focus Stacking for Enhanced Depth of Field

Despite the creative control that polarizers offer, they can’t overcome the physical limitations of depth of field—especially in macro photography.
When working with polarizing filters, you’ll need to employ focus stacking to achieve complete sharpness throughout your subject.
For ideal results with focus stacking:
- Set your aperture between f/8 and f/16 to balance depth of field with diffraction effects.
- Keep your camera on a sturdy tripod to eliminate parallax issues during the shooting sequence.
- Maintain consistent lighting and camera settings across all frames to guarantee uniform exposure.
Software like Adobe Photoshop or Helicon Focus can then merge your series of differently-focused images into one perfectly sharp composite.
This technique is particularly valuable when your polarizing filters are reducing available light, making wider apertures necessary for proper exposure.
Troubleshooting Common Cross-Polarization Issues
Even when you’ve invested in quality polarizing equipment, cross-polarization techniques can present frustrating challenges that compromise your final images. When troubleshooting, first check your polarizing filter orientation by rotating it while viewing through your camera to find the position that minimizes reflections.
| Issue | Cause | Solution |
|---|---|---|
| Persistent blue reflections | Incorrect angle of incidence | Adjust light positioning or camera angle |
| Partial glare reduction | Undersized polarization film | Use larger polarizing sheets for complete coverage |
| Uneven polarization | Multi-faceted surfaces | Add diffusion to blend harsh lighting |
| Ineffective cross-polarization | Misaligned polarizing filters | Verify perpendicular orientation between light source film and lens filter |
If problems persist after proper alignment, experiment with diffusion techniques to soften your lighting. Remember that surface texture greatly impacts polarization effectiveness, so adapt your approach accordingly.
Post-Processing Workflow for Polarized Microscopy Images
While capturing perfect polarized microscopy images is essential, your post-processing workflow will ultimately determine the scientific and aesthetic value of your final results.
Begin by adjusting brightness and contrast to enhance details and reduce any residual glare in your polarized images.
Optimize your workflow with these critical steps:
- Apply noise reduction tools to minimize unwanted artifacts, particularly in darker regions where cross-polarization techniques can emphasize noise.
- Implement accurate color correction to guarantee the specimen’s true appearance is maintained, adjusting hue and saturation as needed.
- Crop images strategically to eliminate distracting elements and focus attention on the specimen.
Always save your post-processing work in high resolution to preserve image quality for future analysis or publication.
Advanced Techniques for Specialized Specimen Types
Moving beyond standard post-processing methods, let’s examine how different specimen types require tailored polarization approaches.
When working with wet specimens or reflective surfaces, you’ll need both a linear polarizing filter on your light source and a circular polarizing filter on your camera lens to eliminate unwanted glare.
Position your flash units at 45° angles to the specimen, ensuring the polarizing film is perpendicular to the lens polarizer for effective cross-polarization.
For particularly challenging reflective surfaces, use larger polarizing gel sheets placed at greater distances from your lights.
Don’t forget to regularly check filter alignment during setup—even minor misalignments can compromise your results.
Try adding diffusion materials over your light sources for softer illumination while maintaining polarization benefits, giving you greater control over highlights in these specialized specimens.
Frequently Asked Questions
What Happens to Light if It Goes Through Two Polarizers That Are Crossed?
When you pass light through two polarizers at 90 degrees to each other, you’ll see complete darkness. The first polarizer only allows certain light waves through, while the second blocks them entirely.
What Angle Should a Polarizing Filter Be to the Sun for Best Results?
For best results, position your polarizing filter at a 90-degree angle to the sun. You’ll get maximum glare reduction when the sun is 30-60 degrees in elevation and your filter is perpendicular to sunlight.
How Much Light Goes Through Perpendicular Polarizers?
When you use perpendicular polarizers (oriented at 90° to each other), only about 1% of the incident light passes through. This follows Malus’s Law, where light transmission decreases according to the cosine squared of the angle.
How Do You Take Pictures With a Circular Polarizer?
You’ll need to attach the circular polarizer to your lens, then rotate it while viewing through your camera to find the ideal position. Adjust exposure settings to compensate for the 1-2 stop light reduction.
In Summary
By mastering cross-polarized light photography, you’ll reveal extraordinary visual details invisible to the naked eye. Remember to fine-tune your polarizer angles, optimize exposure settings, and position your light source correctly for best results. Don’t hesitate to experiment with focus stacking and post-processing techniques. With practice, you’ll overcome common challenges and create stunning images that reveal the hidden microscopic world in remarkable clarity.


Leave a Reply