
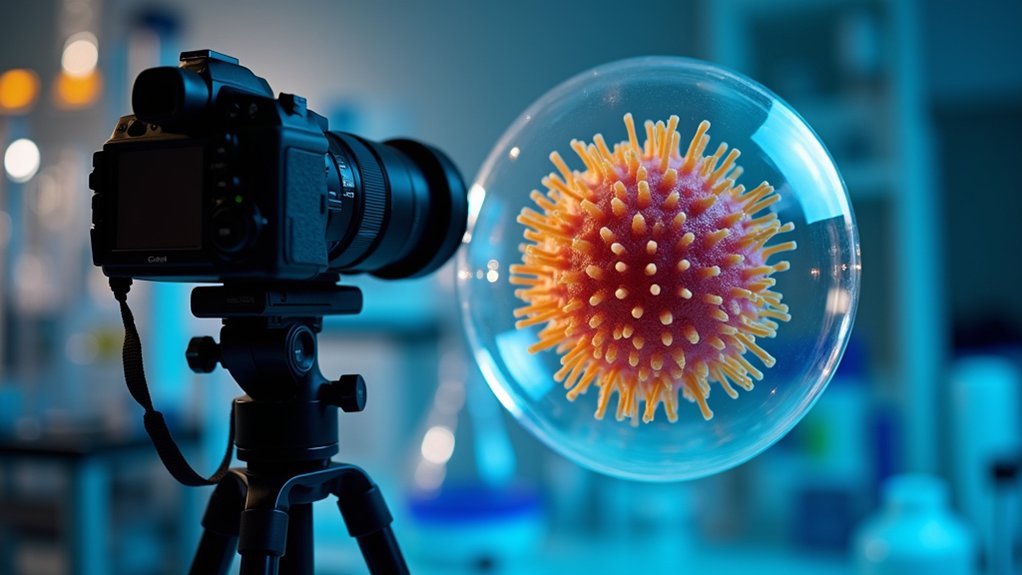
For ideal scientific imaging, set your camera to RAW format and use Adobe RGB color space. Keep ISO below 1600 to minimize noise, while maintaining aperture between f/5.6-f/8 for maximum sharpness. Balance exposure times with your specimen’s light properties, starting around 10 seconds. Calibrate white balance with a gray card and monitor your histogram to avoid under/overexposure. These foundational adjustments will dramatically improve your specimen documentation quality and research validity.
Optimal Camera Settings for Clear Scientific Imaging
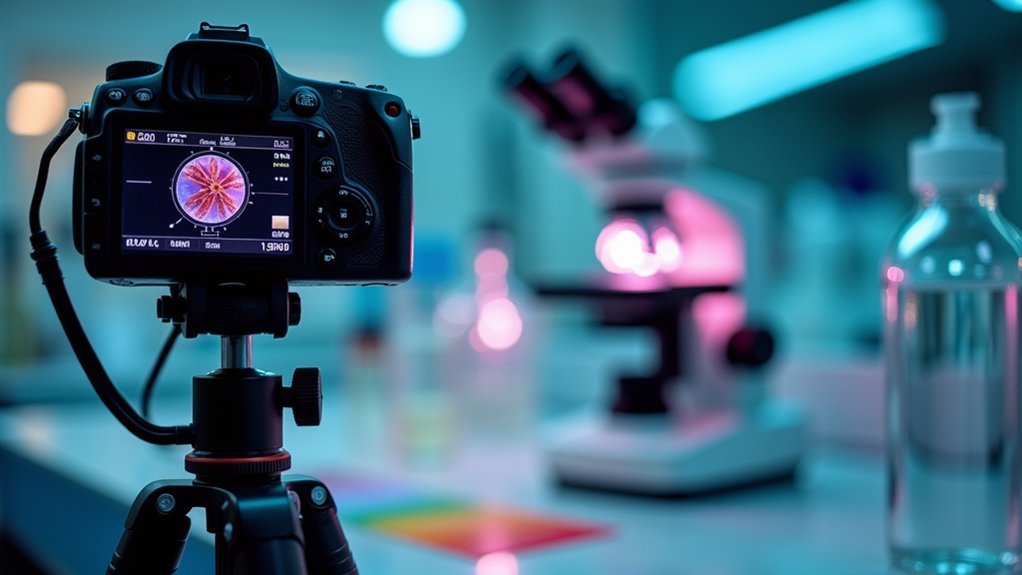
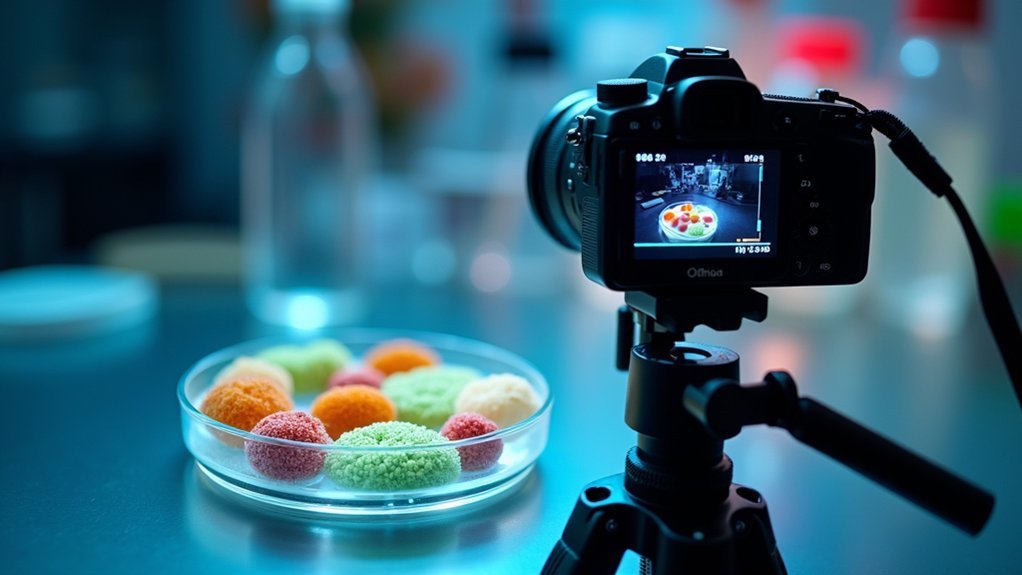
When capturing scientific imagery, your camera settings can make the difference between mediocre results and publication-quality documentation.
Start by setting your camera to RAW format to preserve maximum color and light information, enabling detailed post-processing that JPEG can’t match.
RAW format preserves the full spectrum of light data, giving scientists control to extract critical details invisible in compressed formats.
Choose Adobe RGB over sRGB color space to capture a wider color gamut, resulting in more accurate representation of your specimens.
Keep your ISO below 1250 to minimize noise while maintaining image clarity, particularly essential in low-light microscopy work.
For ideal image quality, switch to manual mode for complete control over exposure variables.
Set your aperture between f/5.6 and f/8 to achieve the sharpest images possible while avoiding diffraction issues that compromise detail at smaller apertures.
Understanding Light Intensity in Microscopy Applications
While mastering camera settings forms the foundation for scientific imaging, light intensity management represents the cornerstone of microscopy excellence.
You’ll achieve clearer images by optimizing your signal-to-noise ratio through higher photon counts.
When evaluating intensity data, you’ll need to understand gain conversion factors that translate ADUs to actual photons, as measurements often appear in arbitrary units.
Different camera technologies like CCD and EMCCD operate with distinct “sweet spots” where performance peaks based on their unique noise characteristics.
Remember that read noise, measured in e- rms, markedly impacts image quality.
To maximize light capture, adjust your exposure time and shutter speed appropriately.
Longer exposures collect more photons but might introduce rotation issues with non-equatorial mounts.
Finding this balance is essential for producing publication-quality microscopy images.
Selecting Appropriate Exposure Times for Scientific Specimens
How effectively you balance exposure times can make the difference between capturing meaningful scientific data and producing unusable images. Start with shorter exposures around 10 seconds, then adjust based on your specimen’s brightness and tracking stability.
- Begin with high ISO settings for initial short exposures
- Monitor your histogram—it should shift away from the left edge for ideal exposure
- Gradually decrease ISO while increasing exposure time to find the best balance
- Consider extending exposures up to 5 minutes if your tracking system allows
- Watch noise levels carefully, especially when using high ISO settings
The key is experimentation—each specimen has unique light properties requiring specific exposure times.
Your goal is to maximize detail capture while maintaining a strong signal-to-noise ratio throughout your imaging session.
ISO Selection to Balance Detail and Noise Levels
When configuring your scientific imaging system, start with a low ISO baseline (below 1600) to establish a foundation for minimal noise in your captures.
You’ll need to analyze the signal-to-noise ratio of your test images, checking histograms to verify peaks don’t fall on the left edge while maintaining sufficient detail in darker regions.
For best results, implement ISO gain compensation techniques—using higher settings for initial focusing and composition, then reducing ISO while extending exposure times for final captures that maximize detail without introducing destructive noise.
Low ISO Baseline
The foundation of scientific imaging excellence begins with selecting the appropriate ISO setting. When capturing scientific images, you’ll want to establish a low ISO baseline—typically below 1250 or 1600—to minimize noise and maximize detail.
Low ISO settings are critical for preserving the integrity of your data, especially in challenging low-light conditions.
- Start with the lowest practical ISO setting your camera offers
- Conduct camera-specific tests to determine your equipment’s ideal ISO threshold
- Increase ISO gradually only when necessary for proper exposure
- Pair low ISO with appropriate aperture and exposure time settings
- Remember that different camera models have varying noise performance at identical ISO values
Signal-to-Noise Ratio Analysis
Beyond setting a low ISO baseline, understanding signal-to-noise ratio (SNR) becomes your next priority for scientific imaging excellence.
As you capture more photons, your SNR improves, resulting in clearer images with reduced noise artifacts.
Keep your ISO settings below 1250-1600, even in challenging light conditions.
When you increase ISO, you’re fundamentally amplifying both signal and noise—with noise gaining prominence at higher values.
Instead of boosting ISO, consider extending exposure time to gather more light naturally.
When evaluating camera performance, pay attention to read noise measurements (e- rms), as they directly impact your achievable SNR.
Always maintain consistent exposure parameters when comparing images; variations can mislead your analysis of noise levels and overall data quality.
ISO Gain Compensation
Selecting ideal ISO settings requires careful balancing between noise control and exposure requirements for scientific imaging.
You’ll want to keep your ISO below 1250-1600 to preserve image quality while maintaining adequate brightness in low-light conditions. When capturing dynamic subjects, consider ISO 800 for shorter exposures, but be aware of potential noise introduction in darker areas.
- Monitor your histogram to avoid underexposure, ensuring the peak isn’t pressed against the left edge
- Follow the reciprocal rule: shutter speed should exceed 1/(equivalent 35mm focal length)
- Use ISO adjustments strategically to achieve shorter exposure times
- Balance noise control with the need for adequate detail capture
- Higher ISO settings can be acceptable when they help preserve dynamic range in scientific data collection
Aperture Considerations for Depth of Field in Microscopy
In microscopy imaging, you’ll achieve the best results by using apertures between f/5.6 and f/8, which balance sharpness with sufficient depth of field.
You can visualize field depth changes by adjusting your aperture—smaller values like f/6.3 enhance depth of field, making more of your specimen appear in focus.
Remember that extremely small apertures (f/22 or f/32) cause diffraction that degrades image quality, while your specific objective lens may have its own ideal aperture setting for maximum detail capture.
Optimal Aperture Range
While successful scientific imaging depends on multiple factors, the aperture setting stands as a critical determinant of image quality in microscopy applications.
For ideal results, you’ll want to maintain your aperture between f/5.6 and f/8, which effectively balances light intake and depth of field without introducing diffraction.
- Avoid extremely small apertures (f/22, f/32) as they cause diffraction that reduces image sharpness
- Consider using wider apertures for fixed samples to maximize light collection
- Select narrower apertures for live cell imaging to achieve greater depth of field
- Remember that changing aperture affects exposure, requiring adjustments to shutter speed or ISO
- Always tailor your aperture selection to your specific sample characteristics and imaging objectives
Finding this balance guarantees you’ll capture the clearest possible images while maintaining appropriate depth of field for your scientific specimens.
Field Depth Visualization
Depth of field serves as the cornerstone of effective scientific visualization, allowing you to control precisely how much of your specimen appears in sharp focus. When working with microscopy, selecting the right aperture directly impacts your ability to capture three-dimensional structures clearly.
| Aperture Setting | Effect on Depth of Field |
|---|---|
| f/2.8 | Very shallow, limited focus plane |
| f/4 | Shallow, critical structures only |
| f/5.6 | Ideal balance of clarity and depth |
| f/8 | Maximized depth without diffraction |
| f/11+ | Excessive depth, potential diffraction |
You’ll find the sweet spot between f/5.6 and f/8, which provides sufficient depth of field while avoiding diffraction that diminishes image quality. Remember to adjust your exposure settings accordingly, as smaller apertures reduce light transmission through your microscope system.
White Balance Calibration for Accurate Color Reproduction
Accurate color reproduction depends critically on proper white balance calibration when conducting scientific imaging. Without it, color casts from varying light sources can compromise your data’s integrity.
You’ll need to routinely adjust your white balance to guarantee colors in your images truly reflect your sample’s characteristics.
- Use a gray card or white balance target for precise calibration
- Consider custom white balance settings instead of relying on presets
- Recalibrate during long sessions or when lighting conditions change
- Capture with accurate white balance from the start to minimize post-processing
- Remember that different lighting sources (tungsten, fluorescent, LED) require different calibration
While post-processing software offers white balance correction, starting with properly calibrated images preserves quality and saves time.
Your scientific conclusions may depend on subtle color distinctions that only proper white balance can reveal.
Gain Control for Low-Light Microscope Imaging
When adjusting gain for low-light microscope imaging, you’ll need to find the precise balance between amplifying weak signals and controlling noise introduction.
You can optimize this balance by first determining the minimum exposure time needed for your specimen, then incrementally increasing gain until faint structures become visible without compromising image quality.
EMCCD and sCMOS cameras each have their own “sweet spot” settings, so regular calibration will guarantee you’re capturing the highest quality data while maintaining acceptable signal-to-noise ratios.
Gain Control Subheading Discussion Points
Although often overlooked by novice microscopists, gain control represents a critical parameter in low-light imaging scenarios where every photon counts.
When you’re capturing faint fluorescent structures, properly adjusting your camera’s gain can dramatically improve your signal-to-noise ratio without sacrificing resolution.
- Set your gain to minimize read noise while still enhancing signal detection, especially with EMCCD cameras
- Avoid excessive gain settings that introduce unnecessary noise into your images
- Use gain adjustment to reduce exposure times when capturing dynamic processes
- Find the ideal “sweet spot” where signal amplification doesn’t detract from image quality
- Familiarize yourself with your specific camera’s gain characteristics and how they interact with your optical system
Noise vs. Signal Balance
Balancing noise and signal represents the fundamental challenge of low-light microscopy imaging. When you increase gain settings, you’ll amplify both your desired signal and the unwanted noise simultaneously.
Finding your camera’s “sweet spot” is essential for ideal results. Your signal-to-noise ratio improves as you capture more photons, making gain adjustment a vital skill. Too much gain introduces excessive noise, while too little may leave important details hidden.
Always consider your camera’s read noise (measured in e- rms) when determining appropriate settings. For meaningful data analysis, convert your analog-to-digital units (ADUs) to actual photon counts using the proper gain conversion factors.
This translation helps you accurately assess the true signal you’ve captured and make informed decisions about your imaging parameters.
Exposure Time Tradeoffs
Setting ideal exposure times represents a critical decision point in low-light microscopy imaging. You’ll need to balance your exposure time with gain settings to achieve the best image quality.
When working with dynamic samples, consider these tradeoffs:
- Longer exposure times capture more light but increase risk of motion blur, especially in live specimens.
- Higher gain settings allow for shorter exposure times while maintaining detail, though noise may increase.
- Start with lower gain and gradually increase while reducing exposure time until you find the best signal-to-noise ratio.
- Different camera technologies respond uniquely—EMCCD cameras excel with high gain in low light, while sCMOS requires careful adjustment.
- Monitor your histogram during imaging to guarantee your sample isn’t under or overexposed, making adjustments as needed.
Resolution Settings for Scientific Documentation
The five essential resolution settings for scientific documentation can make or break your research imagery. Always capture at your camera’s highest resolution to maximize pixel count and detail retention. This guarantees you’ll have the highest quality images for scientific analysis and future reference.
Choose RAW format over JPEG to preserve all image data, giving you greater flexibility during post-processing. When configuring your settings, confirm resolution is at least twice the typical screen resolution for proper on-screen viewing.
Frame your shots carefully to avoid post-processing crops that diminish resolution. For text documentation requiring OCR, use black and white mode with your camera positioned perpendicular to the subject.
This combination of resolution settings maximizes clarity and data preservation essential for scientific validity.
Histogram Analysis for Optimal Dynamic Range
Why do professional scientific photographers obsess over histograms? These graphical representations provide critical exposure information that guarantees you capture all details necessary for scientific analysis.
Your histogram shows the distribution of pixel intensity, from shadows (left) to highlights (right).
For ideal scientific imaging:
- Position the histogram peak slightly right of center without clipping to maximize dynamic range
- Watch for leftward skewing, which indicates underexposure and potential loss of shadow detail
- Avoid rightward peaking that signals overexposure and lost highlight information
- Aim for distribution across the full width to capture complete tonal range
- Check your histogram regularly during sessions to make real-time exposure adjustments
Camera Binning Techniques to Enhance Sensitivity
While histogram analysis helps you optimize exposure, another powerful technique addresses the fundamental challenge of low-light scientific imaging. Camera binning combines adjacent pixels to greatly increase sensitivity and reduce noise in your scientific images.
When you activate binning, you’re making a calculated trade-off between resolution and signal quality. You’ll sacrifice some spatial detail but gain dramatically improved signal-to-noise ratio—crucial for visualizing faint structures or capturing dynamic processes.
| Binning Mode | Sensitivity Increase | Resolution Impact | Ideal Application |
|---|---|---|---|
| 1×1 (None) | None | Maximum | High-detail, bright samples |
| 2×2 | 4× higher | Reduced by half | General low-light imaging |
| 3×3 | 9× higher | Considerably reduced | Extremely dim samples |
| 4×4 | 16× higher | Greatly reduced | Ultra-fast dynamic processes |
Consider using lower binning settings when you need to balance sensitivity with maintaining sufficient structural detail.
Exposure Bracketing for High Dynamic Range Samples
Scientific samples with extreme brightness variations can exceed your camera’s dynamic range, causing frustrating detail loss in both shadows and highlights.
Exposure bracketing solves this problem by capturing multiple images at different exposure levels, which you’ll later merge into a single HDR image with the highest resolution possible.
To implement effective exposure bracketing:
- Take at least three shots: one properly exposed, one underexposed, and one overexposed
- Adjust only your shutter speed in 1-stop increments between shots
- Maintain consistent ISO settings across all images to prevent noise variation
- Use a tripod to guarantee perfect alignment between bracketed images
- Keep aperture constant to maintain consistent depth of field
This technique preserves vital details in both bright and dark regions, essential for accurate scientific analysis and documentation.
Live Mode vs. Capture Mode Settings Optimization
Maximizing the quality of scientific images requires understanding the distinct advantages of both Live Mode and Capture Mode on your camera.
In live mode, you’ll monitor real-time adjustments to exposure, focus, and framing before capturing your image. Experiment with different gain settings to balance detail and noise while adjusting white balance to match lighting conditions. This preview stage guarantees you’re properly set up before committing to an image.
Live mode offers the crucial preview stage where real-time adjustments ensure optimal setup before final image capture.
Switch to capture mode for final image acquisition, where manual exposure controls become vital. Fine-tune your ISO, aperture, and shutter speed based on your specific scientific subject.
Use histogram feedback to verify ideal exposure without clipping. Remember that precise white balance remains essential in both modes for accurate color representation, which is fundamental for subsequent scientific analysis.
File Format Selection for Scientific Documentation
Choosing the correct file format represents one of the most vital decisions you’ll make in scientific imaging. RAW files capture over 260,000 times more light and color information than JPEGs, providing superior data retention necessary for accurate scientific analysis.
When documenting research through photography, format selection can greatly impact your ability to interpret and present findings.
- RAW file format preserves all original sensor data, allowing post-capture adjustments without quality degradation
- JPEG compression discards vital information, compromising scientific accuracy
- Consider using RAW + JPEG settings to balance data preservation with shareability
- Format selection should align with your field’s specific requirements and analysis software
- RAW files enable essential exposure and white balance corrections without destroying underlying data
Frequently Asked Questions
What Is the Best Setting for Image Quality?
For the best image quality, you’ll want to set your camera to RAW format. It captures over 260,000 times more color and light information than JPEG, giving you more vibrant colors and editing flexibility.
How to Get the Sharpest Image?
To get the sharpest image, you’ll want to shoot in RAW, use apertures between f/5.6-f/8, keep shutter speeds fast enough to prevent shake, maintain low ISO, and utilize back-button focus for precise control.
What Are the 3 Most Important Camera Settings?
For the sharpest images, you’ll need to prioritize proper aperture (f/5.6-f/8), low ISO (below 1600), and RAW format. These three settings maximize detail while minimizing noise in your scientific photography work.
How Do I Make My Camera Quality Clear?
You’ll get clearer photos by shooting in RAW, lowering your ISO (under 1250), using proper shutter speed to avoid shake, and setting aperture between f/5.6-f/8 for ideal sharpness. Clean your lens regularly too.
In Summary
When you’re capturing scientific images, you’ll need to balance all these technical elements as a cohesive system. Remember that your settings should serve your research objectives, not just produce aesthetically pleasing images. By methodically optimizing exposure, ISO, aperture, and file format for each specific application, you’ll generate consistent, reproducible results that accurately represent your specimens and strengthen your scientific documentation.


Leave a Reply