To convert pixels to microns for accurate scale bars, you’ll need to determine your imaging system’s pixel size. Establish calibration by measuring a known reference object (like a micrometer slide) and dividing its actual size by pixel count. In ImageJ, use Analyze > Set Scale to input this relationship (e.g., 100 pixels = 645 μm). Always verify your calibration by measuring known biological structures. The difference between proper and improper calibration can dramatically impact your scientific conclusions.
Understanding Pixel-to-Micron Conversion
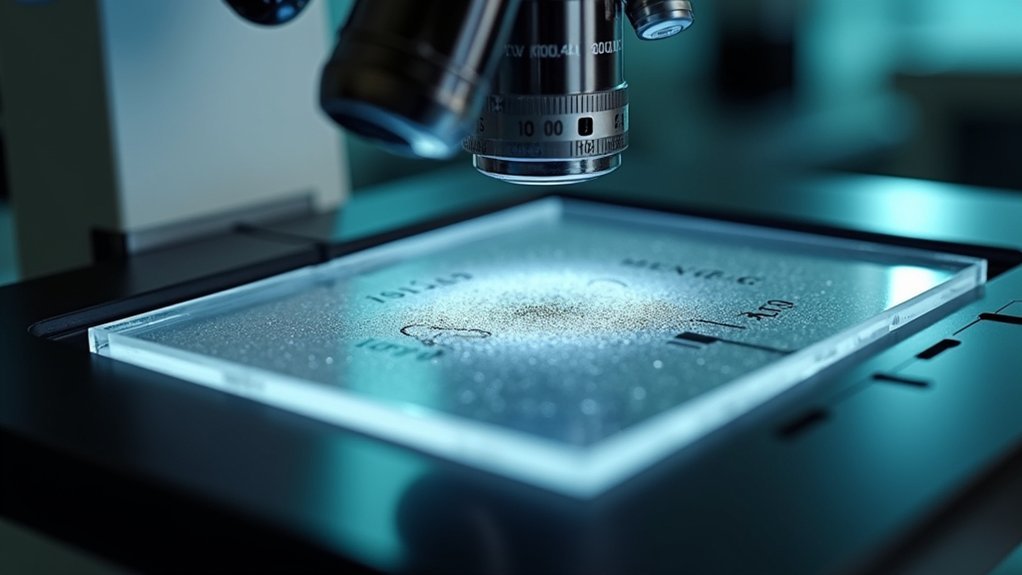
When analyzing microscopy images, you’ll need to translate what you see on screen into real-world measurements. This conversion process is essential for accurate scientific analysis of cellular structures.
With a pixel size of 6.45 × 6.45 µm in your imaging system, each pixel represents this physical dimension in your samples. To properly calibrate your images, use analysis software like ImageJ where you can establish that 100 pixels correspond to 645 µm. This scale setting enables precise measurements in micrometers rather than arbitrary pixel counts.
Precise calibration converts pixels to microns, transforming abstract digital units into meaningful biological measurements.
For reference, monocytes (15-25 µm) appear as approximately 2×2 to 4×4 pixel objects, which can help verify your calibration.
Remember that incorrect pixel-to-micron conversion can greatly impact your interpretation of cellular dimensions and experimental results.
Finding Scale Information in Image Metadata
Image metadata serves as a treasure trove of scale information that you’ll need for proper calibration.
You can extract EXIF data through ImageJ’s “Show Info” function (Ctrl+I), but be aware that different file formats store scaling details in varying locations and formats.
While FIJI often applies default scale settings based on metadata automatically, you should always verify these values manually to guarantee accurate measurements for your scientific analysis.
EXIF Data Extraction
Why manually measure scale bars when your image might already contain the exact calibration information you need? Many scientific image formats store essential calibration details directly in their metadata.
EXIF data extraction can reveal pixel dimensions, resolution, and even pre-calibrated units in micrometers.
To access this valuable information in FIJI, simply use “Image – Show Info” command to view embedded scale data. When importing files with bio-formats, remember to select the “Display Metadata” option, which reveals vital calibration information.
The best part? If your image contains proper scale information, FIJI often calibrates automatically upon opening, instantly converting measurements from pixels to microns.
This eliminates the need for manual calibration and reduces potential measurement errors in your scientific analysis.
File Format Considerations
Different image file formats store calibration data in unique ways, which can considerably impact how you access scale information.
When using bio-formats importer, you’ll find scale information in the metadata of most scientific formats, often listing pixel size in microns or other appropriate units.
To access this valuable data, make sure you’ve selected “Display Metadata” in your bio-formats settings. You can verify scale calibration by checking “Image – Properties” in FIJI, which displays the current microns per pixel conversion.
Even without bio-formats, you can view scale information through “Image – Show Info,” revealing the metadata directly from your image file.
Remember that accurate analysis depends on proper pixel size information being present in your files’ metadata.
Default Scale Settings
Three key places in FIJI automatically display scale information embedded in your image metadata. When you open files with proper calibration, FIJI reads this information and sets the scale correctly without requiring manual intervention.
The Image Properties dialog (Ctrl+Shift+P) shows the current microns/pixel value, which is essential for accurate measurements.
- Check Image > Properties to view and modify the current scale settings
- Enable “Display Metadata” in bio-formats importer to examine calibration details
- Look for unit information (typically in microns) within the file’s metadata
- For uncalibrated images, manually set the scale by entering known conversion factors
If your images lack proper calibration, you’ll need to set the scale manually to guarantee measurement accuracy – particularly important for scientific analysis and publication.
Manual Calibration Using Known Reference Objects
When working with microscopic images, you’ll need to establish an accurate scale to make meaningful measurements. To calibrate your image using reference objects, measure the size of a known object in pixels and compare it to its actual size in micrometers.
For example, if your reference object is 100 µm and appears as 645 pixels in your image, your calibration factor is 6.45 pixels/µm. In ImageJ, navigate to Analyze > Set Scale and enter these values to convert from pixels to micrometers.
Always maintain consistent microscope settings throughout your calibration process to guarantee accuracy across different images.
To verify your calibration’s precision, measure objects with known dimensions, such as monocytes (15-25 µm), and check if your measurements align with expected values.
Setting Up ImageJ for Accurate Scaling
You’ll need to download and install ImageJ from the official website before accessing its powerful measurement capabilities.
Navigate to the Analyze menu and select “Set Scale” to input your known dimensions (645 μm per 100 pixels) and verify the unit is set to micrometers.
After setting the global scale parameters, confirm your calibration by checking Image Properties (Ctrl+Shift+P) to guarantee all subsequent measurements will be accurate.
Install and Prepare ImageJ
Before analyzing immunofluorescence images of monocytes, it’s essential to properly configure ImageJ’s scaling parameters. You’ll need to set scale correctly to guarantee your measurements reflect accurate biological dimensions. For monocyte imaging, remember that your pixel size is 6.45 x 6.45 µm.
- Download and install ImageJ from the official NIH website
- Launch the application and navigate to Analyze > Set Scale
- Enter 100 pixels for “Distance in Pixels” and 645 µm for “Known Distance”
- Select “micrometers” (µm) as your unit of length and check “Global” for consistent scaling
Verify your calibration by measuring several monocytes—they should fall within the typical 15-25 µm range.
Proper scaling guarantees all your subsequent analyses and measurements will accurately represent the true cellular dimensions.
Locate Measurement Tools
Once ImageJ is running, locating the right measurement tools is essential for accurate scale calibration.
You’ll need to navigate to the “Analyze” menu where most measurement functions are housed. From here, access “Set Scale” to input your conversion factor—where 100 pixels equal 645 µm—and make sure the unit field displays “µm” for micrometers.
To verify existing scale information or make adjustments to image properties, press Ctrl+Shift+P or select “Image > Properties.”
For images without calibration, you’ll need to manually set the scale using your known conversion factors.
After you’ve set the scale correctly, find the “Analyze > Tools > Scale Bar” option to add a visual reference that displays your calibrated measurements in micrometers on your image.
Set Global Scale Parameters
Setting global scale parameters in ImageJ guarantees that all your measurements maintain consistent accuracy across multiple images. To set this up, navigate to Analyze > Set Scale and add your calibration data. Input a known distance of 645 µm corresponding to 100 pixels, and make certain you select the “Global” option to apply this calibration across all open images.
- Always set your unit of length to micrometers (µm) for standardized measurements
- Verify your pixel size regularly using a brightfield micrometer to maintain accuracy
- Once calibrated, all measurements will display in microns instead of pixels
- The global setting guarantees you don’t need to recalibrate each individual image
Calculating Pixel Size From Microscope Specifications
When you’re working with microscope images, determining the precise pixel size is fundamental for accurate measurements and scale bar creation.
To calculate pixel size, divide the field of view (FOV) in micrometers by the number of pixels spanning that distance.
Pixel size calculation: FOV in micrometers divided by pixel count equals precise measurement scale for microscopy work.
For instance, if your microscope has a 1000 µm FOV captured in a 640-pixel wide image, your pixel size equals 1.563 µm per pixel (1000 µm ÷ 640 pixels).
Always note the magnification level used during imaging, as pixel size varies considerably with different optical magnifications.
You can verify your calculations using a micrometer slide in brightfield microscopy.
Remember to maintain consistent imaging settings, including exposure time and objective lens, to guarantee reliable pixel size determination and accurate scaling across all your images.
Adding Professional Scale Bars to Microscopy Images
Professional-looking scale bars transform microscopy images from simple pictures into quantifiable scientific data. To add a scale bar correctly, you’ll first need to calibrate your image by setting the scale in ImageJ. Navigate to Analyze > Set Scale and input 100 pixels equals 645 µm, ensuring your unit is set to µm.
- Use Analyze > Tools > Scale Bar to add your scale bar with customized width and appearance.
- Verify accuracy by comparing to known cellular structures like monocytes (15-25 µm).
- Choose contrasting colors and appropriate font sizes for maximum visibility.
- Save your image after adding the scale bar to preserve calibration information.
Remember that consistent scale bars allow viewers to immediately understand the size relationships in your microscopy images, making your scientific data more valuable and comparable.
Verifying Calibration Accuracy With Standard Samples
You’ll need to compare your microscope’s measurements against known reference materials like stage micrometers to confirm proper calibration.
Regular assessment of potential calibration drift helps you maintain consistent and reliable measurements across multiple imaging sessions.
When your pixel dimensions (6.45 × 6.45 µm) are correctly configured, biological references like monocytes (15-25 µm) should match expected size ranges in your calibrated images.
Subheading Discussion Points
Why risk inaccurate measurements when you can easily verify your scale bar calibration? Confirming your scale accuracy guarantees all measurements truly reflect real-world dimensions.
You’ll need to routinely check that your pixel-to-micrometer conversion remains consistent, especially when changing imaging conditions.
- Use standard samples with known dimensions (like stage micrometers) to validate your calibration
- Measure monocytes (15-25 µm) as biological reference points to verify scale accuracy
- Compare measurements of known structures against expected values after setting the scale in ImageJ
- Perform regular calibration checks whenever you change microscope settings or equipment
Remember that consistent microscope settings are vital—even small variations can create significant discrepancies in your measurements, potentially compromising your entire dataset.
Reference Materials Comparison
Three reliable reference materials stand out when verifying your scale bar calibration accuracy. Stage micrometers provide exact measurements that you can compare against your calibrated values. Monocytes (15-25 µm) serve as biological reference standards when working with immunofluorescence images. Control slides with known dimensions help maintain consistency across imaging sessions.
| Reference Material | Size Range | Best Used For |
|---|---|---|
| Stage Micrometer | 10-1000 µm | Precise calibration verification |
| Monocytes | 15-25 µm | Biological sample validation |
| Control Slides | Variable | Cross-session consistency |
| Standard Beads | 1-100 µm | Multiple magnification checks |
You’ll need to maintain consistent microscope settings, including your 6.45 × 6.45 µm pixel size, when comparing these reference materials. Regular verification prevents measurement drift and guarantees your research data remains reliable over time.
Calibration Drift Assessment
Regular verification of your scale bar’s accuracy becomes necessary as microscope systems naturally drift over time. Environmental factors and equipment adjustments can cause your pixel-to-micron conversion to shift gradually.
To combat calibration drift, periodically check your setup against standard samples with known dimensions, such as a micrometer slide.
- Document each calibration session, recording date, settings, and any adjustments made
- Maintain consistent microscope settings (magnification, camera parameters) between calibrations
- Schedule routine verification checks at regular intervals—more frequently for critical measurements
- Compare current measurements with previous calibration results to identify developing trends
Maintaining Scale During Image Processing
While processing microscopic images, maintaining accurate scale is essential for obtaining reliable measurements. To add scale properly, confirm your software’s calibration settings reflect the correct pixel size of 6.45 x 6.45 µm. When calibrated accurately, your images will display dimensions in micrometers rather than pixels, allowing you to measure monocytes (15-25 µm) with precision.
Always use consistent microscope settings and verify calibration with a micrometer to achieve dependable scaling. For multiple images, utilize the “Apply To All Open Images” feature to maintain uniform calibration across your dataset.
Don’t forget to regularly document your calibration parameters, especially when switching between different magnifications or camera configurations. This systematic approach will prevent scale discrepancies and confirm measurement integrity throughout your image analysis workflow.
Batch Processing Multiple Images for Consistent Scaling
When analyzing multiple microscopic images, processing each one individually becomes tedious and introduces inconsistencies. To efficiently batch process your image set for consistent scaling, follow these proven techniques.
- Verify all images have identical pixel size (6.45 x 6.45 µm) and calibration settings before scaling.
- Use the “Apply To All Open Images” option in the Calibrate Distances dialog for uniform application.
- Add consistent scale bars across all images using Analyze > Tools > Scale Bar with matching width, font, and color.
- Save your calibration as a .CAL file for quick application to future image sets.
This standardized approach guarantees reliable measurements across your entire dataset, particularly important when measuring cellular structures like monocytes (15-25 µm), where precision is critical for accurate analysis and comparison.
Software Options for Automated Calibration
Although manual calibration provides precise control, several software packages now offer automated calibration features that greatly lessen processing time.
FIJI stands out with its ability to automatically calibrate images by extracting metadata from raw files, instantly converting pixel measurements to microns when you open images.
When using FIJI’s bio-formats importer, you’ll get accurate scale information if you select the display metadata option. This eliminates the need for manual calculations and reduces errors.
QuPath also provides built-in scale bar adjustment capabilities that streamline your workflow.
Both programs allow you to save calibration data for future use, making it easy to maintain consistent scaling across experiments.
These automated calibration tools guarantee your measurements remain accurate while considerably cutting down on preparation time.
Common Pitfalls in Scale Bar Implementation
Automated calibration tools save time, but they can’t prevent all user errors. When you add a scale bar to your microscopy images, seemingly minor oversights can lead to significant measurement inaccuracies.
Before you select “New Calibration,” confirm you’ve set the image pixel size correctly—otherwise, your scale will reflect pixels instead of micrometers.
- Forgetting to draw a line along your stage micrometer before defining the Distance in pixels and Unit of Length
- Failing to select the appropriate X and Y calibration values consistently across all images
- Not saving calibration settings, forcing you to recalibrate the next time
- Overlooking region of interest tools that might reset your carefully applied scale parameters
Always verify your calibration against known reference measurements before finalizing your work.
Microscope-Specific Calibration Techniques
Different microscope models require tailored calibration approaches to ascertain accurate scale bar representation.
When working with your specific microscope, you’ll need to input the correct pixel dimensions—such as 6.45 x 6.45 µm—into your image analysis software to properly convert pixels to micrometers.
Access calibration settings in programs like ImageJ through the Analyze > Set Scale menu, where you’ll enter your microscope’s unique pixel-to-distance ratio.
For verification, use a micrometer slide in brightfield mode to confirm your calibration matches real-world measurements.
Remember to save your calibration settings for future use, as each microscope has unique optical and camera specifications.
Maintaining consistent settings throughout your imaging sessions ascertains your scale bars remain accurate across all experiments and image sets.
Exporting Calibrated Images for Publication
Once you’ve established accurate calibration for your microscope, your next step involves properly exporting these images for publication. Choose high-quality formats like TIFF or PNG that retain your calibration information and scale bar data. Set your resolution to at least 300 DPI to guarantee your images remain clear and detailed when printed in journals or viewed digitally.
- Verify your scale bar is clearly visible and correctly positioned before finalizing the export.
- Double-check that calibration settings are properly saved and applied to prevent measurement errors.
- Use consistent scale bar styles across all figures in your publication.
- Include detailed calibration information in your figure legends, specifying the pixel-to-micrometer conversion.
Always validate the exported image against your original to confirm the scale representation remains accurate throughout the publication process.
Frequently Asked Questions
How to Calculate Microns per Pixel?
To calculate microns per pixel, you’ll divide the known physical distance (in microns) by the corresponding pixel distance. For example, if 100 pixels equal 645 µm, you’d have 6.45 µm per pixel.
What Is the Scale Bar for 63X Magnification?
At 63X magnification, your scale bar depends on your camera’s pixel size. With 6.45µm pixels, you’ll need to divide this by 63 to get approximately 0.1µm per pixel for accurate measurements.
What Is Calibrated Pixel Size?
Calibrated pixel size is your conversion factor that transforms image pixels into real-world measurements (typically micrometers). You’ll need this value to accurately measure microscopic structures in your digital images for scientific analysis.
What Is the Scale Bar for 40X Magnification?
At 40x magnification, your scale bar is typically 100 μm, which equals about 15.5 pixels (based on 6.45 μm per pixel). You’ll need to calibrate this accurately for reliable measurements.
In Summary
Your mastery of scale bar calibration transforms raw image data into quantifiable scientific evidence. By carefully converting pixels to microns, you’re ensuring measurement accuracy in your research. Whether you’ve chosen manual calibration with reference objects or automated software solutions, you’re now equipped to properly document microscopic features. Remember, accurate scale representation isn’t just good practice—it’s essential for reproducibility and credibility in your microscopy work.


Leave a Reply