For fluorescence imaging, start with manual mode using ISO 400-800, aperture f/8-f/14, and shutter speed 1/60-1/250s. Underexpose ambient light by 3 stops while maintaining full dynamic range. Adjust ISO based on fluorescence intensity but watch for noise at higher settings. Use consistent settings when comparing control and treated specimens. Lock focus in white light before switching to fluorescence conditions. The right balance between these settings will reveal the subtle details invisible to the naked eye.
Numeric List of Second-Level Headings
When setting up your camera for fluorescence imaging, you’ll need to adjust several key parameters to capture the subtle glow of fluorescent specimens.
- ISO Settings: Use 200-1600 for DSLRs and mirrorless cameras; 400-1600 for point-and-shoot models.
- Camera Modes: Choose Manual (M) or Aperture Priority (Av).
- Aperture Range: Set between f/8-f/14 for DSLRs; f/8-f/18 for point-and-shoot cameras.
- Shutter Speed Selection: Maintain 1/60-1/250 seconds depending on camera type.
- Exposure Time Optimization: Adjust based on your brightest sample.
- Fast Capture Technique: Aim for 1/200-1/500 sec to reduce ambient light interference.
- White Balance Adjustment: Test the Cloudy setting for enhanced color representation.
Understanding Exposure Fundamentals for Fluorescence Imaging
The exposure triangle in fluorescence imaging requires careful balancing of shutter speed, aperture, and ISO to isolate your fluorescent signal from ambient light.
You’ll need to monitor your histogram continuously to guarantee you’re capturing the full dynamic range without clipping highlights or losing detail in shadows.
Fast shutter speeds (1/200-1/500 sec) combined with manual exposure control will give you the precision needed to properly expose the fluorescence while intentionally underexposing ambient light by at least 3 f-stops.
Exposure Triangle Interactions
Understanding how aperture, shutter speed, and ISO interact is essential for successful fluorescence imaging. When you adjust one setting, you’ll need to compensate with the others to maintain proper exposure while maximizing fluorescence capture.
| Setting | Function | Fluorescence Recommendation |
|---|---|---|
| Aperture | Controls light input | Wider (f/2.8-4) for more signal |
| Shutter Speed | Controls exposure duration | 1/200-1/500 sec to match flash |
| ISO | Controls sensor sensitivity | 200-1600 depending on brightness |
| Balance | Compensates for adjustments | Raise ISO when using faster shutter |
For ideal results, set your shutter speed between 1/200-1/500 second to capture the fluorescence flash while excluding ambient light. If you’re struggling with dim signals, you can increase ISO rather than slowing your shutter speed, which would risk ambient light contamination.
Histogram Signal Monitoring
A histogram serves as your most reliable exposure gauge when capturing fluorescence images, providing real-time feedback on light distribution across your sensor.
When monitoring your histogram, aim for a concentration of data in the mid-tones, avoiding contact with either edge to preserve your full dynamic range.
You’ll want to regularly check your histogram while adjusting your exposure settings. This practice helps guarantee your fluorescence details aren’t lost to clipping in highlights or shadows.
By maintaining a balanced exposure, you’ll capture the subtle luminescence that makes fluorescence photography so compelling.
The histogram allows you to make dynamic exposure adjustments, maximizing the fluorescence signal while minimizing ambient light interference.
This careful monitoring results in clearer, more vibrant images that accurately represent the fluorescent elements you’re working to document.
Optimizing ISO Settings for Maximum Fluorescence Clarity
When capturing fluorescence imagery, selecting the right ISO setting becomes essential for balancing sensitivity and noise. For DSLR and mirrorless cameras, aim for ISO ranges between 200-1600, while point-and-shoot models require slightly higher settings (400-1600) to compensate for filter light loss.
You’ll need to adjust your ISO based on your specific imaging conditions. In low-light situations, increasing your ISO helps reveal more fluorescence details, but watch for pixel saturation that could compromise image integrity.
When comparing treated versus control samples, maintain consistent ISO settings to guarantee accurate intensity comparisons.
For precise control, switch to manual mode where you can fine-tune ISO based on your subject’s fluorescence strength. Remember that higher sensitivity comes with increased noise—find the sweet spot that maximizes clarity without compromising quality.
Selecting the Ideal Aperture for Depth of Field Control
While ISO settings control sensitivity, your aperture choice determines how much of your fluorescent subject remains in focus. For ideal fluorescence imaging, aim for an aperture range between f/8 and f/14. This sweet spot balances sufficient light capture with adequate depth of field to guarantee your specimen is sharp throughout.
Aperture selection between f/8 and f/14 creates the perfect balance of light and depth for crisp, detailed fluorescence imaging.
If you’re working with particularly small subjects, consider using a smaller aperture (higher f-number) to increase your depth of field. This guarantees more of your specimen remains in focus, capturing intricate details that might otherwise be lost.
For closer subjects, you’ll typically need to stop down further to maintain sharpness across the entire sample.
Don’t hesitate to experiment with different aperture settings to find the perfect balance between sharpness and proper exposure for your specific fluorescence subject.
Shutter Speed Considerations in Low-Light Fluorescence Capture
Selecting the right shutter speed represents a critical balancing act in fluorescence imaging.
You’ll achieve ideal results with settings between 1/200 and 1/500 second, which effectively minimize ambient light while preserving your fluorescence image quality.
Avoid dropping below 1/500 second, as excessively fast shutter speeds can prevent adequate exposure of the fluorescence signal. Your goal is to underexpose ambient light by at least 3 f-stops while capturing the fluorescence during the flash’s brief 2-millisecond duration.
While longer exposures might tempt you for creative purposes, remember they’ll introduce more ambient light interference.
Through careful shutter speed selection, you’ll create striking fluorescence images where vibrant signals stand prominently against darker backgrounds—achieving that perfect balance between technical precision and visual impact.
White Balance Techniques for Accurate Color Representation
White balance settings can make or break your fluorescence photography, with manual adjustments typically offering more consistency than auto WB which often struggles with the unusual light conditions.
You’ll need to develop specific WB adjustments for each filter combination you use, as different excitation and barrier filters create distinct color challenges that require tailored settings.
Testing both preset options like Cloudy or Shade alongside custom Kelvin temperature settings will help you discover which approach best represents the true fluorescent colors of your specific subjects.
Manual vs. Auto
Because fluorescence photography captures light emissions with unique spectral characteristics, traditional auto white balance settings often fail to produce accurate results. You’ll find manual white balance options provide considerably better color rendering, especially when photographing chlorophyll fluorescence.
| WB Setting | Best For | Results |
|---|---|---|
| Cloudy | Red/warm fluorescence | Enhanced warmth, vibrant reds |
| Custom | Specific subjects | Tailored color accuracy |
| Auto | Not recommended | Inconsistent results |
When shooting fluorescence subjects, set your camera to RAW format for maximum post-processing flexibility. This allows you to experiment with different white balance adjustments in Lightroom or Photoshop after the shoot. Through continued experimentation with manual settings, you’ll develop personalized preferences that best represent your specific fluorescence subjects—something auto settings simply cannot achieve.
Filter-Specific Adjustments
While manual white balance settings provide a strong foundation, different emission filters require specific adjustments to capture true fluorescent colors. When photographing fluorescence, the standard Auto or strobe white balance presets typically fall short because fluorescent emissions operate within narrow wavelength bands.
Try the “Cloudy” preset as your starting point—it enhances warmth and emphasizes red tones in chlorophyll fluorescence. Each barrier filter will affect color transmission differently, requiring tailored adjustments.
Since no single setting works universally, you’ll need to experiment with all available white balance options in post-processing. Don’t hesitate to develop your own approach through continuous testing.
The right white balance setting can dramatically transform your image’s color accuracy, revealing subtle details that might otherwise be lost in fluorescence photography. Your subject’s unique emission properties should ultimately guide your adjustments.
Dynamic Range Management for Fluorescent Samples
Since fluorescence imaging relies on capturing faint signals amid varying background intensities, mastering dynamic range is essential for meaningful results. You’ll need to enhance exposure times that prevent pixel saturation while still capturing your brightest fluorescent signals.
For effective dynamic range management, never set exposure times shorter than 1/500 sec, and underexpose ambient light by at least 3 f-stops to enhance fluorescence visibility against background noise.
| Setting | Ideal Approach | Common Mistake | Effect on Image |
|---|---|---|---|
| Exposure Time | Just below saturation | Too short | Loss of signal detail |
| Dynamic Range | Full camera capacity | Underutilization | Reduced data quality |
| Pixel Intensity | Regularly monitored | Ignored | Missed saturation issues |
| Sample Variation | Trial and error testing | One-size-fits-all | Uneven fluorescence capture |
Use your imaging software to constantly monitor pixel intensity levels, ensuring maximum dynamic range utilization while preserving critical fluorescent details.
Camera Settings for Comparing Control and Treated Specimens
Moving beyond general dynamic range considerations, accurate comparisons between control and treated specimens present a specific technical challenge. You’ll need to maintain identical exposure times for both samples to prevent bias in your results.
Begin by identifying which specimen exhibits the brightest fluorescence and set your exposure time to the longest duration that doesn’t cause pixel saturation.
Apply consistent camera settings throughout your imaging session—same ISO, aperture, and other parameters—to guarantee any observed differences reflect actual biological variation rather than technical inconsistencies. This standardized approach maximizes your dynamic range while preserving data integrity.
Continuously monitor both specimens during imaging sessions, making adjustments only when necessary. Remember that your goal is capturing true fluorescence intensity differences between samples, which requires disciplined adherence to identical imaging conditions.
Special Considerations for Live-Cell Fluorescence Imaging
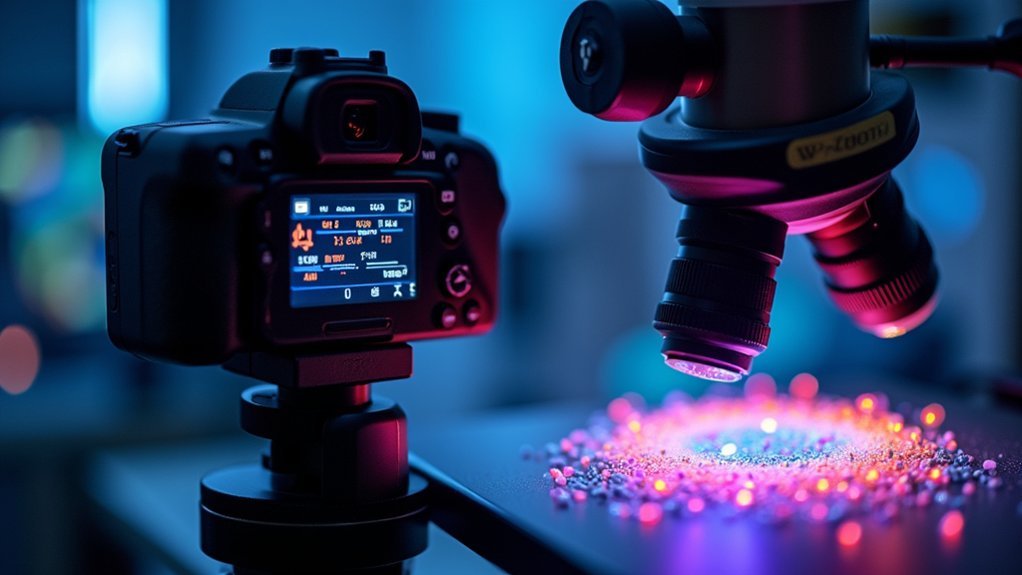
Because living specimens are particularly sensitive to phototoxicity, live-cell fluorescence imaging demands a fundamentally different approach than fixed samples.
You’ll need to minimize light exposure by using shorter exposure times that capture essential details without compromising cellular viability.
Finding the ideal exposure time often requires experimentation—aim for just enough duration to collect necessary data while maintaining cell health.
Be prepared to sacrifice some signal strength to preserve your live cells throughout the imaging session.
Use lower ISO settings whenever possible to reduce noise, but make sure you’re still capturing adequate fluorescence signals.
The key is striking a balance between image quality and cellular health.
Before beginning your imaging session, review specific guidelines for live-cell protocols to make sure you’re following best practices that maximize both data quality and specimen longevity.
Balancing Ambient Light and Flash in Fluorescence Photography
While live-cell imaging focuses on minimizing photodamage, fluorescence photography introduces another challenge: managing the interplay between ambient light and flash.
You’ll want to underexpose ambient light by at least 3 f-stops to make fluorescent signals stand out clearly.
Use fast shutter speeds (1/200-1/500 sec) to limit ambient light influence while your light source illuminates the subject for just 2 milliseconds. Your camera lens aperture should be adjusted accordingly to maintain this balance.
Don’t completely eliminate background light—controlled ambient illumination provides context without overwhelming fluorescence.
Check your histogram regularly to guarantee fluorescent elements remain prominent against a properly subdued background.
Experiment with exposure times strategically; longer exposures can create artistic effects by introducing more ambient light, but watch for pixel saturation that could compromise image clarity.
Equipment-Specific Settings for Various Camera Types
Your camera type greatly impacts the ideal settings for fluorescence imaging, with each system requiring specific adjustments to capture the subtle luminescence.
For DSLR and mirrorless cameras, you’ll need ISO 200-1600, manual or aperture priority mode, and apertures between f/8-f/14 with shutter speeds of 1/60-1/125 for crisp fluorescence capture.
Point-and-shoot cameras perform best at ISO 400-1600 with slightly faster potential shutter speeds up to 1/250 and apertures from f/8-f/18 to maximize their more limited sensor capabilities.
DSLR Fluorescence Parameters
When capturing fluorescence with a DSLR camera, selecting the right settings becomes critical for revealing the subtle glow that might otherwise remain invisible.
Set your ISO between 200-1600 based on your strobe power, using either manual or aperture priority mode for complete control.
Choose an aperture between f/8-f/14, balancing sufficient depth of field with minimal lens aberrations.
Maintain shutter speeds of 1/60-1/125 seconds to capture fluorescence without bright ambient light interference.
Your setup requires an electronic flash with a dichroic excitation filter, paired with a yellow barrier filter on your lens to block reflected excitation light.
Always lock focus while in white light before turning off ambient lighting, as your camera will struggle to focus in low-light fluorescence conditions.
Point-and-Shoot Optimal Setup
Three distinct advantages make point-and-shoot cameras surprisingly viable tools for fluorescence imaging despite their limitations.
Their built-in macro capabilities, compact form factor, and user-friendly interfaces allow for quick setup without specialized knowledge.
For best results, set your ISO between 400-1600 to balance sensitivity with noise in low-light conditions.
You’ll need a tripod when working with slower shutter speeds, especially at the recommended 1/60-1/250 second range.
Select either Manual or Aperture Priority mode for consistent control, then adjust your aperture between f/8-f/18 to achieve proper depth of field while managing light intensity.
Don’t overlook your camera’s macro or microscope mode for close-up fluorescence work.
Consider adding supplementary close-up lenses if your camera without interchangeable optics limits your magnification capabilities.
Frequently Asked Questions
What Camera Settings Should I Use for Fluorescent Light?
For fluorescent light, you’ll want ISO 200-1600, shutter speed 1/60-1/125s, and aperture f/8-f/14. Don’t forget to use manual mode and add a barrier filter to your lens.
How Do You Photograph Fluorescence?
To photograph fluorescence, you’ll need a UV light source, manual camera settings (ISO 100, f/8-14), a barrier filter, and fast shutter speeds (1/200-1/500). Use cloudy white balance to enhance the vibrant colors.
What Is the Best Camera for Fluorescence Microscopy?
For fluorescence microscopy, you’ll find the Olympus Tough TG-6 or a DSLR/mirrorless camera with manual controls, fast shutter speeds, and macro lens capabilities ideal. Don’t forget RAW shooting capability for better post-processing flexibility.
What Is the Exposure Time for Fluorescence Microscopy?
For fluorescence microscopy, you’ll typically use 1-8 second exposure times. Adjust based on your sample’s brightness, aiming for the longest time that avoids pixel saturation. For live cells, use shorter exposures to minimize damage.
In Summary
You’ll achieve the best fluorescence imaging results by customizing settings to your specific specimens and equipment. Remember to balance exposure variables, minimize photobleaching, and maintain consistent parameters for comparative analysis. Don’t hesitate to experiment with different settings while documenting your successful configurations. With practice and these optimized camera settings, you’ll capture stunning fluorescence images that clearly demonstrate your research findings.



Leave a Reply