To align fluorescence microscope color values: (1) Create backup copies in TIFF format, (2) Use calibrated reference standards for each channel, (3) Adjust brightness and contrast incrementally while monitoring histograms, (4) Eliminate cross-channel bleeding with appropriate filters, (5) Calibrate using control samples under identical conditions, (6) Apply consistent LUTs across experiments, and (7) Document all steps for reproducibility. These steps will guarantee your imaging data maintains scientific integrity while enhancing visibility of critical structures.
7 Steps to Align Fluorescence Microscope Color Values
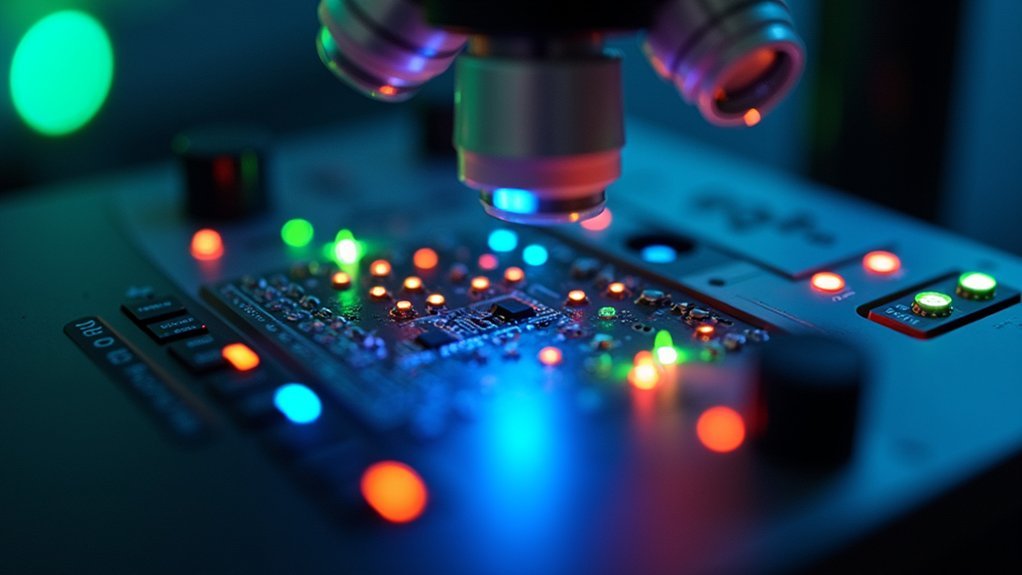
When working with multi-channel fluorescence microscopy images, you’ll often need to correct color misalignments that can distort your results. Start by duplicating your original image to maintain a reference copy before making any adjustments.
Next, use the ImageCombinerWarpy tool to interactively align your duplicated images. Toggle between channel visibility to accurately assess alignment progress. Remember to adjust each channel separately, as offsets typically vary between channels in fluorescence microscope imaging.
During alignment, generate a warpy transform file that serves as a reference for future alignments. This file becomes particularly valuable when batch processing multiple images.
For automated alignment of multiple sections, consider implementing QuASI, ensuring your images follow the required naming convention to facilitate efficient processing.
Create Backup Copies of Original Images
Always create backup copies of your original fluorescence microscopy images before attempting any color alignment procedures.
These duplicates preserve your source data integrity and provide a safety net if alignment manipulations introduce unwanted artifacts or errors.
You’ll thank yourself for this precaution when troubleshooting becomes necessary, as you can easily return to pristine versions without restarting your entire experimental workflow.
Original Data Preservation
Scientific integrity demands that you preserve your original microscopy data before attempting any color alignment procedures.
Always duplicate your original images before making any adjustments, storing them in a separate location from your working files.
Implement a clear file naming convention that distinguishes between original and modified images. For example, use suffixes like “_original” and “_aligned” to track your workflow history.
Save these backups in TIFF format whenever possible to maintain complete pixel value integrity.
Document each step of your alignment process in your lab notebook, including the software used, parameters adjusted, and rationale for changes.
This documentation creates an audit trail that supports reproducibility and allows you to revert to earlier versions if needed.
Prevent Irreversible Changes
Building on proper data preservation practices, you’ll need specific strategies to safeguard against permanent data loss during color alignment.
Before making any adjustments to your fluorescence microscopy images, create duplicate copies in their native format. This preserves all original pixel values and metadata.
Implement a structured approach by using image processing software to generate working copies while storing originals separately. Adopt clear naming conventions that include dates and experiment details to facilitate easy identification and retrieval later.
During complex alignment procedures, save interim versions at key processing stages. This creates a recovery pathway if later steps produce undesirable results.
Regular backups during batch processing are especially critical, as alignment operations often affect multiple channels simultaneously. This systematic approach guarantees you can always return to pristine data when needed.
Establish Channel-Specific Reference Standards
To establish reliable channel-specific reference standards, you’ll need to select appropriate fluorophores with well-characterized excitation and emission profiles for each imaging channel.
You can maximize accuracy by implementing material-specific calibration methods that account for the unique properties of your biological samples and microscope configuration.
When selecting ideal wavelengths, choose fluorophores that minimize spectral overlap while providing strong signal intensity within your detection range.
Reference Standards Fundamentals
Consistency forms the backbone of reliable fluorescence microscopy color alignment. You’ll need calibration samples with known fluorescence characteristics to establish reliable reference points for each imaging channel. These standards guarantee signal intensity remains comparable across different imaging sessions, even when using various microscopes.
| Reference Type | Application | Signal Quality | Reproducibility |
|---|---|---|---|
| Fluorescent beads | Multi-channel calibration | High stability | Excellent |
| Slide standards | Spectral reference | Consistent intensity | Very good |
| Quantum dots | Narrow emission bands | Precise peaks | Good |
| Cellular standards | Biological relevance | Variable but realistic | Moderate |
Always document your calibration protocols thoroughly, including filter settings and detector parameters. By regularly verifying photodetector performance against these standards, you’ll maintain high fidelity in color representation, allowing for reliable data comparison over time and across different imaging platforms.
Material-Specific Calibration Methods
Establishing effective channel-specific reference standards requires detailed attention to each fluorophore’s unique characteristics.
You’ll need to create a calibration curve for each fluorophore by using standard samples with known concentrations to define expected signal intensities across channels. This provides a baseline for accurate comparisons.
Regular adjustment of excitation and emission wavelengths is essential to match your fluorophores’ specific properties, resulting in more consistent fluorescence color representation.
Implement software tools that allow intensity adjustments based on these reference standards, ensuring color values accurately reflect biological signals rather than technical artifacts.
Document all calibration procedures meticulously—record wavelength settings, standard sample details, and adjustment parameters.
This documentation maintains reproducibility across multiple imaging sessions and enables reliable comparison between experiments conducted at different times.
Optimal Wavelength Selection
When setting up channel-specific reference standards, precise wavelength selection serves as the foundation for reliable fluorescence microscopy results.
You’ll need to identify the peak excitation and emission wavelengths for each fluorophore in your experiment. This knowledge allows you to match your microscope settings accordingly, preventing spectral overlap that can compromise your data.
Select filters that precisely correspond to your fluorophores’ specific wavelength requirements. This enhances signal clarity while minimizing background noise.
Once you’ve established these parameters, calibrate your microscope settings to maintain consistency across all samples.
Don’t forget to regularly validate your wavelength standards against known controls. This practice helps you detect any shifts in performance caused by equipment aging or environmental factors, ensuring ideal wavelength selection remains accurate throughout your research project.
Adjust Brightness and Contrast Settings

Properly configured brightness and contrast settings form the backbone of quality fluorescence microscopy images. To optimize your fluorescence signals, you’ll need to adjust brightness and contrast settings incrementally while monitoring the image histogram to prevent data loss.
Make sure you’re avoiding pixel clipping at either end of the value spectrum, preserving your original data integrity.
Preserve data integrity by preventing pixel clipping on both ends of the value spectrum during microscopy adjustments.
- Use ImageJ or similar software to make small, controlled adjustments until fluorescent signals become clearly visible against background noise.
- Monitor your histogram continuously as you work—signals should be distinct without reaching saturation points.
- Revisit your settings regularly throughout imaging sessions, as sample fluorescence and lighting conditions naturally drift over time.
Fine-tuning these parameters enhances signal-to-noise ratio while maintaining scientific accuracy in your microscopy data.
Eliminate Cross-Channel Bleeding
Cross-channel bleeding represents one of the most challenging obstacles in fluorescence microscopy, as it can severely distort your color data and compromise experimental validity.
When signals from one fluorophore leak into other color channels, quantification becomes unreliable.
To combat this issue, select fluorophores with minimal spectral overlap and install appropriate excitation and emission filters designed specifically for your fluorophores.
These filters will help isolate the distinct wavelengths of each marker.
Implement spectral unmixing during post-processing to mathematically separate overlapping signals based on their unique spectral signatures.
This computational approach can greatly reduce bleeding artifacts.
Don’t overlook the importance of regular microscope calibration and careful optical alignment.
These maintenance steps guarantee your color channels remain properly separated, resulting in cleaner, more accurate fluorescence images that truly represent your biological samples.
Calibrate Using Control Samples
Before examining your experimental samples, establishing a reliable color baseline with standardized control samples forms the foundation of accurate fluorescence microscopy.
Select controls with known green and red fluorescence characteristics and optimize your excitation and emission filters specifically for these fluorophores.
Maintain consistent imaging conditions between your controls and experimental samples by:
- Capturing control images using identical illumination intensity, exposure time, and gain settings you’ll use for your actual specimens.
- Analyzing the red and green channel intensities to establish proper thresholds for distinguishing true signal from background.
- Creating a color mapping reference chart that documents how specific fluorescence values should appear in your final images.
Repeat calibration regularly to account for signal drift, ensuring your green and red fluorescence measurements remain reliable and reproducible across multiple imaging sessions.
Apply Consistent Look-Up Tables (LUTs)
While capturing high-quality fluorescence images serves as your foundation, applying consistent Look-Up Tables (LUTs) transforms raw data into meaningful visual information. LUTs enable us to see different channels clearly by assigning specific colors to varying wavelengths of emitted light.
When working with multichannel images, implement standardized LUTs across your experiments to guarantee accurate comparisons. Create custom tables in ImageJ or similar software to highlight particular features while preserving original pixel values for quantitative analysis.
Remember to choose colorblind-friendly LUTs for scientific presentations, enhancing accessibility and interpretation. Regularly review and adjust your color mapping to improve visibility of key structures.
Prioritize inclusive visualization by selecting accessible LUTs and fine-tuning color maps to reveal critical biological details.
This consistency not only improves visualization but also maintains data integrity throughout your analytical workflow.
Frequently Asked Questions
How to Align Microscope Lenses?
To align microscope lenses, you’ll need to activate the light source first, then secure your objective lens properly. Use coarse knobs for initial focusing, fine knobs for clarity, and regularly check for misalignment.
What Is the Procedure of Fluorescence Microscope?
You’ll start by powering up the mercury lamp and letting it warm for 15 minutes. Then place your slide, focus using adjustment knobs, select appropriate filters, capture images, and properly shut down after use.
What Is the Pathway of the Fluorescence Microscope?
The pathway of a fluorescence microscope begins with your light source emitting light through excitation filters, then to the sample, through a dichroic mirror, and finally through emission filters to your detector or camera.
How Do You Set up a Fluorescence Microscope?
You’ll remove the cover, set to low power, turn on the lamp and let it warm up for 15 minutes. Place your slide, focus using adjustment knobs, and handle objectives carefully to avoid UV exposure.
In Summary
Aligning your fluorescence microscope color values doesn’t need to be intimidating. Follow these seven steps consistently for reliable, reproducible imaging results. Remember to preserve your originals, establish proper standards, and use control samples to validate your settings. By implementing these practices in your workflow, you’ll produce more accurate, visually consistent images that better represent your biological samples and strengthen your research conclusions.


Leave a Reply