For ideal lab time-lapse imaging, you’ll need precise intervalometer settings (5-10 minute intervals), manual focus controls with focus peaking, consistent exposure settings, temperature-compensated mounts, and vibration dampening systems. Don’t forget remote triggering options for sterile environments, multi-axis motion control, frame rate optimization (1+ fps for cell division), and efficient data management workflows. These technical controls guarantee your scientific documentation captures cellular processes with extraordinary clarity and precision. The following details will transform your laboratory imaging capabilities.
Precise Intervalometer Settings for Cell Culture Monitoring
Precision is paramount when configuring intervalometer settings for cell culture monitoring. You’ll want to set your device to capture images at 5-10 minute intervals for ideal data collection without disrupting your cell samples.
Precise intervalometer configuration ensures optimal cell culture documentation with 5-10 minute capture intervals balancing data quality and sample integrity.
For slow-growing cultures, consider extending intervals to 15-30 minutes, while rapid-growth specimens may require shorter 1-2 minute intervals to document dynamic changes. Your intervalometer should trigger the camera’s shutter at consistent times throughout the session to maintain proper synchronization.
Take advantage of interval ramping features to adjust capture frequency during critical growth phases.
Always use manual mode to control shutter speed and other exposure settings, which prevents flickering and guarantees uniform lighting across your entire time-lapse sequence, resulting in cleaner, more useful scientific documentation.
Manual Focus Control for Microscopic Detail Clarity
Manual focus stands as the backbone of high-quality microscopic imaging, requiring careful attention where automated systems often fail. When capturing microscopic specimens, you’ll need precise manual focus control to reveal cellular structures that autofocus simply can’t detect reliably.
To maximize clarity in your time-lapse sequences:
- Use focus peaking features to highlight sharp areas, confirming your subject’s essential details are properly captured.
- Set a higher f-stop number to expand your depth of field, ensuring more of your specimen remains in focus.
- Employ a remote shutter or intervalometer to prevent vibrations that could compromise your carefully established focus.
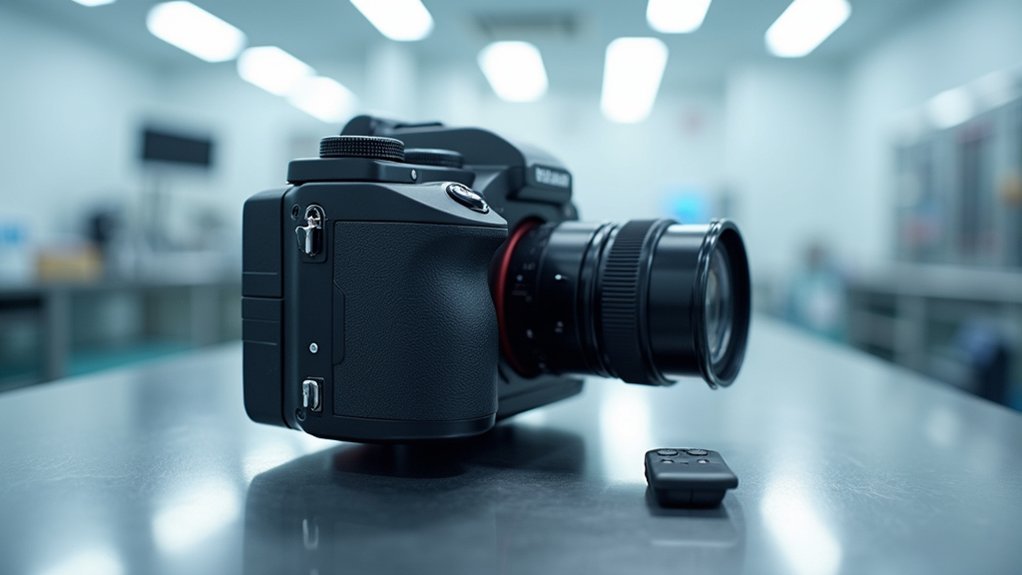
Remember to mount your camera on a stable tripod, particularly for extended time-lapse sessions where maintaining consistent focus is vital for meaningful data collection and analysis.
Exposure Consistency Techniques for Long-Duration Imaging
Maintaining consistent exposure throughout lengthy lab imaging sessions can make the difference between usable scientific data and wasted hours.
To achieve exposure consistency, switch to manual mode for all camera settings—ISO, focus, and white balance—preventing the flickering that automatic adjustments cause.
For bright conditions, apply ND filters to reduce light intake without changing your aperture or shutter speed settings. This allows for controlled motion blur while preventing overexposure.
Set a uniform shutter speed across your entire time-lapse sequence to maintain brightness continuity.
When documenting changes with changing light conditions, use bulb ramping features on your intervalometer to gradually adjust exposure settings.
Begin each session with a quick settings check, as even minor ambient light changes can compromise your entire imaging sequence.
Temperature-Compensated Camera Mounting Solutions
When your lab’s ambient temperature fluctuates, even minor thermal expansions can compromise image alignment in time-lapse sequences. To maintain frame-to-frame consistency, you’ll need mounting solutions specifically designed to counteract these thermal effects.
Temperature-compensated mounts offer significant advantages for your time-lapse imaging:
- Materials engineered to minimize expansion/contraction during temperature shifts guarantee your camera maintains precise positioning throughout extended experiments
- Integrated environmental sensors can automatically adjust mount alignment in real-time, preserving spatial relationships between frames
- Stabilized mounting systems drastically reduce post-processing requirements for image registration
Vibration Dampening Systems for High-Magnification Captures
Vibration isolation platforms provide essential stability for your high-magnification imaging by absorbing environmental tremors that would otherwise blur your microscopic captures.
You’ll notice dramatically improved image clarity when these platforms reduce vibrations by up to 90%, especially when documenting cellular changes over extended time periods.
Magnetic mounting solutions offer an additional advantage, allowing you to quickly secure and adjust camera positions while maintaining isolation from mechanical disturbances throughout your time-lapse experiments.
Vibration Isolation Platforms
The integrity of high-magnification time-lapse imaging depends critically on three factors, with stability being perhaps the most fundamental.
Vibration isolation platforms serve as your first line of defense against unwanted movement that can compromise your dynamic range and blur critical details.
When selecting the right platform for your lab setup, consider:
- Load capacity compatibility with your specific camera equipment
- Frequency range effectiveness against your lab’s unique vibration sources
- Maintenance requirements to guarantee consistent performance
Your platform’s dampening materials—whether rubber, foam, or air-based—can reduce vibrations by up to 99%, dramatically improving image clarity.
For peak results, regularly calibrate your isolation system, especially during extended time-lapse sessions where even minor vibrations compound over time, potentially compromising your entire experimental documentation.
Magnetic Mounting Solutions
Building upon the stability foundation provided by isolation platforms, magnetic mounting solutions offer an additional tier of vibration control specifically engineered for high-magnification imaging scenarios.
You’ll find these systems particularly valuable for maintaining image clarity during time-lapse photography at microscopic levels, where even minor tremors can blur results.
The adjustable strength of magnetic mounting solutions accommodates various camera weights while specialized dampening materials isolate your equipment from ambient vibrations caused by nearby lab machinery or foot traffic.
This vibration dampening capability not only guarantees consistently sharp focus in your captures but also extends your camera’s operational lifespan by minimizing mechanical stress during extended shooting sessions.
For precision time-lapse work requiring absolute stability, these magnetic systems deliver the critical performance edge your laboratory imaging demands.
Advanced Lighting Controls for Specimen Preservation
Three critical factors make advanced lighting controls essential for successful laboratory time-lapse imaging.
First, they protect your specimens from degradation caused by harmful UV wavelengths that accelerate photobleaching. When you implement advanced lighting controls with adjustable LEDs, you’ll gain precise management over both brightness and color temperature without introducing destructive heat.
- Neutral density filters allow longer exposure times while preventing overexposure, capturing finer details in your time-lapse sequences.
- Polarizing filters eliminate unwanted glare and reflections from specimen surfaces, greatly enhancing image clarity.
- Programmable light cycles simulate natural conditions, improving both accuracy and specimen viability.
Remote Triggering Options for Sterile Environment Maintenance
Remote triggering mechanisms represent a significant advancement for laboratory time-lapse imaging by eliminating the need to physically interact with camera equipment.
The Michron app exemplifies these remote triggering options, connecting to most camera brands through the shutter port while maintaining the sterility critical to lab environments.
You’ll appreciate the interval ramping features that allow dynamic adjustments to capture specific changes in experimental conditions without compromising your sterile workspace.
The long exposure capabilities are particularly valuable when monitoring slow-developing processes that require detailed documentation over extended periods.
Remote triggering enables the capture of gradual biological developments that would otherwise remain undocumented, preserving experimental integrity throughout extended monitoring periods.
With over 2000 hours of operational life from a single coin cell battery, devices like Michron minimize maintenance requirements that could introduce contaminants.
This combination of precision control and minimal physical interaction makes remote triggering essential for maintaining sterility in laboratory imaging setups.
Multi-Axis Motion Control for 3D Time-Lapse Sequences
Advanced multi-axis motion control systems transform conventional time-lapse imaging into dynamic 3D visualizations by enabling precise movement across multiple planes.
When you’re capturing laboratory processes, these systems allow you to document complex cellular changes or reactions with unprecedented depth and perspective.
You’ll benefit from:
- Programmable intervalometers that automate complex camera movements, ensuring consistent shifts over extended periods
- Software integration that synchronizes motion control with shutter triggers for intricate choreography of movements
- Enhanced scientific imaging capabilities that reveal detailed analysis of phenomena developing over time
While these multi-axis systems require additional setup time and calibration, they’ll greatly elevate your time lapses with higher production value.
The investment pays off when you need to communicate scientific findings through compelling visual narratives that showcase laboratory processes from multiple angles.
Frame Rate Optimization for Different Biological Processes
When capturing cell division dynamics, you’ll need to shoot at least 1 frame per second to record rapid changes without missing critical shifts.
For slower processes like plant growth, extend your intervals to 15-60 seconds to effectively document gradual developments while managing storage space.
Your frame rate selection should directly match the biological activity’s natural timing, whether you’re recording fast protein interactions requiring higher speeds or long-term tissue development that benefits from greater time compression.
Cell Division Dynamics
As cells undergo division, capturing the precise timing of each phase requires carefully optimized frame rates to guarantee no critical moments are missed.
When recording mitosis, you’ll want to set your camera at 1 frame per second to document each stage with clarity while managing data storage efficiently.
For your time-lapse imaging of cell division, consider:
- Adjusting shutter speeds to avoid motion blur that could obscure critical division stages
- Using 30 frames per second for high-speed cellular activities like vesicle transport
- Slowing to 10-30 second intervals when documenting longer processes such as cytokinesis
Experimenting with different frame rates allows you to customize your approach based on the specific cellular process you’re observing.
An intervalometer with flexible timing options will help you capture the perfect balance between detail and data management.
Slow Growth Capture
Unlike rapid cellular events, slow biological growth processes demand carefully calibrated time intervals to effectively document gradual changes. For best results, set your intervals between 15-60 seconds, allowing subtle developments to be captured over time.
Switch to manual mode to maintain consistent settings throughout your shoot, preventing the flickering that often occurs with changing light conditions. A shutter speed of 1/30 to 1/60 seconds creates appealing motion blur while preserving subject clarity—essential for dynamic visualization of slow growth.
In bright conditions, employ ND filters to prevent overexposure as lighting varies.
Fast Events Settings
Three essential parameters govern successful capture of rapid biological phenomena: interval timing, frame rate, and shutter speed. When documenting cell division or insect activity, select intervals of 1 second or less to capture subtle changes without missing vital moments.
For peak clarity when recording rapid biological processes:
- Set your shutter speed to 1/1000 seconds or faster to freeze motion and eliminate blur.
- Choose a consistent shooting interval that matches your subject’s activity speed—about 2 seconds works well for small creature movement patterns.
- Utilize higher playback frame rates (30fps) to enhance video smoothness.
An intervalometer like the Michron app provides precise control over your shooting interval, allowing you to make real-time adjustments tailored to the specific biological event you’re documenting.
This flexibility guarantees you’ll capture every essential moment with precision.
Data Management Workflows for Extended Imaging Sessions
When conducting extended time-lapse imaging in laboratory settings, efficient data management becomes critical to your project’s success. Unlike normal video capture, time-lapse generates thousands of high-resolution images that require systematic organization. Equip yourself with high-capacity memory cards and create dedicated folders for specific sessions to streamline organization and retrieval.
Monitor battery levels vigilantly and keep fully charged lithium replacements ready, as they outperform Ni-MH batteries during marathon imaging sessions. Program your intervalometer based on your subject’s rate of change to optimize storage usage while capturing sufficient frames.
Battery vigilance is paramount for time-lapse success, with lithium cells providing superior longevity during extended scientific imaging.
Implement consistent file naming conventions during export to simplify editing and analysis.
Consider using a desktop computer for camera programming and file management, providing advanced capabilities and a clearer overview of your imaging workflow.
Frequently Asked Questions
What Are the Best Settings for Timelapse Camera?
For the best timelapse settings, you’ll want to use manual mode with consistent ISO, focus, and white balance. Set appropriate intervals (1-60 seconds depending on subject speed) and adjust shutter speed for desired motion blur.
What Software to Use for Time Lapse Photography?
For time-lapse photography, you’ll need intervalometer apps like Michron, editing software such as Adobe Lightroom for batch processing, and Premiere Pro for compiling sequences. PhotoPills helps calculate required shots for your specific project.
How to Get a Smooth Timelapse?
For a smooth timelapse, you’ll need consistent manual settings, appropriate intervals for your subject’s speed, slower shutter speeds for motion blur, stable mounting, and gradual exposure adjustments if lighting changes during your sequence.
What Is the Best Frame Rate for Timelapse?
For a smooth timelapse, you’ll want 24-30 fps for playback. Shoot at 1 frame per second to capture gradual changes effectively. If you’re recording fast movement, consider 60 fps for more fluid motion.
In Summary
You’ve now explored ten essential time-lapse camera controls for laboratory imaging. By implementing these specialized techniques, you’ll capture cellular processes with unprecedented clarity and consistency. Remember that successful lab time-lapse photography isn’t just about equipment—it’s about thoughtful setup, environmental control, and data management. Master these controls and you’ll transform complex biological dynamics into compelling, analyzable visual data for your research.


Leave a Reply