
Your lab equipment needs a mount that matches standard thread sizes (typically 10 x 1.5mm) and can safely support the weight with a 20% safety margin. You'll want to measure your equipment's dimensions and verify adapter compatibility, especially for microscope ports that often use 28mm x 0.5mm threading. Choose U-shaped or H-shaped bases for stability, and don't forget to account for future upgrades. There's much more to take into account when selecting the perfect mount for your setup.
Standard Mount Dimensions and Specifications
Most laboratory equipment mounts follow standardized dimensions that center around the common 10 x 1.5mm thread size. You'll find this universal specification across various lab stand designs, whether they're rectangular, H-shaped, or T-shaped configurations.
Lab equipment standardization revolves around 10 x 1.5mm threads, ensuring compatibility across rectangular, H-shaped, and T-shaped mounting configurations.
This standardization guarantees you can easily interchange your equipment between different setups.
When selecting mounting clamps for your lab apparatus, you'll discover they're engineered to accommodate rods of different diameters. These versatile components are typically crafted from durable materials like stainless steel, which provides long-lasting stability.
To hold equipment securely, you can choose from adjustable boss head clips or specialized options like three-finger clamps. Each mount type offers specific advantages, allowing you to position your equipment at precise angles while maintaining safety and preventing potential tipping during experiments.
Weight Capacity Guidelines for Different Mounts
Understanding weight capacity limits is the foundation of safe and effective lab equipment mounting. When you're selecting a Lab Stand, you'll need to take into account that standard models can support between 10 to 180 pounds, depending on their configuration and base type.
If you're planning multiple-mounted setups, pay close attention to the combined weight of your equipment. U-shaped bases are specifically designed for multiple components, but you'll still need to stay within their total weight capacity.
Don't forget to check your Boss Head clips' ratings too – they come in various sizes to match different equipment weights.
Always match your mount's specifications to your equipment's weight and dimensions. Heavy-duty stands offer greater support for substantial equipment, while smaller stands work best for lighter items.
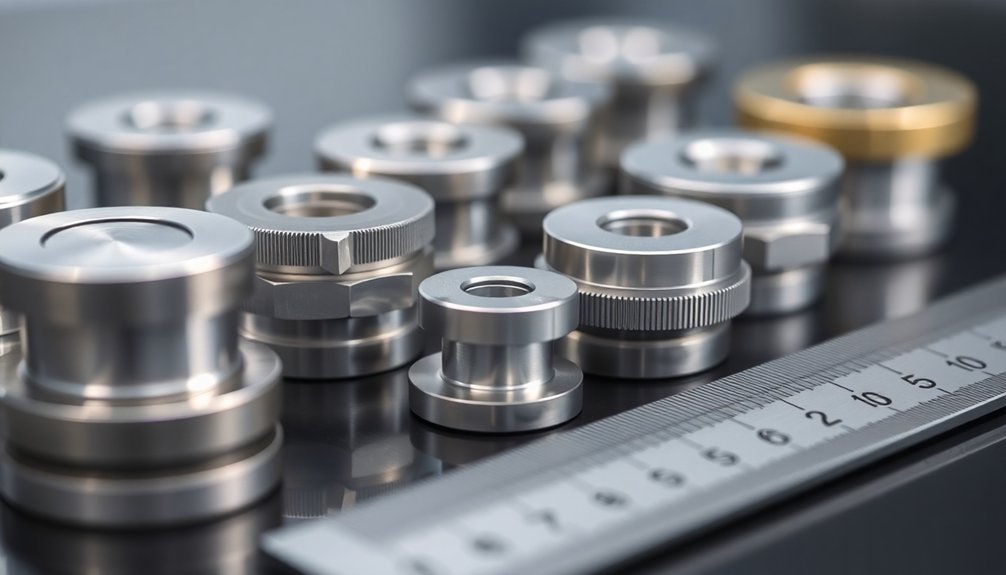
Adapter Ring Compatibility Assessment

Selecting the right adapter ring requires precise measurements and careful consideration of equipment specifications.
You'll need to measure both your piece of equipment and its accessories carefully to guarantee proper adapter ring compatibility.
When evaluating different types of adapter rings, focus on standard sizes that match your equipment's dimensions.
You'll find that most manufacturers produce rings in common measurements like 1-inch or 2-inch diameters.
Pay attention to the material composition of the adapter ring, as it'll affect its performance in your specific lab environment.
Some materials resist chemicals better, while others handle temperature changes more effectively.
Always verify the manufacturer's guidelines before making your final selection.
A proper fit means no gaps between connections, securing safe operation and ideal performance of your laboratory equipment.
Mount Size Selection Based on Equipment Type
When you're selecting mount sizes for lab equipment, you'll need to match the weight capacity of your stand to your apparatus, ensuring it can handle everything from lightweight test tubes to hefty distillation setups.
You should consider the base stability requirements, choosing U-shaped or H-shaped stands for larger equipment that needs multiple support points.
For ideal support, pick rod diameters that accommodate your specific equipment while maintaining the standard 10 x 1.5mm thread size for compatibility with common lab clamps and accessories.
Weight Capacity Considerations
The proper weight capacity of your lab mount serves as a critical foundation for safe and reliable equipment operation.
You'll need to match your equipment's weight with the right mount size – smaller mounts typically hold 10-20 lbs, while larger ones can support up to 50 lbs. Don't forget to add a 20% safety margin above your equipment's weight.
When you're dealing with heavier setups or multiple pieces of equipment, you'll want to choose H-shaped bases for better stability.
Different types of clamps also affect the weight capacity – Boss Head Clips work for lighter items, but you'll need mounting clamps for heavier equipment.
Always check the manufacturer's specifications for both mounts and clamps to guarantee they're compatible with your setup's weight requirements.
Base Stability Requirements
Proper base stability forms the cornerstone of safe lab equipment mounting. When you're selecting a mount base, you'll need to match the design to your equipment's specific requirements.
H-shaped and U-shaped bases offer superior stability for larger setups, while compact platforms work well for lighter apparatus.
Your equipment's weight and dimensions will determine the necessary base configuration. If you're working with heavier components, choose a heavy-duty H-shaped stand that provides robust support and prevents tipping.
For smaller items, a stainless steel plate base might be sufficient. Remember to factor in height requirements to maintain ergonomic access during operations.
Additionally, make sure your chosen base stability solution accommodates compatible rod and clamp systems for secure mounting of all your laboratory components.
Rod Diameter Options
Selecting appropriate rod diameters stands as a crucial decision for lab equipment mounting. When choosing mounting rods for your corrosion resistant lab apparatus, you'll typically encounter two standard sizes: 1/2 inch and 3/8 inch diameters.
These rods, used to hold various equipment, feature consistent 10 x 1.5mm threading that guarantees broad compatibility across different setups.
- Standard 1/2-inch rods provide maximum stability for heavier equipment and complex setups.
- 3/8-inch diameter options work well for lighter apparatus and space-conscious arrangements.
- Stainless steel rods offer durability while maintaining universal threading specifications.
- Specialized clamps adapt to both diameters, supporting diverse equipment needs.
For mounting questions, contact our support team via email address.
Remember that your equipment's weight and size should guide your rod diameter selection, guaranteeing secure and stable experimental setups.
Stability Requirements for Various Applications
When mounting lab equipment, stability requirements vary considerably based on your specific application and apparatus type.
You'll need to match your mounting system to both the weight and configuration of your equipment.
For heavier items, you'll want to select mounts with larger bases to prevent tipping. U-shaped bases work particularly well when you're setting up multiple components or glassware, as they provide enhanced stability across a wider footprint.
If you're working with equipment that needs precise positioning, opt for specialized chain clamps that you can adjust for height and secure attachment.
Consider the height and style of your lab stand carefully – H-shaped or rectangular configurations offer different leverage points.
Remember to use proper assembly techniques and appropriate tools like Allen keys for heavy-duty stands to guarantee maximum stability.
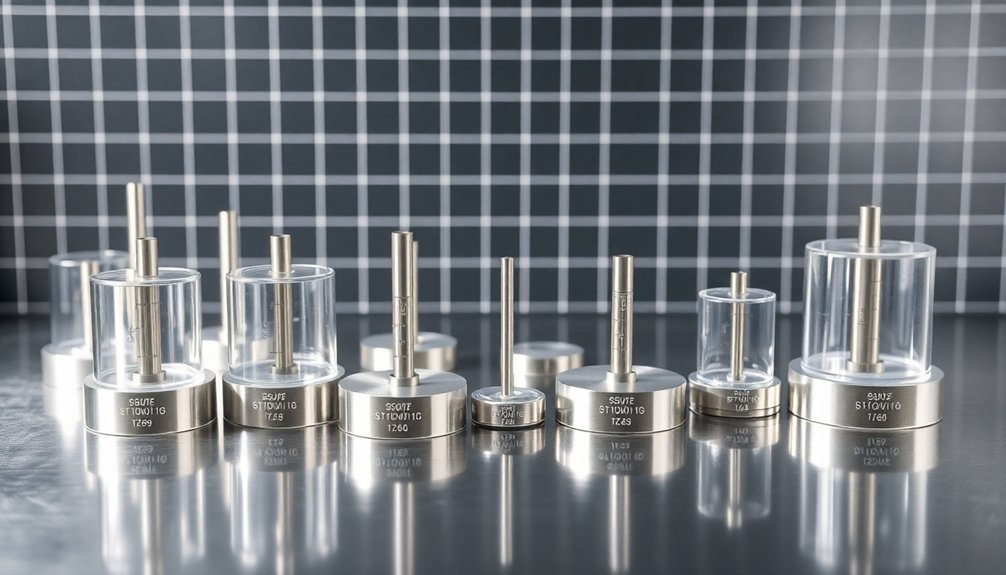
Camera-to-Microscope Mount Measurements
When you're selecting a camera-to-microscope mount, you'll need to measure your microscope's camera port diameter, which typically falls between 23mm and 30mm.
You'll want to check that your mount adapter matches both your camera's thread pattern and your microscope's specifications to guarantee a secure fit.
Standard thread measurements for most camera-to-microscope mounts follow universal sizing conventions, making it easier for you to find compatible equipment across different manufacturers.
Camera Port Size Basics
Proper measurement of camera port sizes forms the foundation of successful microscope-to-camera mounting.
You'll find that most microscopes feature ports ranging from 23.2 mm to 30 mm in diameter, making it crucial to accurately measure your equipment before selecting a mount.
- Measure the outer diameter of your microscope's camera port or ocular tube with precision tools.
- Check if your mount follows the standard thread size of 28 mm x 0.5 mm.
- Consider adjustable mounts with interchangeable adapters for flexibility.
- Factor in the optical path length to prevent image quality issues.
When selecting your mount, you'll want to focus on both size compatibility and design features that prevent vignetting.
Many modern mounts offer adaptable solutions, but getting the right measurements from the start will save you time and guarantee peak performance.
Mount Adapter Compatibility Check
Building on your port size measurements, the next step involves verifying mount adapter compatibility between your camera and microscope.
You'll need to check the thread size specifications of your equipment, with most Eisco products using a standard 10 x 1.5mm threading for universal fit. Measure your microscope's eyepiece or camera body diameter to match it with the appropriate adapter specifications.
Don't forget to examine whether you need additional adjustment features like swivel or tilt options for ideal positioning.
Make certain the mount adapter's weight capacity can support your equipment safely. When selecting materials, opt for durable options like stainless steel, which offers better resistance to corrosion in lab settings.
These considerations will guarantee a secure, long-lasting connection between your camera and microscope.
Standard Thread Measurements Guide
Standard thread measurements for camera-to-microscope mounts follow three key specifications: diameter, pitch, and length.
You'll find that most lab equipment uses the standard 10 x 1.5mm thread size, which guarantees compatibility across different apparatus and mounting systems.
- Check your equipment's thread measurements before purchasing mounts or adapters – the standard 10mm diameter guarantees a secure fit.
- Verify the pitch (1.5mm) matches your mounting needs to prevent cross-threading or damage.
- Confirm mount compatibility with both your camera and microscope specifications to maintain stability.
- Consider using standardized thread sizes for future equipment additions to your setup.
When you're working with various equipment types, maintaining these standard measurements becomes essential for seamless integration and long-term reliability in your lab setup.
Environmental Considerations for Mount Selection
When selecting lab equipment mounts, you'll need to carefully evaluate the environmental conditions that could affect their performance and longevity. Temperature and humidity levels can greatly impact certain materials, with steel being particularly vulnerable to low-temperature environments.
You'll want to prioritize corrosion-resistant materials like stainless steel, especially if your lab involves chemical exposure or high moisture levels. Consider the weight capacity of your mounts, ensuring they can safely support your equipment without risk of tipping.
If you're dealing with multiple components, opt for larger U-shaped bases that provide enhanced stability.
Don't forget to account for vibration and movement in your lab space. Choose mounts with heavy, durable bases to minimize instability and maintain the accuracy of your experimental measurements.
Future-Proofing Your Mount Configuration
When planning your lab's mount configuration, you'll need to take into account future equipment additions by selecting clamps and stands that exceed your current weight requirements by at least 25%.
You can maximize flexibility by choosing adjustable mounts with universal attachments and standardized threading that accommodate various apparatus sizes and shapes.
Investing in heavy-duty lab stands with larger bases allows you to expand your setup efficiently while maintaining stability and safety across multiple components.
Plan For Equipment Growth
Planning for future equipment growth is essential to avoid costly mount reconfigurations down the line. When you're selecting a mount system, you'll need to think beyond your current setup and consider how your lab might expand.
Choose larger base sizes, particularly U-shaped designs, that can accommodate additional equipment while maintaining stability.
- Select corrosion-resistant materials like stainless steel that will endure long-term use and various experimental conditions.
- Invest in adjustable rods and clamps that support different sizes and weights of equipment.
- Choose modular systems that allow for easy expansion without major modifications.
- Factor in the maximum number of rods and clamps you'll need as your lab grows.
Assess Load-Bearing Requirements
Before selecting any laboratory mount system, you'll need to calculate the total weight capacity required for your current and future equipment.
Start by weighing all your lab supplies and equipment to determine the minimum load-bearing requirements for your setup.
When choosing your mount material, consider that stainless steel offers superior strength compared to aluminum, making it ideal for heavier loads.
If you're planning a larger setup with multiple pieces of equipment, you'll need to evaluate how the weight distributes across different mounting points.
Don't forget to factor in additional support structures if necessary.
Select mounts that exceed your current weight requirements to accommodate future expansions.
Always verify the compatibility between your equipment and the mount's specified load limits, including the capacity of supporting rods and clamps.
Multi-Purpose Mounting Options
Investing in multi-purpose mounting options can dramatically enhance your lab's adaptability and efficiency. With adjustable clamps and rods, you'll have the flexibility to support various equipment types while easily reconfiguring your setup as needs change.
Boss heads and universal swivel clamps offer 360° adjustments, guaranteeing you're never limited by rigid mounting configurations.
Key benefits of multi-purpose mounting solutions:
- Larger bases accommodate multiple rods, letting you expand without overhauling existing setups.
- Specialized clamps like three-finger and chain options secure equipment of varying sizes and shapes.
- Corrosion-resistant materials guarantee long-term durability and reliability.
- Adjustable components allow quick modifications for different experimental requirements.
Choose mounts that offer versatility and durability to maximize your lab's potential while minimizing future equipment investments.
Mount Material Options and Durability
When selecting laboratory mounts, you'll need to evaluate the material's durability and its interaction with your specific environment.
Stainless steel mounts offer excellent durability and resist corrosion, making them your best choice for setups involving chemical exposure.
If you're working in cold environments, consider aluminum mounts. They're lightweight yet strong enough for most applications, and they won't corrode.
However, avoid steel mounts in low-temperature settings, as they're prone to rust.
For sensitive equipment, you'll want to use vinyl-coated clamps to guarantee a secure, slip-free grip.
No matter which material you choose, you can rely on Eisco retort stands and metal rods, as they feature a standardized 10 x 1.5mm thread size that's compatible across different mount materials.
Space Requirements and Clearance Guidelines
Since laboratory equipment requires specific spatial considerations, you'll need to plan your mounting setup within a minimum area of 100 square feet. A 10×10 feet room provides ideal spacing for efficient movement and storage.
Your counter space should accommodate between 5 to 20 linear feet, supporting weights from 80 to 180 pounds.
Key spatial requirements to evaluate:
- Lab support lattice spacing should be adjustable at 1-foot intervals to fit various equipment heights.
- Counter strength must match your heaviest equipment's weight requirements.
- Traffic flow patterns need clear pathways for safe operation and maintenance.
- Equipment clearance zones should account for noise control and odor management.
Remember to assess each piece of equipment's specific height and spacing needs to prevent overcrowding and maintain accessibility throughout your lab space.
Precision Adjustment Features by Mount Size
To maximize laboratory accuracy, different mount sizes offer distinct precision adjustment capabilities that match your equipment's specific needs. You'll find that larger mounts provide enhanced stability for heavier equipment, while specialized clamps deliver precise angular adjustments through three-finger mechanisms.
| Mount Size | Adjustment Features |
|---|---|
| Small | Boss head fine-tuning for 10mm rods |
| Medium | Three-finger angle control |
| Large | Multi-component positioning |
| Extra Large | Heavy-duty stability adjustment |
When selecting your mount, consider that Eisco's standard 10 x 1.5mm thread guarantees universal compatibility across sizes. For delicate instruments like burettes, you'll want to use vinyl-coated clamps that offer diameter-specific gripping power. The boss heads' adjustable screws let you fine-tune the securing pressure, assuring stable and precise equipment positioning regardless of rod size.
Multi-Equipment Mounting Solutions
Laboratory efficiency demands smart multi-equipment mounting solutions that maximize your workspace while maintaining stability.
You'll find that U-shaped base lab stands paired with stainless steel rods create the foundation for a versatile setup that accommodates multiple pieces of equipment simultaneously.
- Choose Boss Head Clips and Mounting Clamps for maximum flexibility when arranging your equipment – they'll adapt to various apparatus sizes.
- Install Three Finger Clamps and Chain Clamps to secure equipment at specific angles, preventing unwanted movement.
- Combine different clamp types to create a customized configuration that fits your specific experimental needs.
- Select the appropriate rod length and base size to guarantee proper weight distribution and stability across all mounted components.
Remember to verify that each component is compatible with your chosen mounting system before assembly to confirm a secure laboratory workspace.
Frequently Asked Questions
What Attaches to a Lab Stand and Used to Hold a Variety of Lab Equipment?
You'll need clamps to secure your lab equipment to stands. They come in different types like Boss Head Clips and Mounting Clamps, providing secure attachments for your apparatus during experiments and procedures.
What Is a Laboratory Fitting?
You'll find that a laboratory fitting is a specialized component you use to connect and secure your lab equipment. It includes clamps, connectors, and mounts that guarantee your apparatus stays stable during experiments.
What Is a Ring Stand Used for in a Laboratory?
You'll use a ring stand to securely hold and support your lab equipment like flasks, beakers, and funnels at different heights. It's essential for stable positioning during experiments and safe heating procedures.
What Piece of Lab Equipment Can Make the Most Precise Measurements?
You'll find that analytical balances are your most precise lab instruments. They can measure mass down to 0.0001 grams using electromagnetic force restoration technology, and they're essential for highly accurate scientific measurements.
In Summary
You'll need to carefully match your mount size to your specific lab equipment requirements. Consider your equipment's weight, dimensions, and stability needs when selecting between standard sizes. Don't forget to factor in adapter rings if needed, and guarantee you've got adequate clearance space. Remember, it's better to choose a mount that exceeds your minimum requirements than to risk equipment damage or instability.


Leave a Reply