Darkfield lighting reveals details invisible in conventional illumination by creating bright specimens against dark backgrounds. You’ll achieve striking scientific images using ring lights with proper positioning, oblique angle techniques (10-15°), specialized condensers for microscopic work, slit apertures to control light scatter, modified strobes for small objects, low-angle illumination for reflective surfaces, and circular lighting arrangements for uniform results. Each method enhances contrast differently, highlighting textures and surface anomalies that bright field lighting simply can’t capture.
7 Best Darkfield Lighting Methods For Scientific Photography

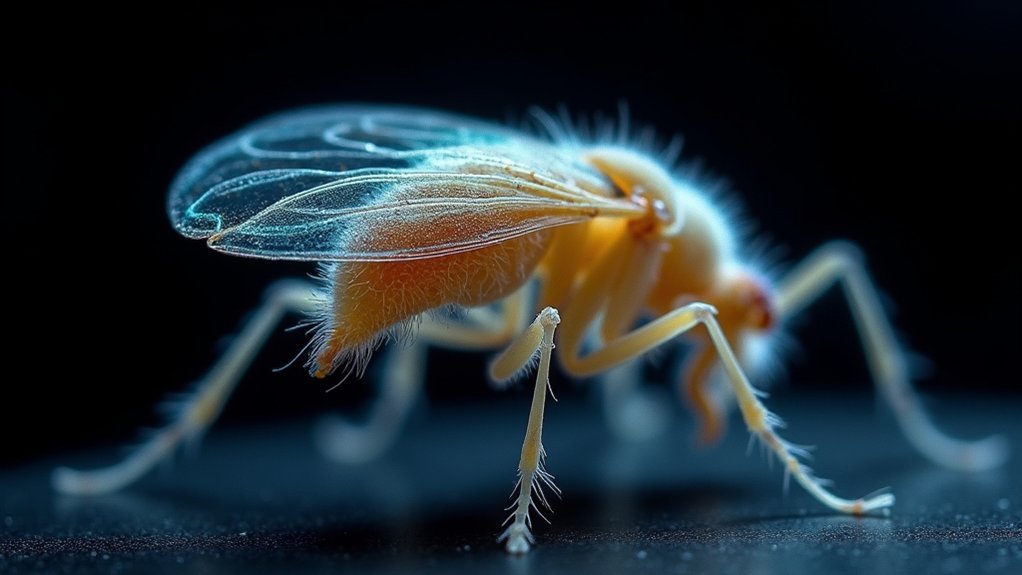
When attempting to visualize transparent or colorless specimens, darkfield lighting stands as an invaluable technique in scientific photography. This lighting technique works by illuminating subjects at oblique angles between 10-15 degrees, allowing only scattered light to enter your objective lens, creating bright specimens against a dark background.
For the best results, verify your specimen lies completely flat, as curved surfaces can shadow themselves and reduce contrast. Consider using specialized condensers that direct light precisely while minimizing unwanted reflections from reflective surfaces.
Flat specimens yield superior contrast, while specialized condensers eliminate distracting reflections for optimal darkfield imaging.
You’ll find that integrating strobe lights with slit apertures greatly enhances detail in small relief objects.
Don’t hesitate to experiment with various light sources—ring lights positioned close to specimens can dramatically improve edge definition and contrast, making previously invisible structures clearly visible in your scientific photography.
Ring Light Illumination for Enhanced Edge Definition
You’ll achieve superior darkfield imaging by positioning your ring light at an ideal distance from the specimen, typically within 2-3 centimeters for microscopic subjects.
Adjusting the ring light angle to approximately 90 degrees relative to your lens axis maximizes the contrast between the illuminated edges and the dark background.
Fine-tune your setup by incrementally altering both distance and angle until you’ve captured the distinctive halo effect that reveals otherwise invisible surface details.
Optimal Distance Placement
Achieving superior edge definition in darkfield photography depends critically on proper ring light placement. For best results, you’ll want to position your ring lights within a few centimeters of your specimen. This ideal distance maximizes the scattered light that creates the characteristic edge highlighting effect while minimizing light loss.
- Position the ring light at approximately 90° to your lens axis to guarantee effective light scattering and ideal edge definition.
- For specimens with varying topography, experiment with distances between 2-5cm to find the perfect balance of contrast and detail.
- When working with particularly flat specimens, move the light slightly closer to intensify the darkfield effect.
Remember that flat specimens generally produce cleaner results, as curved surfaces can create unwanted shadows that diminish your darkfield illumination.
Angle Adjustment Techniques
Three vital angles determine success in darkfield ring light photography. The primary angle—positioning your light at nearly 90 degrees to the lens axis—creates the classic darkfield effect by illuminating only the specimen’s edges while maintaining a dark background.
For highly reflective subjects, adjust this angle to between 10-15 degrees to enhance edge definition without creating unwanted surface reflections.
The specimen’s flatness represents your second vital angle consideration. Curved surfaces self-shadow and compromise ring light effectiveness, so prioritize flat specimens when possible.
For your third angle adjustment technique, consider implementing taped slit apertures on your ring light to create narrow light strips that dramatically improve relief perception in detailed specimens.
Consistent Dark Field Lighting results depend on precise positioning—maintaining proper angles prevents self-shadowing while maximizing illumination where it matters most.
Oblique Angle Techniques for Transparent Specimens
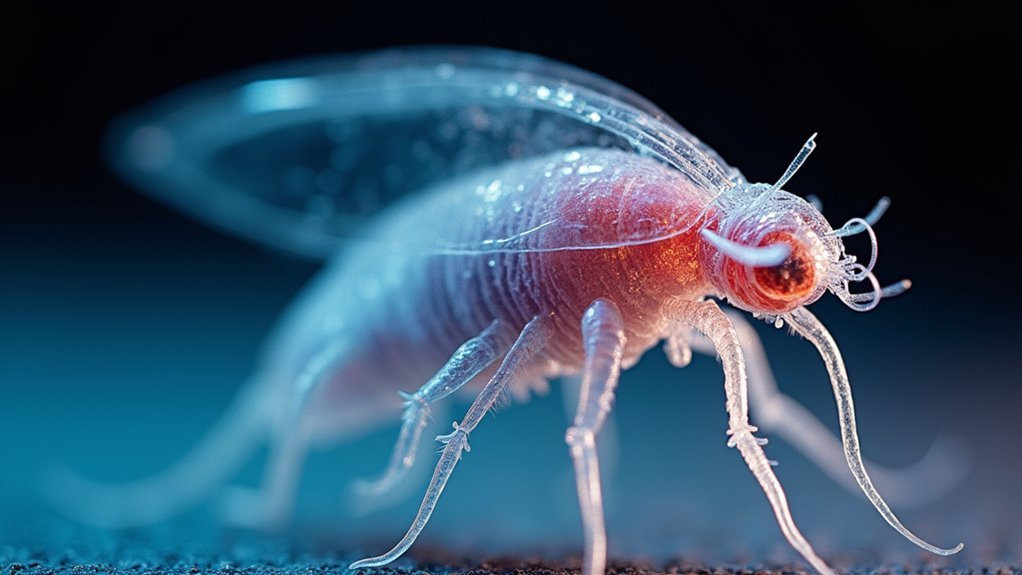
How can nearly invisible transparent specimens become vividly detailed under a microscope? The answer lies in oblique angle techniques, where light directed at 10-15 degrees to your specimen creates dramatic contrast.
This approach is particularly powerful in darkfield microscopy, transforming transparent structures into bright, detailed images against a dark background.
- Position your light source at a shallow 10-15 degree angle to illuminate edges and surface features that would otherwise remain invisible.
- Pair this technique with a specialized darkfield condenser to guarantee only scattered light enters your objective lens.
- Adjust the direction of your oblique lighting to highlight different aspects of your transparent specimens, revealing fine cellular structures without staining.
You’ll find these techniques invaluable for observing live microorganisms and delicate biological structures that traditional brightfield methods can’t capture.
Condenser-Based Darkfield for Microscopic Subjects
While oblique lighting techniques offer dramatic results with simple setups, specialized equipment can take your darkfield microscopy to professional levels. A dedicated darkfield condenser transforms your conventional bright field lighting system by directing light at specific angles, ensuring only scattered rays from your specimen reach the objective lens.
You’ll need to adapt your standard microscope with this specialized condenser and compatible objectives designed for darkfield work. Your light source should be powerful and often enhanced with filters to reduce glare and improve clarity.
This configuration creates striking contrast—transparent specimens appear brilliantly illuminated against a pure black background.
This method excels when you’re photographing unstained biological samples like bacteria or living microorganisms. You’ll capture intricate details without damaging delicate specimens, preserving their natural state for scientific documentation.
Slit Aperture Methods for Controlling Light Scatter

When precision becomes paramount in darkfield photography, slit aperture techniques offer remarkable control over light scatter. By placing narrow openings near your light source, you’ll direct oblique illumination exactly where needed, dramatically enhancing contrast in Dark Field imaging. This approach proves especially effective with transparent or colorless specimens where controlling reflection is essential.
Precise slit apertures transform darkfield photography by directing oblique illumination exactly where needed, revealing otherwise invisible specimen details.
- Position taped slits on ring lights to customize the width and angle of illumination, allowing experimentation with different scatter patterns.
- Combine slit apertures with strobe lighting to achieve high-intensity illumination that reveals fine details in small relief objects.
- Maintain consistent application of your slit aperture methods to guarantee controlled light scatter, preventing excessive reflections that could wash out delicate specimen features.
Modified Strobe Techniques for Small Relief Objects
You’ll achieve ideal results with small relief objects by positioning your slit aperture at nearly 90 degrees to the lens axis, creating dramatic edge contrast in darkfield setups.
Control your flash power carefully, testing different output intensities to reveal subtle details while preventing overexposure of highly reflective areas.
When working with curved surfaces, consider using ring lights with strategically placed tape apertures, allowing you to maintain proper illumination angles across uneven topography.
Slit Aperture Positioning
Although traditional darkfield lighting can reveal surface details, modified strobe techniques with slit apertures offer superior control for photographing small relief objects.
When working with Dark Field illumination, you’ll need to position the slit aperture as close to your specimen as possible to maximize scattered light capture.
For ideal results:
- Place your light source at nearly 90° to the lens axis to create true darkfield effects while minimizing self-shadowing.
- Mount the slit aperture directly onto your ring light using tape for precise control over the illumination angle.
- Keep your specimens flat within the frame, as curved surfaces can compromise lighting consistency.
This positioning technique works particularly well when you’re studying textured surfaces, as it enhances the visibility of minute relief details that might otherwise remain invisible under conventional lighting.
Flash Power Optimization
Proper aperture positioning sets the stage for successful darkfield photography, but controlling your flash power represents the next critical variable in capturing fine relief details. When adjusting flash power for Dark Field illumination, position your strobes at nearly 90° to the lens axis and experiment with lower power settings to avoid overwhelming your subject.
| Flash Setting | Bright Field versus Dark Field | Application |
|---|---|---|
| High (1/1) | Creates reflections, reduces contrast | Large specimens |
| Medium (1/4) | Balanced illumination, moderate relief | General purpose |
| Low (1/16) | Enhanced edge contrast, minimal reflections | Delicate structures |
| Micro (1/64) | Maximum relief detail, ideal darkfield effect | Microscopic features |
For best results, place your light source closer to the subject while using a slit aperture to concentrate illumination exactly where needed. This controlled approach enhances microscopic details that would otherwise remain invisible under standard lighting conditions.
Curved Surface Solutions
While flat specimens readily yield to standard darkfield techniques, curved surfaces present unique challenges that require specialized lighting approaches. When photographing curved objects, you’ll need to adapt your setup to prevent self-shadowing while maintaining the distinctive dark field effect.
- Position your strobe light at nearly 90° to the lens axis, creating ideal edge illumination that reveals minute contours without introducing glare.
- Apply slit apertures to your ringlights and position them close to the subject, allowing low angle light to strike curved surfaces effectively.
- Adjust light intensity through careful experimentation, as curved surfaces reflect light differently across their contours.
Consistency with curved specimens demands attention to surface irregularities that may disrupt shadow details.
You’ll find that patience in modifying your lighting setup pays dividends in revealing intricate details that might otherwise remain invisible.
Low-Angle Illumination for Reflective Surface Imaging
When examining highly reflective surfaces under a microscope, the strategic positioning of light sources at low angles—typically between 10 to 15 degrees—creates an ideal darkfield effect that dramatically enhances surface details.
This low-angle illumination captures only scattered light, revealing defects and textures that would otherwise remain invisible.
For glossy or mirrored specimens, proper positioning is essential. Place your light sources close to the object to maximize the dark field effect while minimizing unwanted glare.
Circular lighting arrangements can provide uniform illumination around your subject, ensuring thorough detail visibility against a dark background.
The difference between Bright Field versus Dark Field techniques becomes particularly evident with reflective materials.
While bright field often produces overwhelming specular reflections, dark field illumination highlights edges and surface anomalies with remarkable clarity.
Frequently Asked Questions
What Is Darkfield Microscopy Best Used On?
You’ll find darkfield microscopy best suited for live, unstained biological specimens like cells, bacteria, and parasites, as it enhances contrast in transparent organisms. It’s also effective for surface analysis in materials science.
What Is the Difference Between DF and BF?
Darkfield (DF) captures only scattered light, creating a dark background with bright specimens, while Brightfield (BF) uses direct reflected light. You’ll find DF reveals defects and edges that BF often misses on reflective surfaces.
What Is the Technique of Dark Field Microscopy?
In dark field microscopy, you’ll illuminate your specimen at an angle so only scattered light enters the objective lens. This creates a bright subject against a dark background, revealing details in unstained transparent samples.
What Is the Benefit of Using Darkfield Vs Brightfield?
Darkfield reveals transparent specimens you can’t see with brightfield. You’ll observe fine structures without staining, enhancing contrast for live cells while reducing glare. It’s especially useful for detecting small defects on reflective surfaces.
In Summary
You’ve now explored the top darkfield lighting techniques for scientific imaging. Try implementing these methods to bring out hidden details in your specimens. Remember, it’s not just about equipment—your lighting angle and control are what truly matter. With practice, you’ll achieve stunning contrast and definition that reveals microscopic features invisible under conventional illumination. Keep experimenting to find what works best for your specific subjects.


Leave a Reply